Referencias
La aplicación Referencias de Odoo es un lugar centralizado donde se aloja toda la información relativa a los referidos, desde los puntos ganados, los compañeros contratados y las recompensas seleccionadas. Los usuarios pueden recomendar a personas que conocen para puestos de trabajo y ganar puntos de referencia a medida que esas personas progresan a través del proceso de contratación. Una vez ganados suficientes puntos de recomendación, pueden canjearse por premios. La aplicación Referencias se integra con las aplicaciones Empleados, Reclutamiento y Sitio web, que deben estar instaladas para que la aplicación Referencias funcione.
Las única configuración necesaria en la aplicación Referencias después de instalarla está relacionada con las recompensas, todo lo demás ya está configurado cuando instala esta aplicación de Odoo.
Los usuarios que tengan permisos de acceso de usuario de recomendación, encargado o administrador en la aplicación Reclutamiento tiene acceso a la aplicación Referencias. Solo los usuarios con permisos de acceso de administrador en la aplicación Reclutamiento tienen acceso a los menús de reportes y de configuración. Consulte la siguiente documentación para obtener más información sobre usuarios y permisos de acceso: Usuarios y Permisos de acceso.
Incorporación
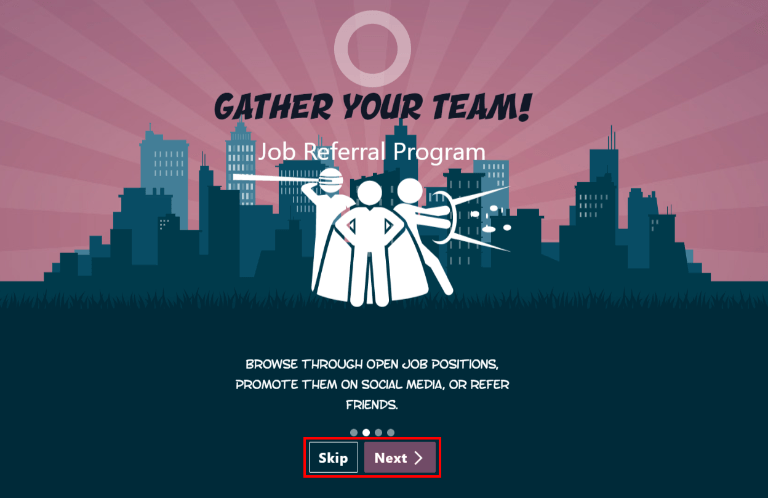
Al abrir la aplicación Referencias por primera vez, aparece un guión de inicio preconfigurado. Se trata de cuatro diapositivas, cada una explica las diferentes partes de la aplicación Referencias. En la parte superior del guión, se muestra el siguiente mensaje a lo largo de todas las diapositivas de incorporación: ¡Reúna a su equipo! Programa de referencias laborales. Detrás de este mensaje principal hay una imagen, y debajo de ella algo más de texto explicativo.
Cada una de las diapositivas de capacitación tiene su correspondiente imagen y mensaje que se muestra. Después de leer cada mensaje, haga clic en el botón Siguiente para avanzar a la siguiente diapositiva.
El texto aparece en cada diapositiva como se muestra:
¡Oh no! ¡Los villanos llegaron a la ciudad! Ayúdanos a reclutar a un equipo de superhéroes que nos salven.
Mira los puestos de trabajo que estamos buscando, anúncialas en redes sociales o refiere a tus amigos.
Colecte puntos e intercámbielos por regalos de la tienda.
¡Compite con tus colegas para crear la mejor liga de la justicia!
Nota
Las diapositivas de capacitación aparecerán cada vez que se abra la aplicación Referencias, hasta que se hayan visto todas las diapositivas y se haya hecho clic en el botón Empezar ahora. Si se sale de la capacitación en cualquier momento, o si no se ha hecho clic en el botón Empezar ahora, las diapositivas del onboarding comenzarán de nuevo cuando se abra la aplicación Referencias. Una vez que se haya hecho clic en el botón Empezar ahora, las diapositivas de capacitación no se volverán a ver, y el panel principal se cargará cuando se abra la aplicación Referencias a partir de ese momento.
En cualquier momento durante la integración, puede hacer clic en el botón Saltar. De este modo se sale de la navegación y se carga el panel principal de Referencias. Si hace clic en Saltar, las diapositivas de capacitación ya no se cargarán al abrir la aplicación Referencias.
Nota
Si hay algún candidato contratado que el usuario haya referido antes de que usted haya configurado la aplicación de Referencias (lo que significa que las diapositivas de capacitación no han aparecido antes), cuando se hace clic en Empezar ahora al final de la capacitación, en lugar de ir al panel principal, aparece una pantalla contratado.
Modificar las plantillas de capacitación
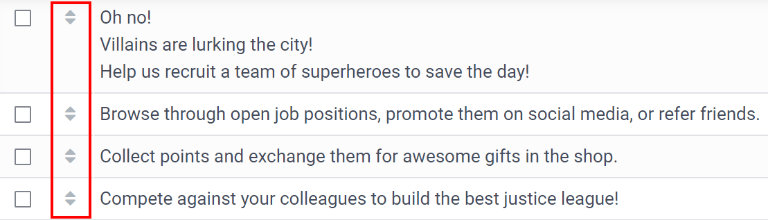
Las diapositivas de incorporación pueden modificarse si se desea. Solo los usuarios con permisos de Administrador para la aplicación de Reclutamiento pueden modificar las diapositivas de integración. Para editar una diapositiva, vaya a Cada línea muestra el texto de la diapositiva individual de integración. Para editar una diapositiva de integración, haga clic en la línea de una diapositiva individual para abrir el formulario de incorporación de la diapositiva y después haga clic en Editar.
Haga los cambios que desee al mensaje en el campo Texto. También puede seleccionar una Empresa, sin embargo, si llena este campo entonces esta presentación solo se mostrará para la empresa que seleccionó.
Nota
El campo Empresa solo aparece en bases de datos multiempresa.
También puede modificar la imagen si pasa el ratón sobre la miniatura de la misma en la esquina superior derecha del formulario para que aparezcan los iconos ✏️ (lápiz) y 🗑️ (basura). Pulse el icono ✏️ (lápiz) para cambiar la imagen. Aparecerá una ventana con un navegador de archivos donde podrá seleccionar la imagen deseada, haga clic en Abrir. La nueva imagen aparece en la miniatura. Para eliminar una imagen, haga clic en el icono 🗑️ (basura) y, a continuación, seleccione una nueva imagen utilizando el icono ✏️ (lápiz).

Puede cambiar la secuencia en la que las diapositivas aparecen desde el tablero Integración. Haga clic en el icono (seis cajas grises pequeñas) que se encuentra a la izquierda del texto de la diapositiva y con ellos arrastre la diapositiva a la posición deseada.
Referencias contratadas
Cuando se contrata a un candidato que el usuario refirió, el usuario «hace que su equipo de superhéroes sea más grande» y se agregará un avatar de superhéroe en el tablero de Referencias.
Después de contratar a un referido, cuando el usuario vuelve a abrir la aplicación Referidos, en lugar del panel principal, se carga una página de contratados, donde aparecerá el texto ¡(Nombre del Referido) ha sido contratado! ¡Elige un avatar para tu nuevo amigo!
Debajo de este mensaje hay cinco miniaturas de avatar para elegir. Si ya se ha asignado un avatar a una referencia, la miniatura aparecerá con los colores atenuados y debajo de él se mostrará el nombre de la referencia para la que que se ha elegido el avatar. Haga clic en un avatar disponible para seleccionarlo.
Si se ha contratado a más de un referido desde que se abrió la aplicación Referencias, después de seleccionar el primer avatar, se pide al usuario que seleccione otro avatar para el siguiente referido contratado. Una vez que todos los avatares se hayan seleccionado, el tablero se cargará y todos los avatares serán visibles. Pase el ratón sobre cada avatar y su nombre aparecerá encima de ellos.
Modificar amigos
Es posible realizar cambios en los avatares de sus amigos del mismo modo que modifica los niveles. Solo los usuarios con permisos de administrador en la aplicación Reclutamiento pueden realizar modificaciones en los amigos. Los amigos preconfigurados son visibles y se pueden modificar desde . El avatar de cada amigo aparece en la columna Imagen del tablero y el nombre correspondiente aparece en la columna Nombre del amigo. Las imágenes predeterminadas son un grupo diverso de héroes, que van desde robots hasta perros.
Para modificar la imagen del panel de control, la miniatura, el nombre o la posición de un amigo, haga clic en un amigo individual para abrir el formulario del amigo recomendado. Haga clic en Editar para realizar modificaciones. Escriba el nombre en el campo Nombre del amigo, esto sirve únicamente para diferenciar a los amigos en el menú de configuración. El nombre del amigo no es visible en ningún otro lugar de la aplicación Referencias.
La posición puede establecerse como adelante o atrás. Esto determina la posición del amigo en relación con el avatar del superhéroe del usuario. Haga clic en el botón de opción situado junto a la selección deseada y el amigo aparecerá delante o detrás del avatar del usuario cuando se active.
Si lo desea, puede modificar tanto la imagen de la miniatura como la imagen del tablero. Pase el ratón por encima de la imagen que desea sustituir para ver los iconos ✏️ (lápiz) y 🗑️ (cubo de basura). Haga clic en el icono ✏️ (lápiz) y aparecerá una ventana del explorador de archivos. Navegue hasta el archivo de imagen deseado y haga clic en Abrir para seleccionarlo.
El formulario para referir a un amigo se guarda de forma automática, pero puede guardarlo de forma manual en cualquier momento si hace clic en la opción Guardar de forma manual, el cual es un icono en forma de (subir a la nube) situado en la esquina superior izquierda. Para cancelar los cambios que haya hecho, haga clic en el icono ✖️ (Descartar todos los cambios) para borrar todos los cambios y regresar al contenido original.

Advertencia
No se aconseja editar las imágenes. El archivo de la imagen debe tener un fondo transparente para que se muestre correctamente. Solo los usuarios con conocimientos en imágenes transparentes pueden intentar ajustar cualquier imagen en la aplicación Referencias.
Una vez que se ha cambiado una imagen y se ha guardado el amigo, no es posible volver a la imagen original. Para volver a la imagen original, es necesario desinstalar y volver a instalar la aplicación Referencias.
Niveles
La aplicación Referencias tiene niveles preconfigurados que se muestran en el avatar del usuario desde el tablero de la aplicación. Conforme el usuario recomienda a empleados potenciales y gana puntos podrá subir de nivel, como en un videojuego.
Los niveles no influyen en el rendimiento de la aplicación, solo sirven para agregar niveles de logros que los participantes pueden alcanzar y esto ludifica las referencias para el usuario.
El nivel actual del usuario se muestra en la parte superior del tablero principal de la aplicación Referencias, justo debajo de la foto, en formato Nivel: X. Además, alrededor de la foto del usuario aparece un anillo que indica cuántos puntos tiene el usuario y cuántos puntos más necesita para subir de nivel. La parte azul del anillo representa los puntos ganados, mientras que la parte blanca representa los puntos que todavía necesitan antes de subir de nivel.
Modificar niveles
Solo los usuarios con derechos de Administrador en la aplicación Reclutamiento pueden modificar niveles. Para modificar los niveles que ya están configurados vaya a . Cada avatar aparece en la columna Imagen y el número del nivel correspondiente en la columna Nombre del nivel. Las imágenes predeterminadas son de los superhéroes de Odoo y cada nivel agrega un elemento al avatar, como capas y escudos.
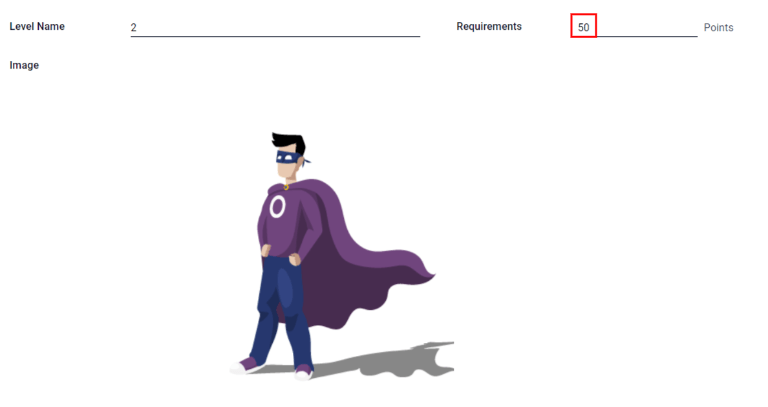
Para modificar la imagen, nombre o los puntos necesarios para llegar a un nivel, haga clic en un nivel individual en la lista para abrir el formulario del nivel y haga las modificaciones.
Escriba el nombre (o el número del nivel) en el campo Nombre del nivel, lo que ingrese aquí se mostrará debajo de la foto del usuario en el tablero principal cuando lleguen al nivel. Ingrese el número de puntos que se necesitan para llegar a ese nivel en el campo Requisitos. Los puntos necesarios para subir de nivel son los puntos totales acumulados que se ganaron desde que el empleado se creó, no los puntos adicionales de un nivel previo que se deben ganar.
Si lo desea, puede modificar la imagen. Pase el ratón por encima de la imagen para ver los iconos ✏️ (lápiz) y 🗑️ (cubo de basura). Haga clic en el icono ✏️ (lápiz) y aparecerá una ventana del explorador de archivos. Navegue hasta el archivo de imagen deseado y haga clic en Abrir para seleccionarlo.
El formulario de nivel se guarda de forma automática, pero puede guardarlo de forma manual en cualquier momento si hace clic en la opción para guardar de forma manual, el cual es un icono en forma de (subir a la nube) situado en la esquina superior izquierda. Para cancelar los cambios que haya hecho, haga clic en el icono ✖️ (Descartar todos los cambios) para borrar todos los cambios y regresar al contenido original.
Advertencia
No se aconseja editar las imágenes. El archivo de la imagen debe tener un fondo transparente para que se muestre correctamente. Solo los usuarios con conocimientos en imágenes transparentes pueden intentar ajustar cualquier imagen en la aplicación Referencias.
Una vez que se ha cambiado una imagen y se ha guardado el nivel, no es posible volver a la imagen original. Para volver a la imagen original, es necesario desinstalar y volver a instalar la aplicación Referencias.
Subir de nivel
Ya que se hayan acumulado los puntos suficientes para subir de nivel, el círculo alrededor de la foto del usuario se pintará completo de color azul y una imagen que dice ¡Subió de nivel! aparecerá arriba de la foto, junto con la frase ¡Haga clic para subir de nivel! debajo de la foto de usuario y el nivel actual.
Para que el usuario suba de nivel, debe hacer clic en el gráfico ¡SUBIÓ DE NIVEL!, en la foto del usuario, o en el texto ¡Haga clic para subir de nivel! debajo de la foto del usuario. El avatar del usuario cambia para mostrar el nivel nuevo y el anillo alrededor de la foto se actualizará para mostrar los puntos actuales.
Subir de nivel no le costará puntos al usuario, el usuario solo tiene que ganar la cantidad de puntos requerida.

Nota
Una vez que el usuario haya llegado al nivel más alto posible, seguirán juntando puntos que pueden intercambiar por recompensas, pero ya no podrán subir de nivel. El anillo alrededor de la foto seguirá siendo azul.