Razorpay
Al conectar un terminal de pago, Razorpay puede ofrecer a sus clientes un flujo de pago fluido y facilitar el trabajo de sus cajeros.
Ver también
Configuración
Encontrar las credenciales de Razorpay
Cree una cuenta de Razorpay y configúrelas en su sitio web.
Necesita las siguientes credenciales para configurar el método de pago en Odoo:
Nombre de usuario de Razorpay
El número de serie del dispositivo de Razorpay, que se puede encontrar debajo del dispositivo en el tablero de Razorpay.
Configure el método de pago
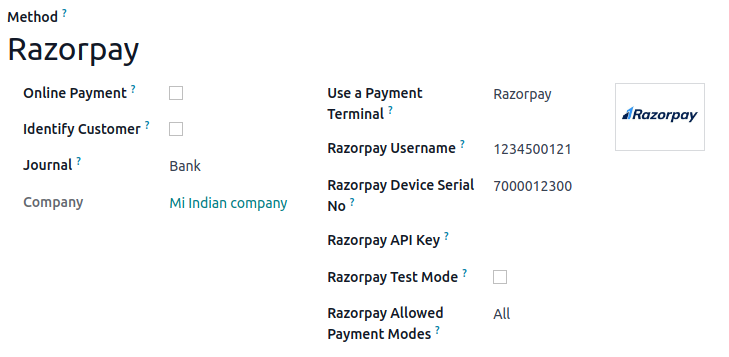
Active el módulo de TPV de Razorpay para activar el terminal de pago.
Cree el método de pago relacionado en .
Configure el tipo de Diario como Banco.
En el campo Usar una terminal de pago, seleccione Razorpay.
Ingrese su nombre de usuario en el campo Nombre de usuario de Razorpay y el número de serie de su dispositivo en el campo Número de serie de dispositivo de Razorpay.
Llene el campo Clave API de Razorpay con la Clave API de Razorpay.
Configure los Modos de pago permitidos de Razorpay según sus necesidades.

Nota
Puede activar el campo Modo de prueba de Razorpay al realizar pruebas, o déjelo desactivado para trabajar en producción.
Ya que haya creado el método de pago, puede seleccionarlo en sus ajustes del TPV. Para hacerlo, vaya a los ajustes del TPV y añada el método de pago en la sección Pago.
Nota
El terminal debe tener al menos 10 % de batería para poder usarlo.