邮件组
**邮件群组**功能允许网站访问者通过电子邮件进行公开讨论。他们可以加入一个群组,接收来自其他群组成员(即已订阅群组的网站用户)的电子邮件,并向所有群组成员发送新邮件。
要激活该功能,请 安装 网站邮件组 (website_mail_group)模块。
配置邮件组
配置邮件组的步骤如下:
通过访问**常规设置**,向下滚动到:guilabel:
讨论`部分,启用:guilabel:`自定义电子邮件服务器`功能,并输入:guilabel:`别名域`(例如`@mycompany.com),配置自定义电子邮件别名域。Go to , then click Create.
指定 团队名称、邮件别名 和 描述。
Enable Moderate this group and specify the Moderators if you wish to moderate messages from this group. Alternatively, if the group is not moderated, you can define Responsible users who can manage the messages in the group.
在 隐私 选项卡中,定义谁可以订阅邮件组:
所有人: 将邮件组公开,任何人都可以订阅;
仅限成员:仅允许定义为成员的用户订阅邮件组;
选定的用户组:只允许 授权组 中的用户订阅邮件组。
如果邮件组进行了审核,您可以通过在 通知成员 选项卡中启用 自动通知,并编写 通知消息,在作者的邮件等待审核时自动通知作者。
如果您希望向新用户发送指南,请启用 向新用户发送指南 并将其写入 指南 选项卡。这在邮件组有管理员时特别有用。
使用邮件组
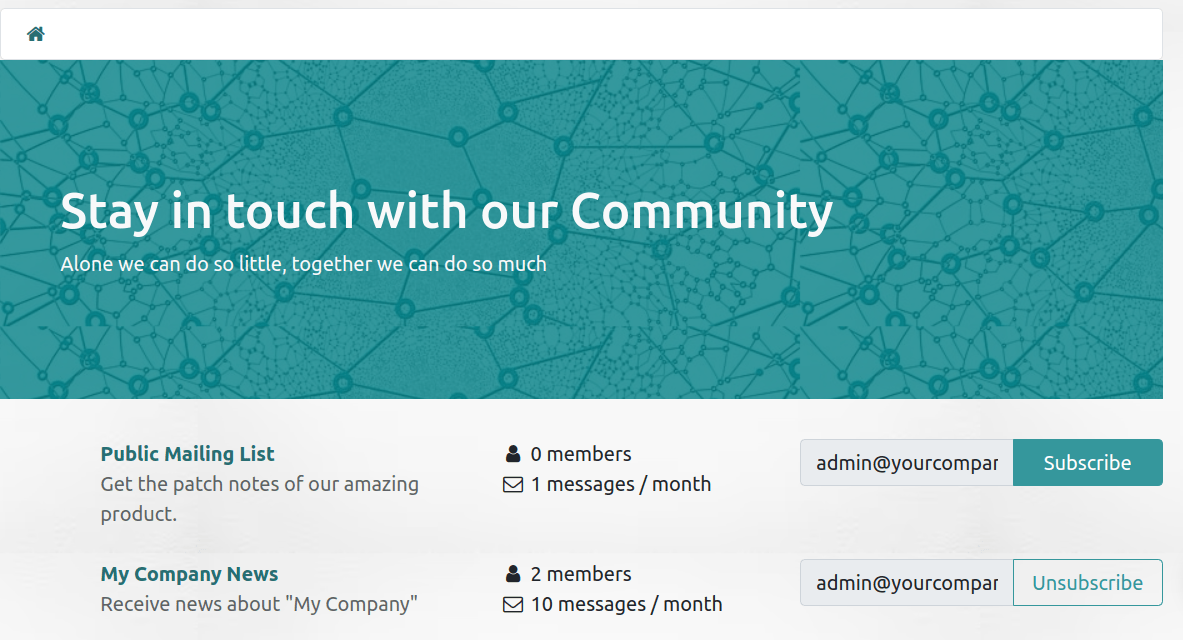
订阅/退订
基于:ref:配置邮件组 <website/mailing_lists/configure_groups>,用户可以从网站页面(默认为 /groups)订阅或退订邮件组。
Internal users can also do this from , using the Join and Leave buttons.
发出信息
To send messages to a mail group, website users can email the mail group’s email address. Internal users can also create messages directly from Odoo. To do so, go to , select the mail group, click the Emails smart button, and click Create. Then, fill in the fields and click Send.
小技巧
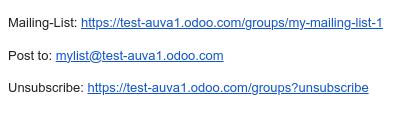
也可以通过从
/groups网站页面选择群组来访问消息列表。群组成员还可以通过在他们收到的任何群组邮件的页脚中使用的链接,取消订阅群组、访问群组邮件页面并向群组发送电子邮件。
管理邮件群组信息
如果已为 邮件组 启用 管理员 功能,则必须有一名 管理员 批准该组的信息,才能将其发送给其他成员。
To moderate messages, go to , select the mail group, and click the To review smart button. You can moderate messages using the buttons at the end of the message line or select a message to view its content and moderate it accordingly.
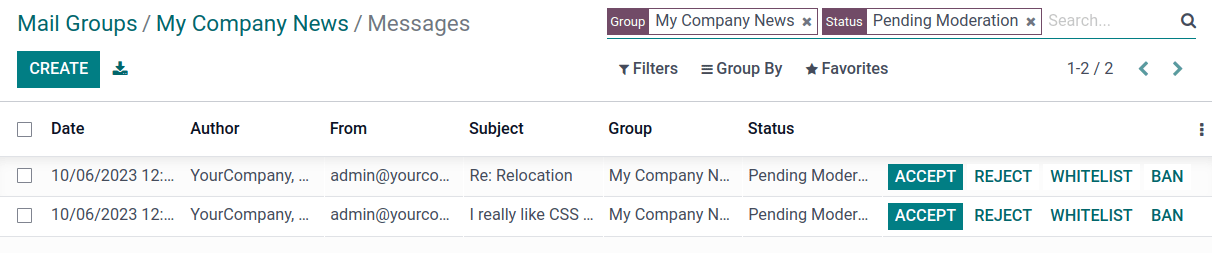
可执行以下操作:
接受:接受电子邮件并将其发送给邮件组成员。
拒绝:拒收电子邮件。在弹出的窗口中,单击 默拒 在不通知作者的情况下拒收邮件,或给提供拒收邮件的解释,然后单击 发送和拒绝 拒收邮件并将解释发送给作者。
Whitelist: to whitelist the author, i.e. automatically accept all of their emails. As a result, a moderation rule is created for the author’s email address with the status Always allow.
Ban: to blacklist the author, i.e. automatically discard all their emails. In the pop-up window that opens, click Ban to ban the author without notifying them, or specify an explanation, then click Send & Ban to ban the author and send them the explanation. As a result, a moderation rule is created for the author’s email address with the status Permanent ban.
注解
Messages can also be moderated from the group’s list of messages. Go to , select the mail group and click the Emails smart button.