Batch payments
Batch payments act as an organizational tool that groups multiple individual customer or vendor payments into a single file. Rather than managing transactions one by one, you can consolidate them to generate a detailed deposit slip or a single electronic payment file. This significantly simplifies bank reconciliation: when a bulk sum appears on your bank statement, Odoo uses the batch reference to automatically match and reconcile all underlying payments in a single step.
For customer payments, the feature supports both physical payments, such as checks and cash, and electronic transfers. Group incoming cash or check payments into batches to print bank deposit slips to ensure your internal records mirror the lump-sum deposit on your bank statement. On the vendor side, batch payments streamline bulk electronic transfers. Instead of processing supplier invoices manually, select multiple bills and generate a single outgoing payment file to upload directly to your banking portal. Because these file formats are region-specific (e.g., SEPA in Europe, NACHA in the U.S., or the global ISO 20022 standard), consult your country’s fiscal localization documentation to verify supported formats.
See also
Configuration
Make sure batch payments are enabled by opening the Accounting app, going to , scrolling down to the Customer Payments section, and enabling Batch Payments.
Note
This enables both customer and vendor batch payments.
Tip
According to your needs, check that the following apps are installed in the Apps app:
Batch creation
To create customer or vendor batch payments and add existing payments to them, follow these steps:
Make sure all payments to be included in the batch have been registered.
Open the Accounting app and go to or according to the nature of the payment and click New.
Next, configure the batch payment:
Batch Type: select whether the money is being transferred to your account (Inbound) or to someone else’s account (Outbound).
Bank: the bank journal to use for this batch.
Payment Method: the payment method used for the invoices’ payments. Only payments matching the payment method selected will appear.
Date: the batch’s creation date.
Reference: the reference of the batch. Leave it empty to generate it automatically.
Add a line: click it to select the payments to include in the batch.
Once all desired payments are included, click Validate to finalize the batch.
Alternatively, you can select the relevant payments and create a batch payment directly from them:
Make sure all payments to be included in the batch have been registered.
Open the Accounting app and go to or and select all payments to include in the batch.
Click Create Batch, or (Actions), and select Create batch payment.
In the view form, review the selected payments. If any individual payments are missing, click Add a line, then select the missing payments to include in the batch.
Once all desired payments are included, click Validate to finalize the batch.
To view existing batch payments, go to or .
Note
All payments in a batch must use the same payment method.
Once validated, no additional payments can be added to a batch. You can delete the batch if necessary by clicking (Actions) and then (Delete).
Tip
Click Print to download a list of the included payments.
To filter payments by payment method, click on the Payment Method column header during the batch payment creation step.
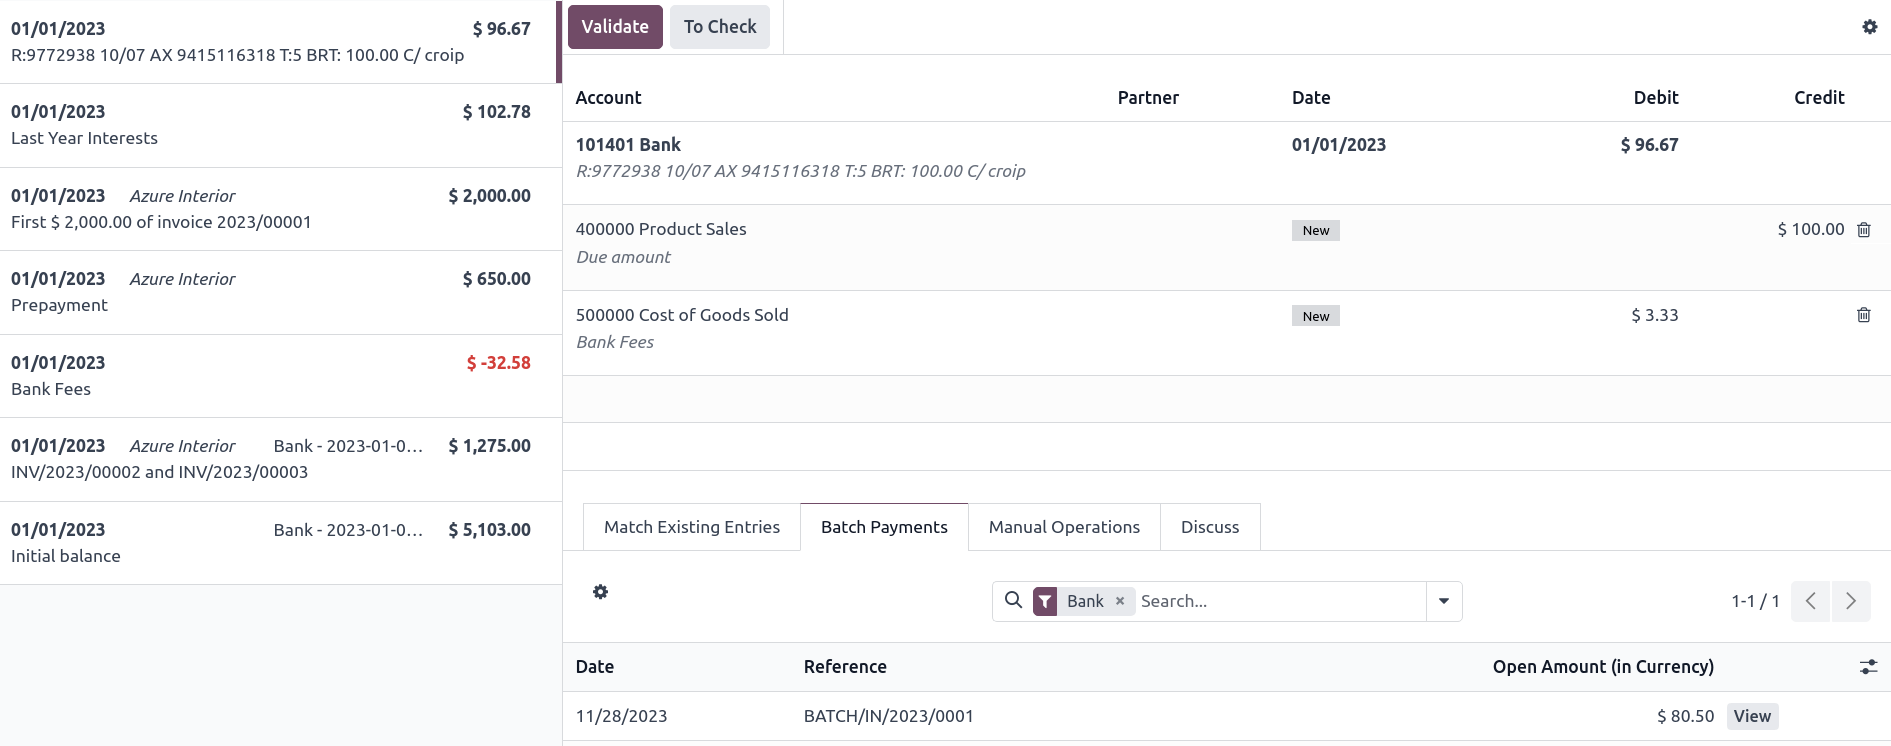
Bank reconciliation
Once the bank transactions have been created in your database, you can reconcile them with the batch payment.
Note
If a specific payment could not be processed by the bank or is missing, remove the line corresponding to that payment by using the (Delete) button before validating the reconciliation of the batch payment.
Bank accounts
Odoo distinguishes between Banks (the financial institution issuing the account) and Bank Accounts (the specific account number and routing details).
You can store banking details for both your own company and your contacts. Odoo automatically uses this information when needed, such as when generating batch payment files.
To protect your business against phishing scams, Odoo configures all new bank accounts as “untrusted” by default, preventing outgoing wire transfers until you manually verify and trust the account.
See also
Configuration
Note
The Contacts app can be installed from the Apps dashboard.
To configure your banking information, open the Contacts app and go to Configuration. From here, you can manage Banks and Bank Accounts.
Create a bank
Go to and click New. Fill in the following fields:
Name: The name of the bank.
Bank Identifier Code: The bank’s SWIFT or BIC code.
Bank Address: Enter the Country. The Street, City, State, and Zip fields are optional.
Phone and Email: Optional contact details.
Create a bank account
Note
Prerequisite: A bank account must be linked to a specific bank record. Ensure you have created the required bank using the steps above before setting up a bank account.
Go to and click New. Enter the following details:
Account Number: The unique identification number for the bank account.
Bank: Select the associated bank from the drop-down menu.
ABA/Routing: The American Bankers Association routing number (if applicable).
Account Holder Name: The full name of the account holder.
Account Holder: Select the holder’s contact from the drop-down menu. If the contact does not exist yet, you can link it later by following the next steps.
Toggle Send Money to mark the account as Trusted. Marking the account as Trusted will enable you to send money to this account, so only do this when you are certain the information is correctly entered and was not provided by a phishing attack.
Link a bank account to a contact
If you need to link an existing bank account to a contact:
Open an app with contact access (such as Accounting or Contacts).
Select a contact and open the Accounting tab.
In the Bank Accounts section, click Add a line and provide the:
Account Number,
Bank,
Account Holder Name,
Account Holder,
Company and Currency (if applicable).
Toggle Send Money to mark the account as Trusted.
Phishing attacks
A phishing attack is an online scam designed to trick individuals or companies into giving away sensitive information or money by sending out fraudulent communication. Fraudsters pretend to be legitimate companies and may use partial information to give credibility to their requests.
There are several types of phishing attacks, including invoice fraud. In this case, the fraudster pretends to be a genuine supplier following up on unpaid bills or sending a new invoice, but with different payment information than usual and with fake contact details.
To protect yourself from these types of phishing attacks, remain vigilant when you receive unexpected invoices or payment requests.
Important
In case of doubt, we recommend contacting the vendor by phone. Make sure to call an official phone number by searching yourself, as the URLs, email addresses, and phone numbers written in the communication you received may be fake.