Connect Gmail to Odoo using Google OAuth
Odoo is compatible with Google’s OAuth for Gmail. In order to send secure emails from a custom domain, all that is required is to configure a few settings on Google’s Workspace platform, as well as on the back end of the Odoo database. This configuration works by using either a personal email address or an address created by a custom domain.
Tip
For more information, visit Google’s documentation on setting up OAuth.
Opzet in Google
Maak een nieuw project aan
To get started, go to the Google API Console. Log in with your Google Workspace account if you have one, otherwise log in with your personal Gmail account (this should match the email address you want to configure in Odoo).
After that, click on Create Project, located on the far right of the OAuth consent screen. If a project has already been created in this account, then the New Project option will be located on the top right under the Select a project drop-down menu.
On the screen, rename the Project name to Odoo and
browse for the Location. Set the Location as the Google Workspace
organization. If you are using a personal Gmail account, then leave the Location as
No Organization.

Click on Create to finish this step.
OAuth-toestemmingsscherm
If the page doesn’t redirect to the options, click on OAuth consent screen in the left menu.
Under User Type options, select the appropriate User Type, and then click on Create again, which will finally navigate to the page.
Waarschuwing
Persoonlijke Gmail accounts mogen alleen een Externe gebruikerstype zijn, wat betekent dat Google mogelijk een goedkeuring nodig heeft of dat Scopes moeten worden toegevoegd. Als je echter een Google WorkSpace account gebrukt, kan je een Interne gebruikerstype gebruiken.
Merk ook op dat wanneer de API verbinding in de Externe testmodus staat, er geen goedkeuring nodig is van Google. De gebruikerslimiet in testmodus is ingesteld op 100 gebruikers.
Edit app registration
Next we will configure the app registration of the project.
On the OAuth consent screen step, under the App information section, enter
Odoo in the App name field. Select the organization’s email address under the
User support email field.
Next, under , click on Add Domain and
enter odoo.com.
After that, under the Developer contact information section, enter the organization’s email address. Google uses this email address to notify the organization about any changes to your project.
Next, click on the Save and Continue button. Then, skip the page by scrolling to the bottom and clicking on Save and Continue.
If continuing in testing mode (External), add the email addresses being configured under the Test users step, by clicking on Add Users, and then the Save and Continue button. A summary of the app registration appears.
Finally, scroll to the bottom and click on Back to Dashboard to finish setting up the project.
Create Credentials
Now that the project is set up, credentials should be created, which includes the Client ID and Client Secret. First, click on Credentials in the left sidebar menu.
Then, click on Create Credentials in the top menu and select OAuth client ID from the dropdown menu.
Under Application Type, select Web Application from the dropdown menu.
In the Name field, enter
Odoo.Under the Authorized redirect URIs label, click the button ADD URI, and then input
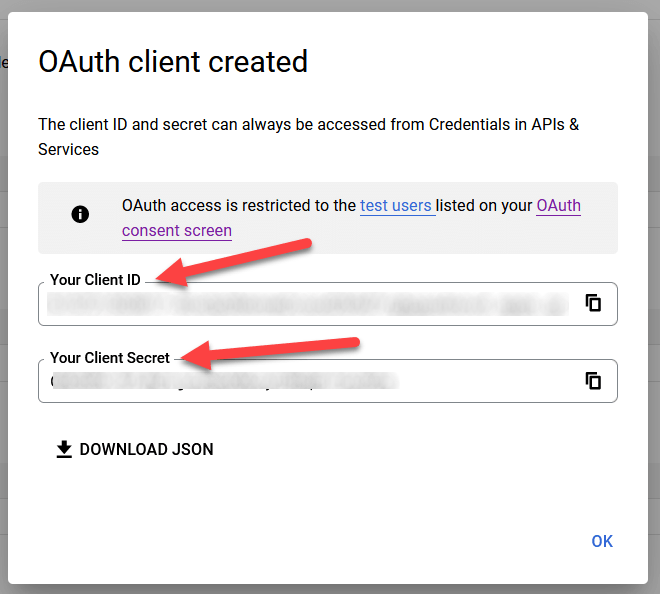
https://yourdbname.odoo.com/google_gmail/confirmin the URIs 1 field. Be sure to replace the yourdbname part of the URL with the actual Odoo database name.Next, click on Create to generate an OAuth Client ID and Client Secret. Finally, copy each generated value for later use when configuring in Odoo, and then navigate to the Odoo database.
Opzetten in Odoo
Enter Google Credentials
First, open Odoo and navigate to the Apps module. Then, remove the Apps
filter from the search bar and type in Google. Install the module called Google
Gmail.
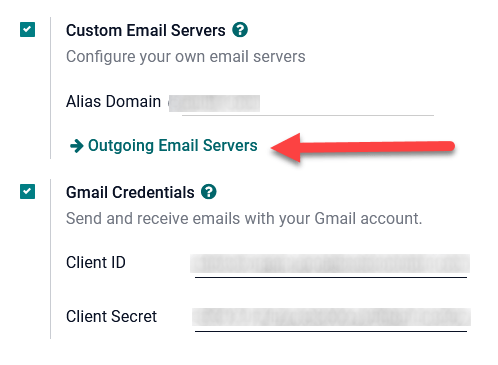
Next, navigate to , and under the Discuss section, ensure that the checkbox for Custom Email Servers or External Email Servers is checked. This populates a new option for Gmail Credentials or Use a Gmail Sever. Then, copy and paste the respective values into the Client ID and Client Secret fields and Save the settings.
Configure outgoing email server
To configure the external Gmail account, return to the top of the Custom Email Servers setting and then click the Outgoing Email Servers link.
Then, click on New or Create to create a new email server, and fill in the Name, Description, and the email Username (if required).
Next, click on Gmail OAuth Authentication or Gmail (under the Authenticate with or Connection section). Finally, click on Connect your Gmail Account.
A new window labeled Google opens to complete the authorization process. Select the appropriate email address that is being configured in Odoo.
If the email address is a personal account, then an extra step pops up, so click Continue to allow the verification and connect the Gmail account to Odoo.
Then, allow Odoo to access the Google account by clicking on Continue or Allow. After that, the page navigates back to the newly configured outgoing email server in Odoo. The configuration automatically loads the token in Odoo, and a tag stating Gmail Token Valid appears in green.
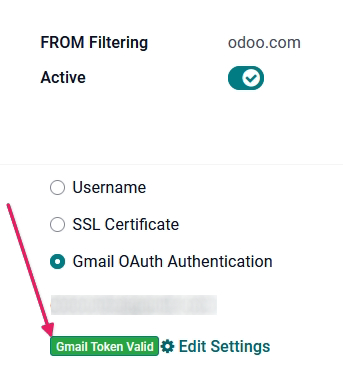
Finally, Test the Connection. A confirmation message should appear. The Odoo database can now send safe, secure emails through Google using OAuth authentication.
Google OAuth FAQ
Production VS Testing Publishing Status
Choosing Production as the Publishing Status (instead of Testing) will display the following warning message:

To correct this warning, navigate to the Google API Platform. If the Publishing status is In Production, click Back to Testing to correct the issue.
No Test Users Added
If no test users are added to the OAuth consent screen, then a 403 access denied error will populate.
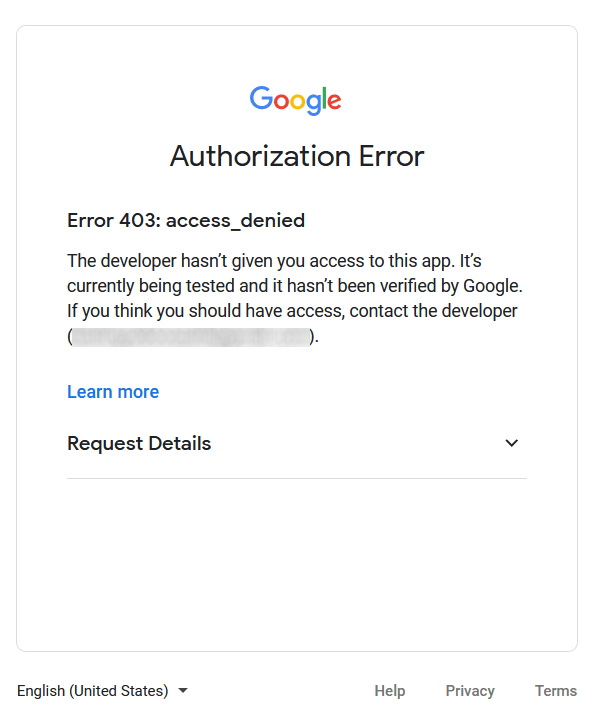
To correct this error, return to the OAuth consent screen under APIs & Services and add test user(s) to the app. Add the email that you are configuring in Odoo.
Gmail Module not updated
If the Google Gmail module in Odoo has not been updated to the latest version, then a Forbidden error message populates.

To correct this error, go to the module and clear out the search terms. Then,
search for Gmail or Google and upgrade the Google Gmail module. Finally, click
on the three dots on the upper right of the module and select Upgrade.
Application Type
When creating the credentials (OAuth Client ID and Client Secret), if Desktop App is selected for the Application Type, an Authorization Error appears.
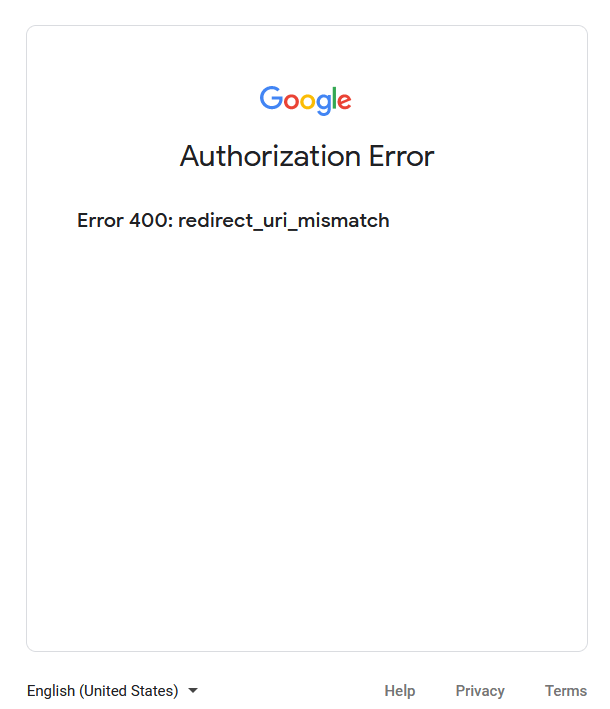
To correct this error, delete the credentials already created and create new credentials, selecting
Web Application for the Application Type. Then, under Authorized
redirect URIs, click ADD URI and type:
https://yourdbname.odoo.com/google_gmail/confirm in the field, being sure to replace yourdbname
in the URL with the Odoo database name.