Puestos de trabajo
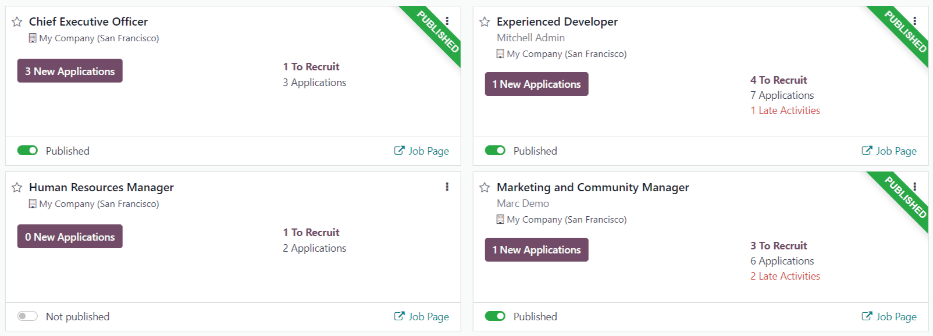
In Odoo Recruitment, all job positions are shown on the default dashboard in the Recruitment app. This includes positions that are being actively recruited for, as well as inactive positions.
Each job position is shown in an individual Kanban card. If the job position is active, and candidates can apply, a Published banner appears in the top-right corner of the card.
Haga clic en cualquier parte de la tarjeta del puesto de trabajo para ver los candidatos.
Crear un nuevo puesto de trabajo
To create a new job position from the main dashboard in the Recruitment app, click the New button in the top-left corner, and a Create a Job Position modal appears.
First, enter the name of the Job Position (such as Sales Manager, Mechanical
Engineer, etc.) in the field.
Next, enter an Application email by typing in the first half of the email address in the first field, then select the second half of the email using the drop-down menu in the second field. Applicants can send a resumé to this specific email address, and Odoo creates an application for them automatically.
When complete, click the Create button to save the entry, or the Discard button to delete it.

Once the job position has been created, it appears as a card in the Kanban view on the main Recruitment app dashboard.
Editar un puesto de trabajo nuevo
Una vez que cree el puesto de trabajo, tiene que ingresar los detalles de la posición. Haga clic en el icono ⋮ (tres puntos) que se encuentra en la esquina superior derecha del panel en cuestión para mostrar varias opciones. Después, haga clic en Configuración para editar los detalles.

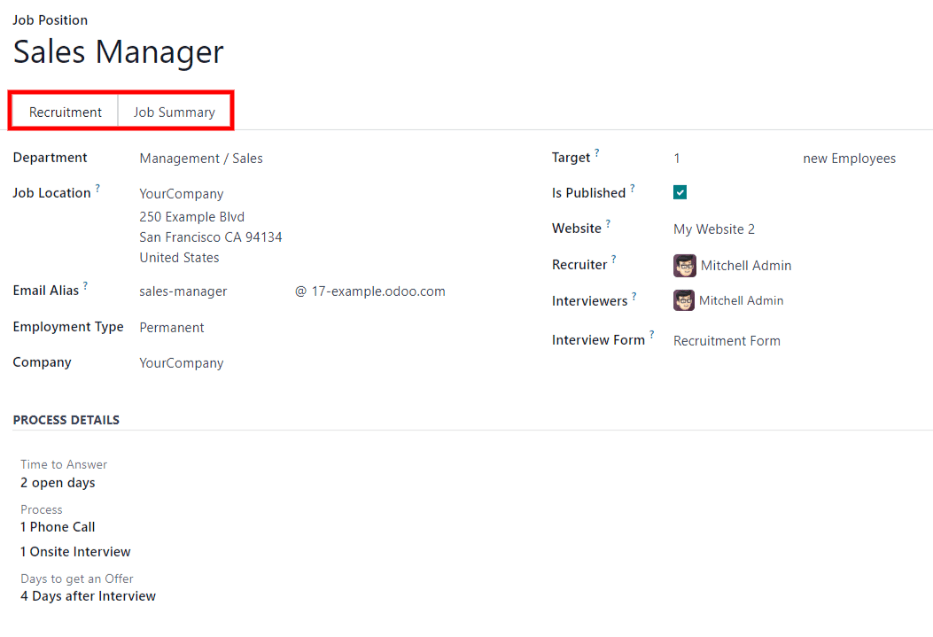
All the basic information about the job position is listed under the Recruitment tab.
None of the fields are required, but it is important to configure and populate the Department, Location, Employment Type, and Job Summary fields, as they are all visible to prospective applicants on the website.
Puede llenar los campos como se muestra aquí:
Department: select the relevant department for the job position. This is visible on the website.
Job Location: select the physical address for the job. If the job position is remote, leave this field blank. This is visible on the website.
Email Alias: enter an email address to which applicants can send a resumé. Once emailed, Odoo automatically creates an application for them.
Employment Type: select what type of position the job is, using the drop-down menu. The default options are Permanent, Temporary, Seasonal, Interim, Full-Time, and Part-Time. This is visible on the website.
Company: select the company the job is for. This field only appears if using a multi-company database.
Objetivo: ingrese el número de empleados que se contratarán para ese puesto.
Está publicado: active esta opción para publicar este puesto en línea.
Website: select the website the job is published on.
Recruiter: select the person responsible for recruiting this role.
Interviewers: select who should perform the interviews. Multiple people can be selected.
Interview Form: select an Interview form that applicants fill out prior to their interview.
Contract Template: select a contract template to be used when offering the job to a candidate.
Sección detalles del proceso: esta sección contiene información que se muestra en línea para el puesto de trabajo. En ella se informa a los candidatos del calendario y los pasos del proceso de contratación, para que sepan cuándo pueden esperar una respuesta.
Tiempo para responder: ingrese el número de días antes de que se contacte al candidato.
Process: enter the various stages the candidate goes through during the recruitment process.
Días para recibir una oferta: proporcione el número de días antes de que el candidato deba esperar una oferta una vez concluido el proceso de reclutamiento.
Nota
La sección detalles del proceso es un campo de texto. Todas las respuestas se escriben en lugar de seleccionarse de un menú desplegable. El texto se muestra en el sitio web exactamente como aparece en esta pestaña.
Finally, enter the job description in the Job Summary tab.
Crear un formulario para la entrevista
Un Formulario de entrevista se utiliza para determinar si un candidato es adecuado para un puesto de trabajo. Los formularios de entrevista pueden ser tan específicos o generales como se desee, y pueden adoptar la forma de una certificación, un examen o un cuestionario general. Los formularios de entrevista los determina el equipo de contratación.
Before creating an interview form, ensure the proper settings are enabled. Navigate to , and under the Recruitment Process section, ensure the Send Interview Survey option is enabled.
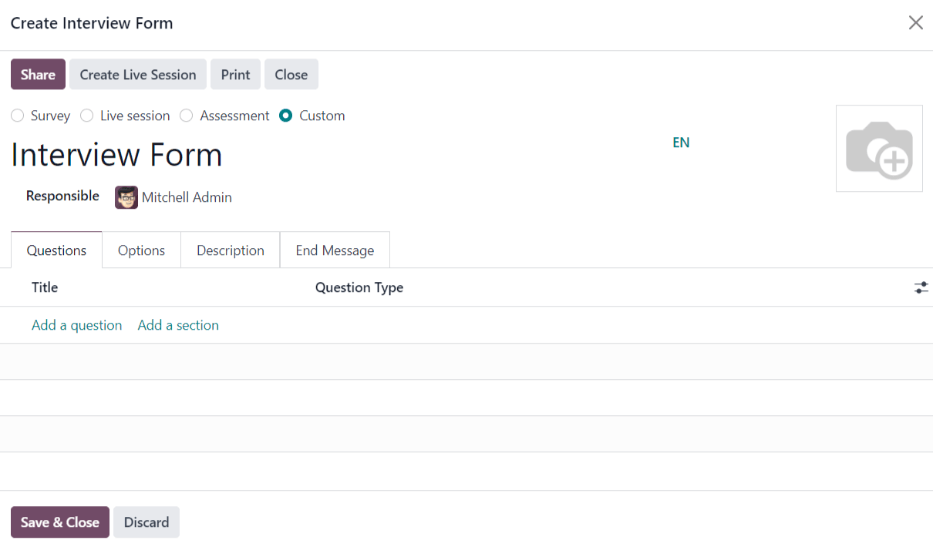
Since there are no pre-configured forms in Odoo, all interview forms must be created. To create an interview form, start from the Recruitment tab of the Job Position form. In the Interview Form field, enter a name for the new interview form. As the name is typed, several options populate beneath the entry: Create (interview form name), Search More…, and Create and edit…. Click Create and edit… and a Create Interview Form modal appears.
Nota
The option Search More… only appears if there are any interview forms already created. If no interview forms exist, the only options available are Create (interview form name), and Create and edit….
Proceed to fill out the modal interview form as a typical survey. For specific directions on how to create a survey, refer to the survey essentials document, which provides step-by-step instructions on how to create and configure a survey.