Gestión de oportunidades perdidas
Not every opportunity results in a successful sale. To keep the pipeline up-to-date, lost opportunities need to be identified. Specifying why an opportunity was lost provides additional insight that can prove useful for future opportunities.
Mark an opportunity as lost
To mark an opportunity as lost, first open the , and select an opportunity from the pipeline, by clicking on its corresponding Kanban card. Doing so reveals that opportunity’s detail form.
Then, click Lost, located at the top of the opportunity’s detail form.

This opens the Mark Lost pop-up window. From the Lost Reason drop-down menu, choose an existing lost reason. If no applicable reason is available, create a new one by entering it into the Lost Reason field, and clicking Create.
Additional notes and comments can be added below the lost reason in the designated Closing Note field.
Truco
Neither the Lost Reason field, nor the Closing Note field, on the Mark Lost pop-up window are required. However, it is recommended to include this information for the sake of traceability, accountability, and reporting purposes.
Una vez que haya ingresado la información deseada en la ventana emergente marcar como perdido, haga clic en marcar como perdido.

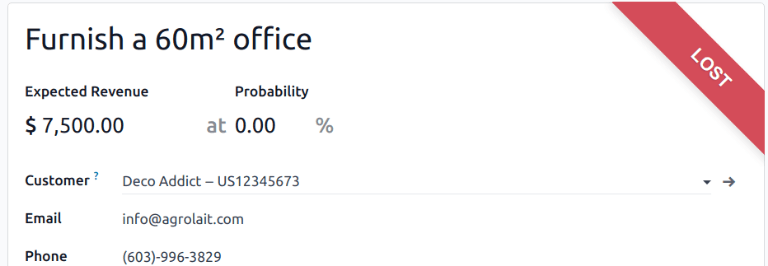
After clicking Mark as Lost, a red Lost banner is added to the upper-right corner of the opportunity.
Creación y edición de motivos de pérdida
Para crear un nuevo motivo de pérdida, o editar uno existente, vaya a la aplicación .
To edit an existing lost reason:
Click on the reason to be edited to highlight it.
Change the selected lost reason by editing the Description field.
When finished, click Save in the upper-left corner.
To create a new lost reason:
Click New in the upper-left corner of the Lost Reasons page.
In the new blank line, click in the Description field, then type the new lost reason.
When finished, click Save.
View lost opportunities
To retrieve lost opportunities in Odoo CRM, open the . On the main Pipeline dashboard, click into the Search… bar at the top of the page, and remove all of the default filters.
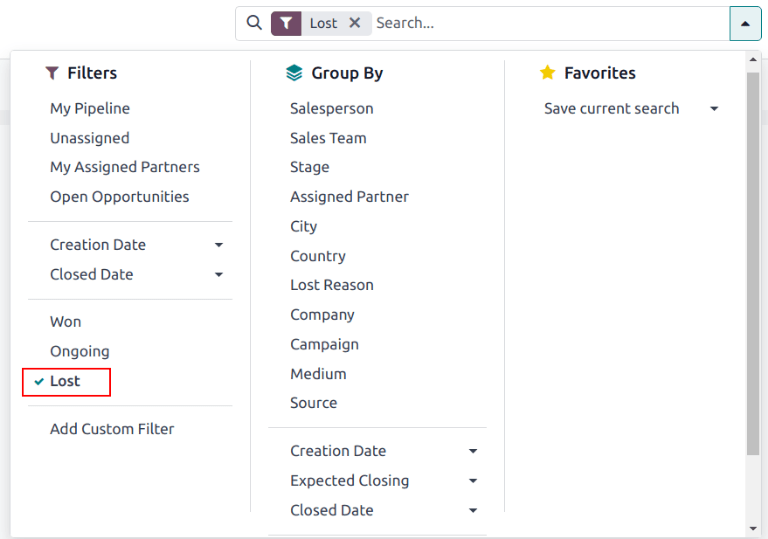
Open the Filters drop-down menu, by clicking the 🔻(triangle pointed down) icon to the right of the Search… bar to open the drop-down menu containing Filters, Group By, and Favorites options, designated into respective columns.
Select the Lost option from the Filters section. Upon selecting
Lost, only the opportunities marked as Lost appear on the Pipeline page.
Sort opportunities by lost reason
To filter opportunities by a specific lost reason, click the 🔻(triangle pointed down) icon to the right of the Search… bar again to open the drop-down menu. In addition to the Lost filter, under the Filters column, click Add Custom Filter, which opens an Add Custom Filter pop-up window.
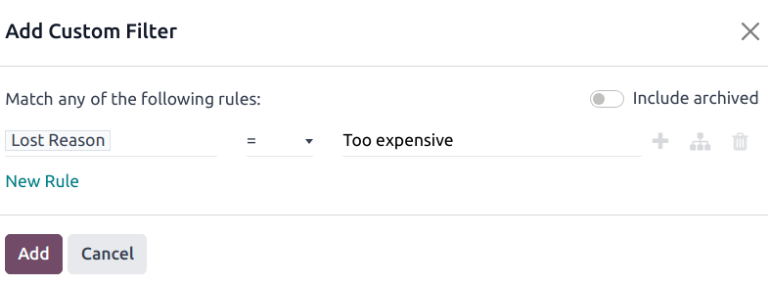
On the Add Custom Filter pop-up window, click in the first field, and type Lost Reason
in the Search… bar, or scroll to search through the list to locate it. Then, click
into the next field, and select = from the drop-down menu. Click into the third field,
and select a lost reason from the drop-down menu. Finally, click Add.
Truco
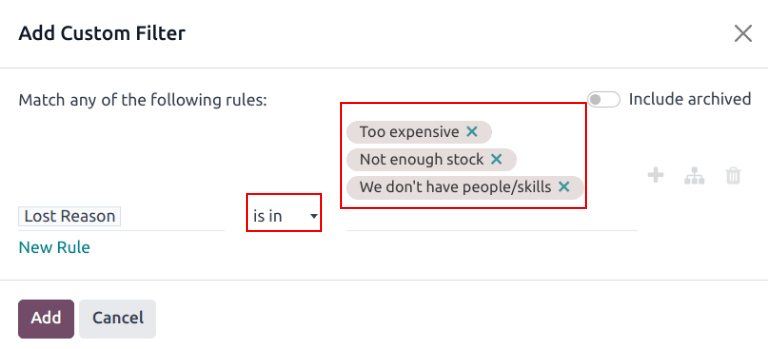
To view results for more than one lost reason, select the operator is in in the second field of the custom filter in the Add Custom Filter pop-up window. Choosing this operator makes it possible to choose multiple lost reasons in the third field.
Restablecer las oportunidades perdidas
To restore a lost opportunity, open the to reveal the Pipeline dashboard. Or, navigate to . From here, click the 🔻(triangle pointed down) icon to the right of the Search… bar to open the drop-down menu that contains Filters, Group By, and Favorites columns.
Under the Filters column, select Lost. Doing so reveals all the lost opportunities on the Pipeline page.
Truco
To see all opportunities in the database, remove the default My Pipeline filter from the Search… bar.
Then, click on the Kanban card of the desired lost opportunity to restore, which opens that opportunity’s detail form.
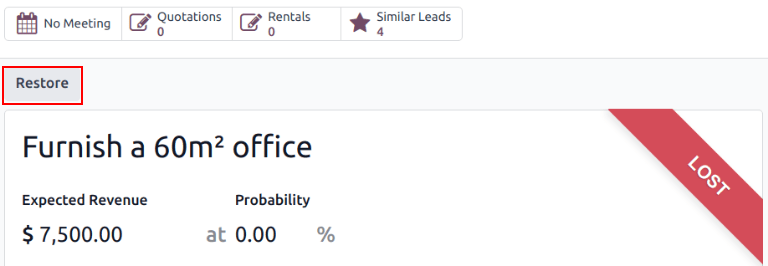
From the lost opportunity’s detail form, click Restore in the upper-left corner. Doing so removes the red Lost banner from the opportunity form, signifying the opportunity has been restored.
Restaurar varias oportunidades al mismo tiempo
Para restaurar varias oportunidades al mismo tiempo, vaya al tablero principal de Flujo en la aplicación CRM, abra el menú desplegable de Filtros y seleccione la opción Perdido.
Next, select the list view option, represented by the ≣ (list) icon in the upper-right corner. Doing so places all the opportunities from the Pipeline page in a list view. With the list view chosen, select the checkbox to the left of each opportunity to be restored.
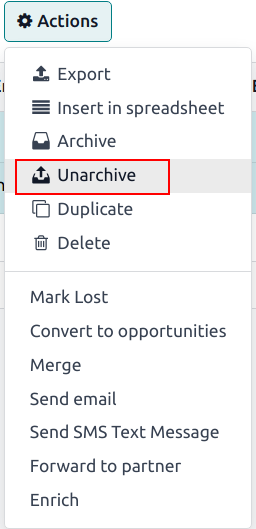
Once the desired opportunities have been selected, click the ⚙️ Actions drop-down menu at the top of the Pipeline page. From the ⚙️ Actions drop-down menu, select Unarchive.
Doing so removes those selected opportunities from the Pipeline page because they no longer fit the Lost filter criteria. Delete the Lost filter from the search bar to reveal these newly-restored opportunities.
Manage lost leads
If Leads are enabled on a database, they can be marked as lost in the same manner as opportunities. Leads use the same lost reasons as opportunities.
Nota
To enable leads, navigate to and check the Leads checkbox. Then, click Save. This adds a new Leads menu to the header menu bar at the top of the page.
Marcar un lead como perdido
To mark a lead as lost, navigate to , and select a lead from the list. Doing so reveals that lead’s detail form.
Después, haga clic en el botón Perdido que podrá encontrar en la parte superior del formulario del lead.
This opens the Mark Lost pop-up window. From the Lost Reason drop-down menu, choose an existing lost reason. If no applicable reason is available, create a new one by entering it into the Lost Reason field, and clicking Create.
Additional notes and comments can be added below the lost reason designated in the Closing Note field.
Una vez que haya ingresado la información deseada en la ventana emergente marcar como perdido, haga clic en marcar como perdido.
Restore lost leads
To restore a lost lead, navigate to , then click the 🔻 (triangle pointed down) icon to the right of the Search… bar to open the drop-down menu that contains the Filters, Group By, and Favorites columns.
Under the Filters column, select Lost. Doing so reveals all the lost leads on the Leads page.
Then, click on the desired lost lead to restore, which opens that lead’s detail form.
Una vez en el formulario de detalles del lead, haga clic en el botón Restaurar que se enuentra en la esquina superior izquierda. Así se quitará el listón rojo de Perdido del formulario del lead y habrá restaurado la oportunidad.
Restore multiple leads at once
To restore multiple leads at once, navigate to , open the Filters drop-down menu, and select the Lost option. Select the checkbox to the left of each lead to be restored.
Once the desired leads have been selected, click the ⚙️ Actions drop-down menu at the top of the Leads page. From the ⚙️ Actions drop-down menu, select Unarchive.
Doing so removes those selected leads from the Leads page because they no longer fit the Lost filter criteria. Delete the Lost filter from the Search… bar to reveal these newly-restored leads.
Ver también