Advanced Use Cases: Creating Models and Adding Fields

  • Case scenario 1: on the leads’ form, if the chosen country is France, show a field ‘Pay by check?’

On your leads’ form, add a Related Field to Country > Country Name.
Now, add a Checkbox field and define its invisibility options as Country (carefully select the one just created) > is not = > France.
You can now hide the related field created (Country) if you wish.
View of the invisibility domain of a field being set in Odoo Studio
Another approach is to use the country’s ID. To do so, go to Contacts ‣ Configuration ‣ Countries, select France (for example), and on the URL check its ID.
The related field invisibility path should now be Country (carefully select the one just created) > is not = > 75.
Again, hide the related field with the country’s ID if you prefer.
View of an URL emphasizing where a country’s ID can be found for Odoo Studio
  • Case scenario 2: create a model called ‘Properties’ and add fields called: company, value, name, address, active, image.

From the dashboard, (optionally) start a new module. Then, click on Edit Menu and start a New Menu (model). Set your menu name and Confirm. Now, on its form, drag & drop the necessary fields.

View of the recommended fields for an object in Odoo Studio
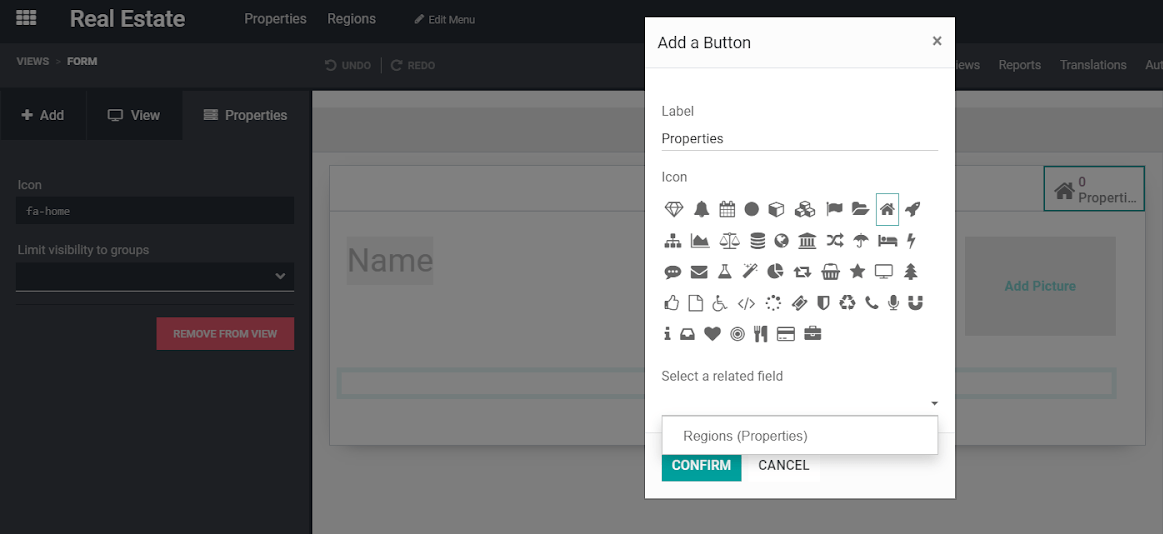
  • Case scenario 2.a: now, you would like to have a model called ‘Regions’ to which each property must be linked. And, on ‘Regions’, you would like to see the properties for each region.

Go to Edit Menu > New Menu and create your menu, calling it Regions. Add the necessary fields on its form by dragging & dropping them.
Now, in the form view of Properties, add a Many2one field with a relation to your model Region.

Tip

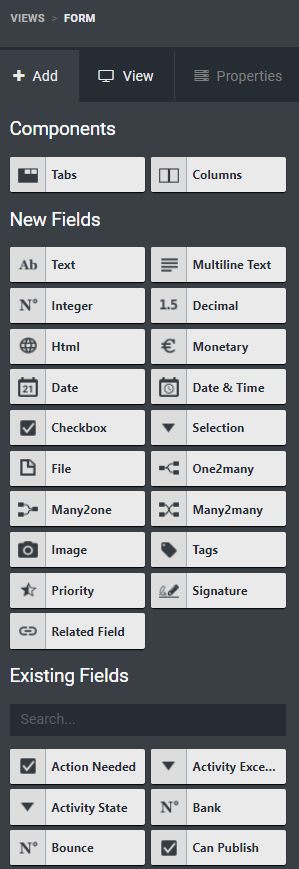
The Existing Fields are the ones that are on the current model but not yet in the view.

Form view and a Many2one field being dropped in Odoo Studio
Now, go to the model Regions, select the form view, and add a status button selecting Regions (Properties) as your relational field.
Status buttons are computed fields, meaning that they count the numbers of records on the related model, and allow you to access them.
Form view and the status button window being shown in Odoo Studio

Tip

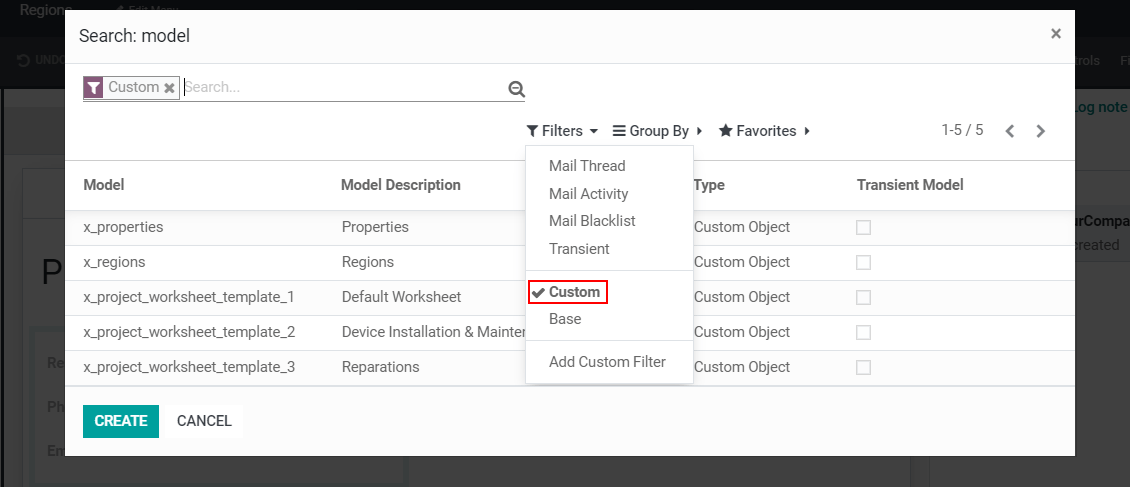
When searching for relations, click on Search more and filter it by Custom. This way you avoid creating duplicates.

View of the search model window in Odoo Studio
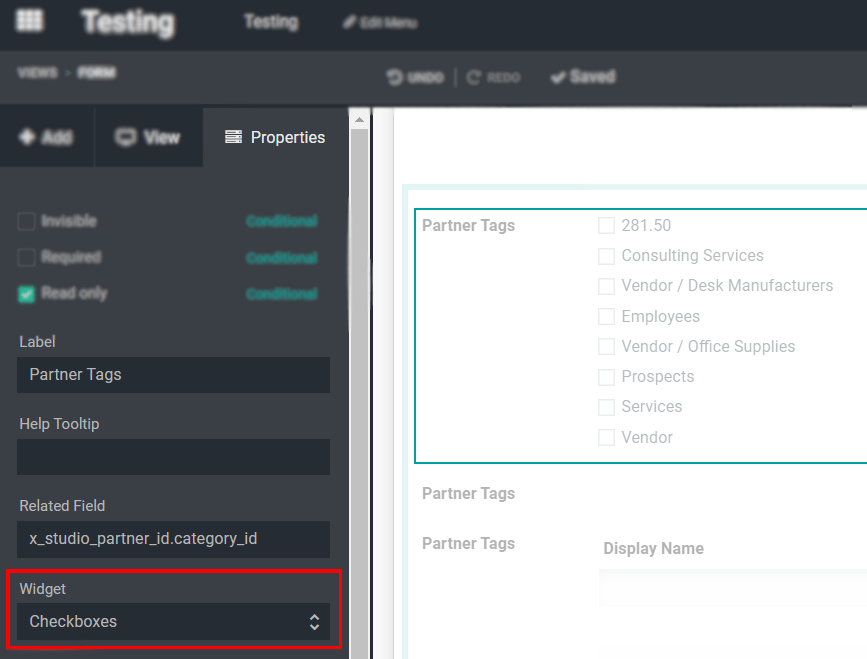
  • Case scenario 2.b: in the model ‘Properties’, show all the tags as checkboxes instead of tags.

Once the field Tags is added to the form, select it and, under its Properties > Widgets, choose Checkboxes.

Form view showing the widgets available in Odoo Studio
  • Case scenario 3: on the leads’ form, add a selection field with the values:’Tags’ & ‘List’ & ‘Checkboxes’. According to the value of the field, show tags as many2many_tags, many2many_radio, or many2many(_list).

In your form view, add a Tags field and relate it to Partners Tag. Under Properties, define its Widget as Many2many. Do the same process another 2 times for Checkboxes and Tags.

Form view emphasizing the widget property in Odoo Studio
Now, add a Selection field and the necessary values.
Continue by selecting your Tags fields, one by one, to set their Invisible options according to their Widget. In the example below, the invisibility rule for the Partner Tags is set as: Select Tag type > is not = > Tags.
Form view emphasizing a field added and its invisibility properties in Odoo Studio
  • Case scenario 4: on a quotation’s form, add a selection field called ‘Manager Validation’ with the values: ‘Accepted’ and ‘Refused’. Only a sales manager can see it, and the field should be set as mandatory if the untaxed amount is higher than 500€.

On your quotation form, add a Selection field with the values Accepted and Refused. Set its Required condition as Untaxed Amount > 500 and the Limit visibility to groups as Sales / Administrator or managers.

Form view of a required domain being set in Odoo Studio
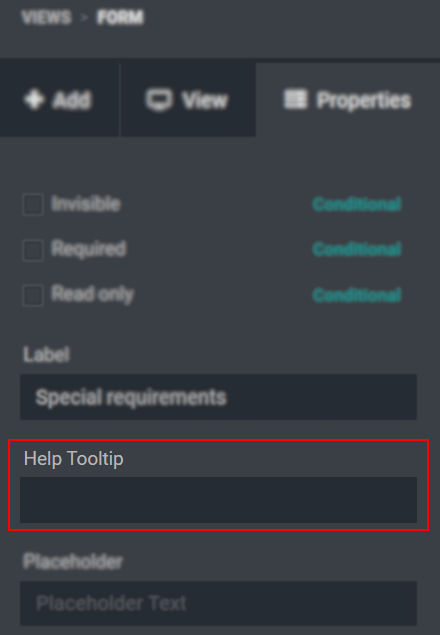
  • Case scenario 5: change the tooltip of a field for all views.
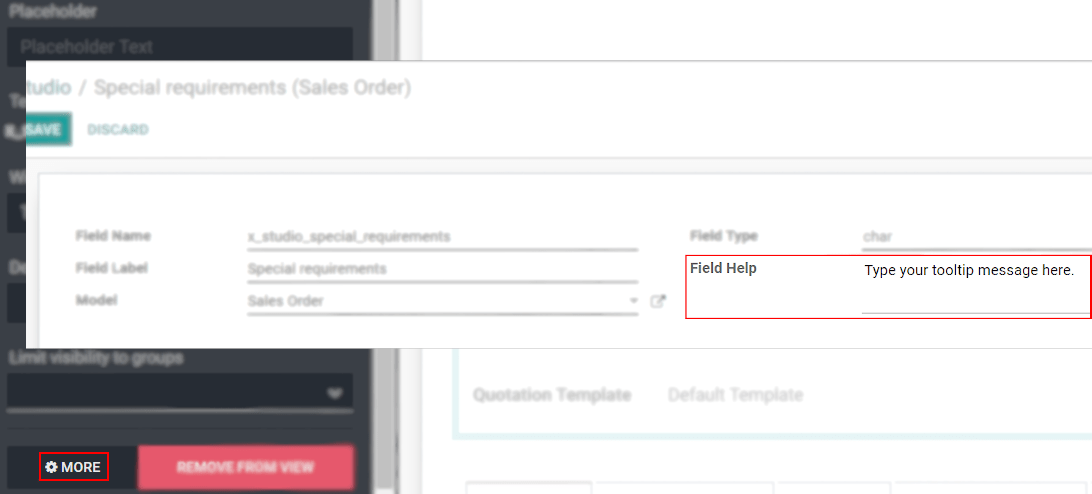
Activate the developer mode and open Studio.
Select the necessary field and, under Properties, click on More to write your tooltip message on Field Help. The tooltip message is the explanatory message shown when the user hovers the field. The message here written is displayed on all views forms where the field is added.
Form view showing more property options and emphasizing the help feature in Odoo Studio

Note

The Field Help message can only be applied to new fields. If you would like to change/apply a tooltip for a specific field, use the Help Tooltip option under Properties.

View of the properties emphasizing the help tooltip option in Odoo Studio