Documentation
This introductory guide will help you acquire the tools and knowledge you need to write documentation, whether you plan to make a minor content change or document an application from scratch.
Read the introduction to the reStructuredText language if you are not familiar with it. Then, you have two courses of action to start contributing to the documentation, depending on whether you want to propose minor changes to existing content or you instead want to work on significant changes to new and existing content.
For minor changes, for example, adding a paragraph or fixing a typo, we recommend using the GitHub interface. This is the easiest and fastest way to submit your changes, and it is suitable for non-technical people. Jump directly to the Make your first contribution section to get started.
For more complex changes, it is necessary to use Git and work from a local copy of the documentation. Follow the instructions in the Environment setup section to first prepare your environment.
reStructuredText (RST)
The documentation is written in reStructuredText (RST), a lightweight markup language consisting of regular text augmented with markup, which allows including headings, images, notes, and so on. This might seem a bit abstract, but there is no need to worry; RST is not hard to learn, especially if you intend to make minor changes to the content.
If you need to learn about a specific markup, head over to our cheat sheet for RST; it contains all the information you should ever need for the documentation of Odoo.
Environment setup
The instructions below help you prepare your environment for making local changes to the documentation and then push them to GitHub. Skip this section and go to Make your first contribution if you have already completed this step or want to make changes from the GitHub interface.
First, you need to create a GitHub account. Odoo uses GitHub to manage the source code of its products, and this is where you will make your changes and submit them for review.
Generate a new SSH key and register it on your GitHub account.
Go to github.com/odoo/documentation and click on the Fork button in the top right corner to create a fork (your own copy) of the repository on your account. This creates a copy of the codebase to which you can make changes without affecting the main codebase. Skip this step if you work at Odoo.
Install Git. It is a command-line (a text interface) tool that allows tracking the history of changes made to a file and, more importantly, working on different versions of that file simultaneously. It means you do not need to worry about overwriting someone else’s pending work when making changes.
Verify that the installation directory of Git is included in your system’s
PATHvariable.Follow the guide to update the PATH variable on Linux and macOS with the installation path of Git (by default
/usr/bin/git).Follow the guide to update the PATH variable on Windows with the installation path of Git (by default
C:\Program Files\Git).Configure Git to identify yourself as the author of your future contributions. Enter the same email address you used to register on GitHub.
$ git config --global user.name “Your Name”
$ git config --global user.email “youremail@example.com”
Clone the sources with Git and navigate into the local repository.
$ git clone git@github.com:odoo/documentation.git
$ cd documentation
Configure Git to push changes to your fork rather than to the main codebase. In the commands below, replace
<your_github_account>with the name of the GitHub account on which you created the fork. Skip this step if you work at Odoo.$ git remote add dev git@github.com:<your_github_account>/documentation.gitConfigure Git to ease the collaboration between writers coming from different systems.
$ git config --global core.autocrlf input
$ git config commit.template `pwd`/commit_template.txt
$ git config --global core.autocrlf true
$ git config commit.template %CD%\commit_template.txt
Install the latest release of Python and pip on your machine.
Install the Python dependencies of the documentation with pip.
$ pip install -r requirements.txtVerify that the installation directory of the Python dependencies is included in your system’s
PATHvariable.Follow the guide to update the PATH variable on Linux and macOS with the installation path of the Python dependencies (by default
~/.local/bin).Follow the guide to update the PATH variable on Windows with the installation path of the Python dependencies.
Install Make.
$ sudo apt install make -yFollow the guide to install Make on Windows.
That’s it! You are ready to make your first contribution with Git.
Make your first contribution
Verify that you are browsing the documentation in the version that you intend to change. The version can be selected from the dropdown in the top menu.
Head to the page that you want to change and click on the Edit on GitHub button in the top right corner of the page.
Click on the Fork this repository button to create a fork (your own copy) of the repository on your account. This creates a copy of the codebase to which you can make changes without affecting the main codebase. Skip this step if you work at Odoo.

Make the desired changes while taking care of following the content and RST guidelines.
Tip
Click on the Preview changes button to review your contribution in a more human-readable format. Be aware that the preview is not able to handle all markups correctly. Notes and tips, for instance, are shown as plain text.
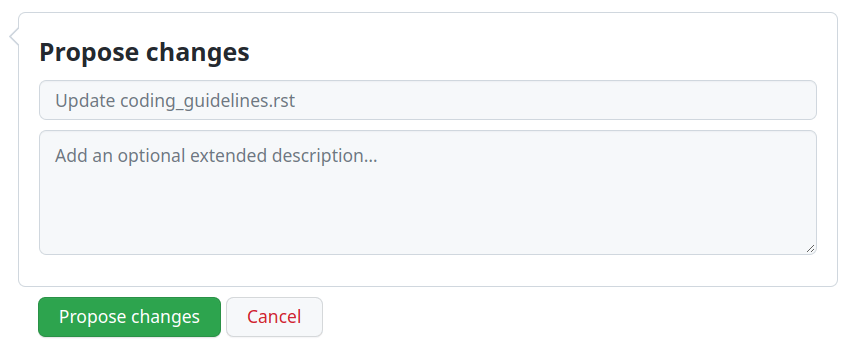
Scroll to the bottom of the page and fill out the small form to propose your changes. In the first text box, write a very short summary of your changes. For instance, “Fix a typo” or “Add documentation for invoicing of sales orders.” In the second text box, explain why you are proposing these changes. Then, click on the Propose changes button.
Review your changes and click on the Create pull request button.
Tick the Allow edits from maintainer checkbox. Skip this step if you work at Odoo.
Review the summary that you wrote about your changes and click on the Create pull request button again.
At the bottom of the page, check the mergeability status and address any issues.
As soon as your PR is ready for merging, a member of the Odoo team will be automatically assigned for review. If the reviewer has questions or remarks, they will post them as comments and you will be notified by email. Those comments must be resolved for the contribution to go forward.
Once your changes are approved, the reviewer merges them and they appear online the next day!
Important
Some steps of this guide require to be comfortable with Git. Here are some tutorials and an interactive training if you are stuck at some point.
Now that your environment is set up, you can start contributing to the documentation. In a terminal, navigate to the directory where you cloned the sources and follow the guide below.
Choose the version of the documentation to which you want to make changes. Keep in mind that contributions targeting an unsupported version of Odoo are not accepted. This guide assumes that the changes target the documentation of Odoo 14, which corresponds to branch
14.0.Create a new branch starting from branch 14.0. Prefix the branch name with the base branch:
14.0-.... If you work at Odoo, suffix the branch name with your Odoo handle:14.0-...-xyz.Example
$ git switch -c 14.0-explain-pricelists
$ git switch -c 14.0-explain-pricelists-xyz
Make the desired changes while taking care of following the content and RST guidelines.
Compress all PNG images that you added or modified.
$ pngquant path/to/image.png
$ mv path/to/image-fs8.png path/to/image.png
Write a redirect rule for every RST file that your renamed.
Build the documentation with make. Then, open
_build/index.htmlin your web browser to browse the documentation with your changes.Tip
Use make help to learn about other useful commands.
Commit your changes. Write a clear commit message as instructed in the Git guidelines.
$ git add .
$ git commit
Push your change to your fork, for which we added the remote alias
dev.Example
$ git push -u dev 14.0-explain-pricelists
If you work at Odoo, push your changes directly to the main codebase whose remote alias is
origin.Example
$ git push -u origin 14.0-explain-pricelists-xyz
Open a PR on GitHub to submit your changes for review.
Select 14.0 for the base.
Click on compare across forks.
Select <your_github_account>/odoo for the head repository. Replace
<your_github_account>with the name of the GitHub account on which you created the fork. Skip this step if you work at Odoo.Review your changes and click on the Create pull request button.
Tick the Allow edits from maintainer checkbox. Skip this step if you work at Odoo.
Complete the description and click on the Create pull request button again.
At the bottom of the page, check the mergeability status and address any issues.
As soon as your PR is ready for merging, a member of the Odoo team will be automatically assigned for review. If the reviewer has questions or remarks, they will post them as comments and you will be notified by email. Those comments must be resolved for the contribution to go forward.
Once your changes are approved, the reviewer merges them and they appear online the next day!