Add a social media stream
Add a social media account as a stream by navigating to and then select the Add A Stream button located in the upper left corner
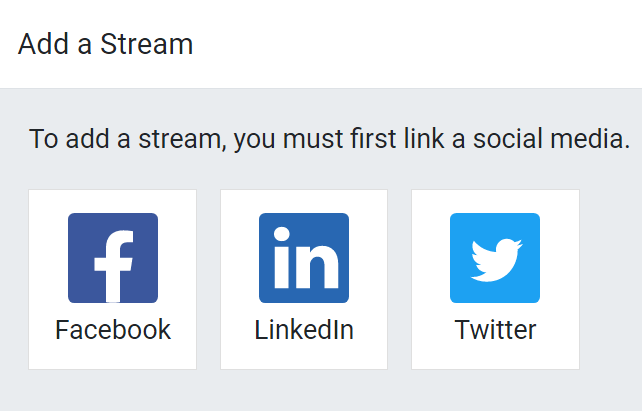
When Add A Stream is clicked, the following pop-up appears, displaying the different social media outlets to choose from.
Note
Additional social media outlet options are available depending on your version of Odoo.
From this pop-up, select a social media option: Facebook, LinkedIn, or Twitter.
Then, Odoo navigates directly to that specific social media outlet’s authorization page, where permission must be granted, in order for Odoo to add that particular social media account to the Social Marketing application as a stream on the main dashboard of the app.
Note
A Facebook page can be added as long as the Facebook account that grants permission is the administrator for the page. Also, different pages can be added for different streams.
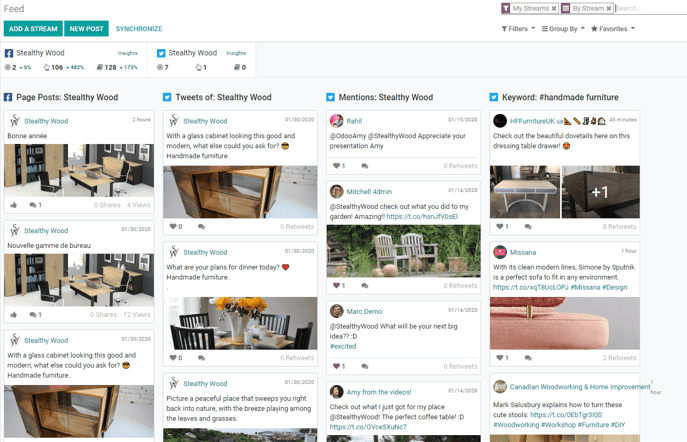
Once permission is granted, Odoo navigates back to the Feed on the main Social Marketing dashboard, and a new column with that account’s posts are automatically added.
From here, new accounts and/or streams can be added and managed at any time.
Note
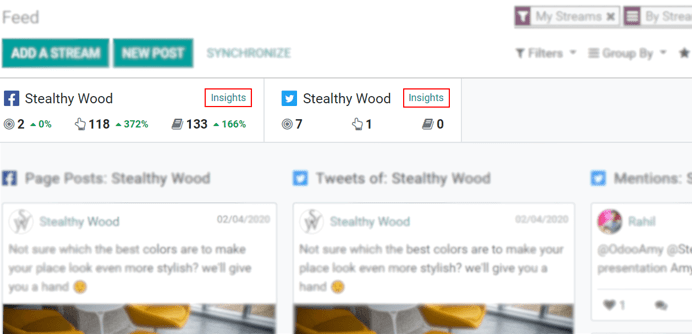
Adding social media accounts to the feed also links that specific social media platform’s KPIs (if the platform has them). To get redirected to the statistics and metrics related to any social account, click on Insights.
Create and publish social media posts in Odoo
To create content for social media accounts in the application, click the New Post button located in the upper-left corner of the main dashboard, or navigate to from the header menu.
Either route reveals a blank post template page that can be customized and configured in a number of different ways.
Post template
The post template page has many different options avaiable.
‘Your Post’ section
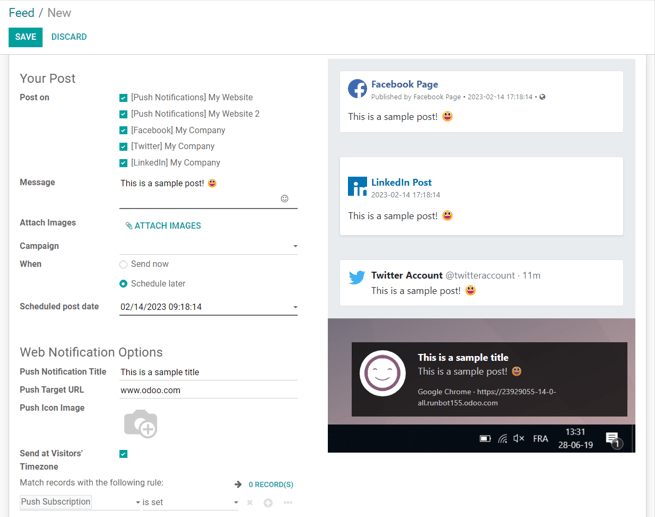
The first option is the Post on field. This is where it’s determined on what social media account(s), or on which website(s) via push notification, this post will be published.
Important
In order for the Push Notification option to appear, make sure the Enable Web Push Notifications feature is enabled in the Website app. To do that, navigate to , activate Enable Web Push Notifications, fill out the corresponding fields, and click Save.
Odoo automatically provides every available social media account that’s been linked to the database as an option in this section, as well.
Note
If a social media account hasn’t been added as a stream to the Social Marketing application, it will not appear as an option on the post template.
Next, there’s the Message field. This is where the main content of the post is created.
Type the desired message for the post in this field. To the right, as the Message field is populated, Odoo displays visual samples of how the post will look on all the previously selected social media accounts from the Post on field above.
Tip
Emojis can also be added directly to the text in the Message field. Just click the emoji (smiley face) icon, located on the line of the Message field to the far right. Clicking this icon reveals a drop-down containing numerous emojis to choose from.
If images are to be used in the post, click the ATTACH IMAGES link beneath the Message field, and Odoo reveals a pop-up window. In this pop-up, the desired image must be chosen, and then uploaded.
A preview of the entire post, text and image (if applicable), is instantly displayed in the visual preview of the post.
Next, there’s the option to attach this post to a specific marketing campaign in the database in the Campaign field. Click the blank line next to Campaign to reveal the previously configured campaigns to choose from.
Tip
A new campaign can be created, as well, by typing the name of the new campaign on the blank Campaign field, and selecting Create from the drop-down field menu. Or, select Create and edit from the menu to further customize that newly-created campaign.
Note
A social post does not need to be attached to a campaign.
Then, in the When field, choose either Send Now to have Odoo publish the post immediately, or Schedule later to have Odoo publish the post at a later date and time.
If Schedule later is selected, Odoo reveals a new field beneath it (the Scheduled post date field). Clicking that empty field reveals a pop-up calendar, in which a future date and time is designated. At which time, Odoo will promptly publish the post on the pre-determined social media accounts.
Click on the desired date to schedule the post for that day. Then, either select and customize the default time in the Scheduled post date field manually. Or, adjust the desired post time, by clicking the scheduling (clock) icon located on the calendar pop-up, and choose the desired time for Odoo to publish this post on that future date.
If scheduling a post, remember to hit Schedule in the upper left of the post template. Doing so, locks in that specific date/time for Odoo to send the post, and it changes the status of the post to Scheduled.
Note
Also, when Schedule is clicked, a number of analytical smart buttons appear on the post page. Each one offers up a detailed anaylsis of the corresponding metric (e.g. Leads, Revenues, etc.). These same smart buttons appear when a post is officially published, as well.
‘Web Notification Options’ section
If any Push Notifications are selected in the Post on field, Odoo provides another section of settings/options at the bottom of the post template. It should be noted that none of these fields are required.
The first field is for a Push Notification Title. This is text that is displayed as the title of the push notification whenever it’s sent. Odoo displays a visual preview of this title, if one is created.
To designate a specific page on the website that should trigger this push notification, enter that page’s URL in the Push Target URL field. Then, once a visitor reaches that specific page, Odoo will display the push notification.
Below that field is the option to add a custom Push Icon Image. This is an icon that appears beside the push notification. By default, Odoo uses a “smiley face” as the icon.
To upload a new image, click the Edit (pencil) icon when the Push Icon Image field is hovered over with the cursor. Then, proceed to locate and upload the desired image, and Odoo automatically displays a preview of how the icon will appear on the push notification.
Next, there is the option to Send at Visitors’ Timezone. If enabled, Odoo will send it at the appropriate, pre-determined time, taking the visitor’s location into consideration.
Save, post, and test notification options
When all the modifications have been made, and the post is completed, either click Save to save the post as a Draft. Or, if the post is ready to be published immediately, click Post, and Odoo automatically publishes the post on the pre-determined social media accounts.
There is also the option to Test Notification, if a Push Notification was selected in the Post on field. Clicking that, provides a quick example of how the notification will appear for visitors.
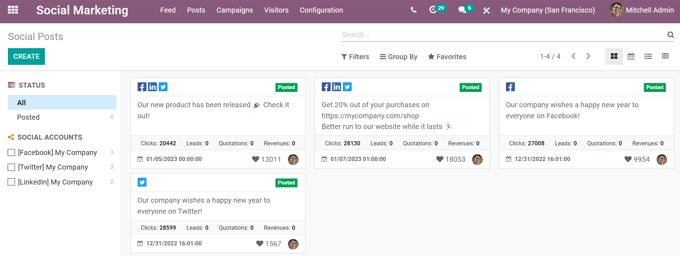
Posts page
To see a complete overview of posts, go to Odoo , and click in the header menu. Here, every post that has been created and posted with Odoo is available.
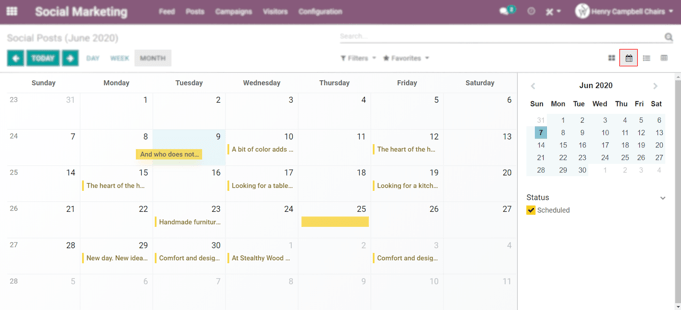
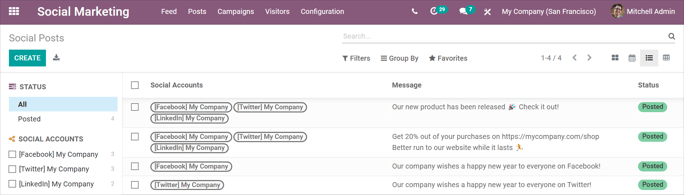
There are four different view options for Posts page data: kanban, calendar, list, and pivot. The view options are located in the upper right corner of the Posts page, beneath the search bar.
By default, Odoo displays the posts in a kanban view. The information on this page can be sorted even further, via the Filters and Group by drop-down menu.
The calendar view option displays a visual representation in a calendar format of when posts were published, or are scheduled to be published. This option provides a clear overview of any planned day, week, or month, and Odoo displays all drafted, scheduled, and published posts.
The list view option is similar to the kanban option, but instead of individual blocks, all the post information is displayed in a clear, list layout. Each line of the list displays the Social Accounts, Message, and Status of every post.
The pivot view option provides a fully customizable grid table, where different measures of data can be added and analyzed.
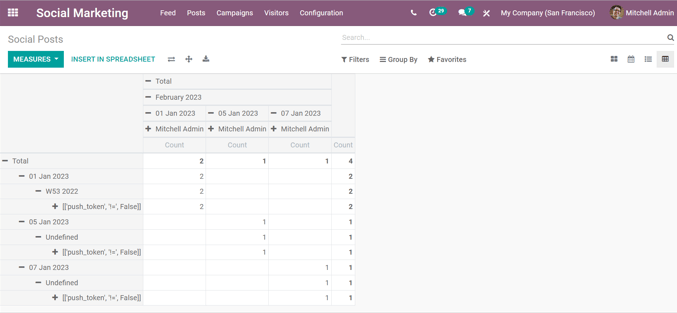
The pivot view option provides numerous analytical options, allowing for in-depth, detailed analysis of various posts.
Click on any + (plus sign) icon next to a line in the pivot table to reveal more metric options to add to the grid.
While in the pivot view, the option to Insert in Spreadsheet is available, located to the right of the Measures drop-down.
When clicked, a pop-up appears, where the option to add this information to a current spreadsheet is available. The option to create a new spreadsheet for this information on-the-fly is also available in this pop-up, as well.
Next to the Insert in Spreadsheet are three view options, specific to the pivot view.
From left to right, the options are:
Flip Axis, which switches the X and Y axis in the grid table.
Expand All, which expands each line in the grid, revealing more detailed information related to it.
Download, which, when clicked, instantly downloads the pivot table as a spreadsheet.
Visitors
To see a complete overview of all the people who have visited the website(s) connected to the database, navigate to in the header menu.
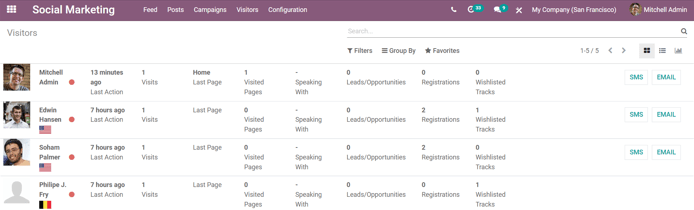
Here, Odoo provides a detailed layout of all the visitors’ pertinent information in a default kanban view. This same information can be sorted via the Filters and Group By options.
The visitor data can also be viewed as a list or a graph. Those view options are located in the upper-right corner of the Visitors page beneath the search bar.
Social media page
Go to to see a collection of all social media options: Facebook, LinkedIn, Twitter, and Push Notifications.
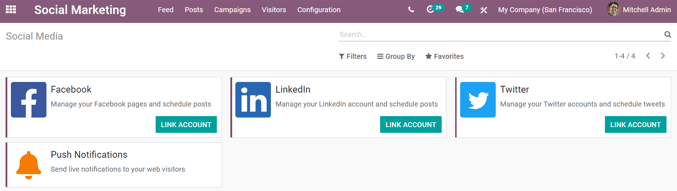
If no account has been linked to any particular social media, click Link Account to proceed through the linking process.
Social accounts page
To see a list of all social accounts linked to the database, go to . This page will display the Medium Name and the Social Media platform it is associated with.
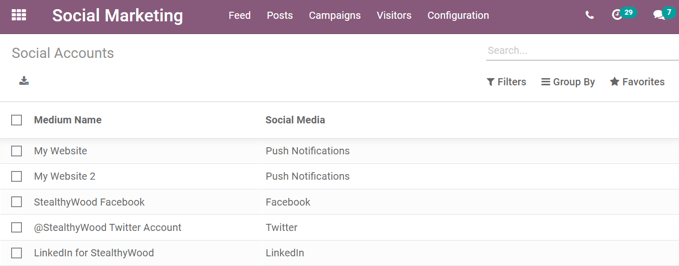
To edit/modify any social accounts, simply select the desired account from the list on this page, and proceed to make any adjustments necessary. Don’t forget to hit Save to secure any changes.
Social streams page
Navigate to to reveal a separate page containing all of the social media streams that have been added to the main dashboard of the Social Marketing app, accessible via the Feed option in the header menu.
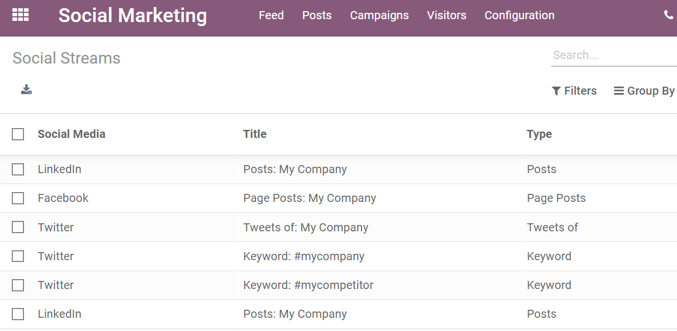
Here, the social stream information is organized in a list with the Social Media, the Title of the stream, and the Type of the stream (e.g. Posts, Keyword, etc.).
To modify any stream’s information, simply click the desired stream from the list, and proceed to make any necessary adjustments. Don’t forget to hit Save to secure any changes.
See also
Social marketing essentials
Odoo’s Social Marketing helps content marketers create and schedule posts, manage various social media accounts, analyze content effectiveness, and engage directly with social media followers in one, centralized location.