
Bestellen en afrekenen
Odoo E-commerce biedt verschillende opties om het bestel- en afrekenproces te organiseren. Het biedt verschillende bestelknop opties en opeenvolgende afrekenstappen, waarvan sommige extra functies ondersteunen. De gerelateerde knoppen en afrekenpagina’s kunnen worden aangepast met de website-editor.
Opties voor toevoegen aan winkelmandje
Standaardgedrag voor toevoegen aan winkelmandje
When clicking the Add to Cart button, the customer remains on the product page by default.
On the e-commerce landing page (
/shop): if the selected product is configurable (i.e., it has configurable attributes and/or multiple packagings), a Configure pop-up opens to let the customer choose the desired options.On a specific product page: attributes/packagings configuration is done directly on the page.
If the product has linked optional products, a Configure pop-up opens on both the shop page and the product page. The customer can then choose between Add to Cart (to stay on the product page) and Go to Checkout (to be redirected to the cart).
Tip
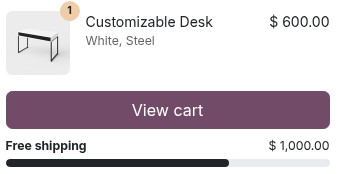
When loyalty programs with the Promotions program type are configured, a progress bar toward the reward is displayed when an item is added to the cart.
Example
Offer customers free shipping when they place a larger order. To do so:
Create a loyalty program and set the Program Type field to Promotions.
Set a conditional rule with the minimum order amount required to qualify for free shipping, e.g.,
$ 1,000.00.Define a Free shipping reward.
Nu kopen
To let customers choose to go directly to the Order summary step, add an additional Buy now button. To do so, go to any product’s page, open the website editor, go to the Style tab, and click the Buy Now button next to the Purchase Options.

Producten opnieuw bestellen
Klanten kunnen artikelen uit een eerdere verkooporder opnieuw bestellen:
vanuit hun klantportaal, met de Opnieuw bestellen knop. Alle producten uit de geselecteerde order worden automatisch aan het winkelmandje toegevoegd en klanten kunnen vervolgens artikelen die ze niet opnieuw willen bestellen Verwijderen.
vanuit het winkelmandje, door op Snel opnieuw bestellen te klikken bij de Orderoverzichtsstap. Klanten kunnen vervolgens hoeveelheden aanpassen en op de (winkelmandje) knop klikken naast de product(en) die ze opnieuw willen bestellen.

Afrekensstappen
During checkout, customers are taken through the following steps:
Elke stap kan worden aangepast met de website-editor door bouwblokken toe te voegen of het tabblad Stijl te openen om verschillende afrekenopties in te schakelen.
Notitie
Inhoud toegevoegd via bouwblokken is specifiek voor elke stap.
Besteloverzicht
The Order summary step allows customers to see the items they added to their cart, adjust quantities, Remove products, and reorder products from a previous order. Information on product prices and the taxes applied is also displayed. Customers can then click the Checkout button to continue to the Address step.
Open de website-editor om checkoutopties te inschakelen, zoals:
Suggested Accessories: to showcase accessory products;
Promo Code: to allow customers to redeem gift cards and apply discount codes or promotional codes;
Add to Wishlist: Enable wishlists to allow signed-in users to remove a product from their cart and add it to their wishlist using the Save for Later option.
Notitie
Als een fiscale positie automatisch wordt gedetecteerd, wordt de btw op het product bepaald op basis van het IP-adres van de klant.
Als de geïnstalleerde betaalprovider express checkout ondersteunt, wordt een speciale knop weergegeven, waarmee klanten direct van het winkelmandje naar de bevestigingspagina kunnen gaan zonder het contactformulier in te vullen.
Address
Zodra ze hun bestelling hebben beoordeeld:
Unsigned-in customers are prompted to Sign in or enter their Name and Email address, along with their delivery address and phone details;
Ingelogde klanten kunnen het juiste Bezorgadres selecteren.
Ze kunnen vervolgens een leveringsmethode kiezen, hun Factuuradres selecteren of invoeren (of de schakelaar Hetzelfde als bezorgadres inschakelen als het facturatie- en bezorgadres identiek zijn), en op Bevestigen klikken om door te gaan naar de volgende stap.
Tip
Voor B2B-klanten kun je ook optionele :ref:` <ecommerce/checkout/customize_steps>`B2B-velden:ref:` <ecommerce/b2b_b2c/b2b-fields>` inschakelen in de website-editor.
Je kunt een selectievakje toevoegen voor gebruikers zonder rekening om zich in te schrijven voor een nieuwsbrief. Ga hiervoor naar , scroll naar de sectie E-commerce, schakel de functie Nieuwsbrief in en selecteer een Nieuwsbrieflijst.
When the Pick up in store delivery method is selected, the customer can Choose a pick-up point and, if applicable, filter them by country, provided several pick-up points are available.
When the Expected Delivery option is configured, the customer views the expected delivery date or can select a desired delivery date.
Automatic address validation
Use the Google Places API to ensure that partner delivery addresses are valid. Addresses are automatically validated as the user types during checkout.
To enable this feature, the Google Places API needs to be configured first. Then, go to . In the General section, enable Google Address Validation, then paste the Google Places API key in the API Key field.
Extra info
You can add an Extra Info step in the checkout process to collect additional customer information through an online form, which is then included in the sales order. To do so, enable the Extra Step option in the website editor. The form can be customized as needed.
Betaling
At the Payment step, customers can choose a Payment method, enter their payment details, and click Pay now.
Notitie
The Pay now button label can be customized using the website editor.
Algemene voorwaarden
Om van klanten te eisen dat ze akkoord gaan met de algemene voorwaarden voordat ze betalen, open je de website-editor en schakel je de optie Voorwaarden accepteren in het tabblad Stijl in.
E-wallets en cadeaubonnen
Klanten kunnen tijdens het afrekenen betalen met een eWallet of cadeaubon. Om deze opties aan te bieden, ga je naar en schakel je in de sectie E-commerce in. Ga vervolgens naar en maak een cadeaubon- en/of eWallet-programma.

Orderbevestiging
The final step of the checkout process is the order confirmation page, which provides a summary of the customer’s purchase details. A sales order is automatically created in the backend.
To automatically send notification emails and documents, navigate to and scroll down to the eCommerce section. Then configure the following settings:
To send an order confirmation email: Under Order Confirmation, select an Email template, or, if the WhatsApp app is installed, a WhatsApp template from the dropdown list. To edit the selected template, click the (Internal link) arrow.
To send a product review request to the customer: Enable the Request ratings setting.
To send an invoice to the customer: Enable the Automatic Invoice setting.
Zie ook