Want to accept debit cards, QRIS, paylater, or e-wallets? With Xendit, you can offer multiple payment methods.
However, managing a business isn’t just about accepting payments—you also need to track transactions, generate reports, and keep operations running smoothly. That’s where Odoo + Xendit comes in! Every payment is automatically recorded, reports are generated instantly, and everything stays organized in one platform.
So, how do you set it up? Let’s break it down! ⬇️
Enable Xendit in Odoo
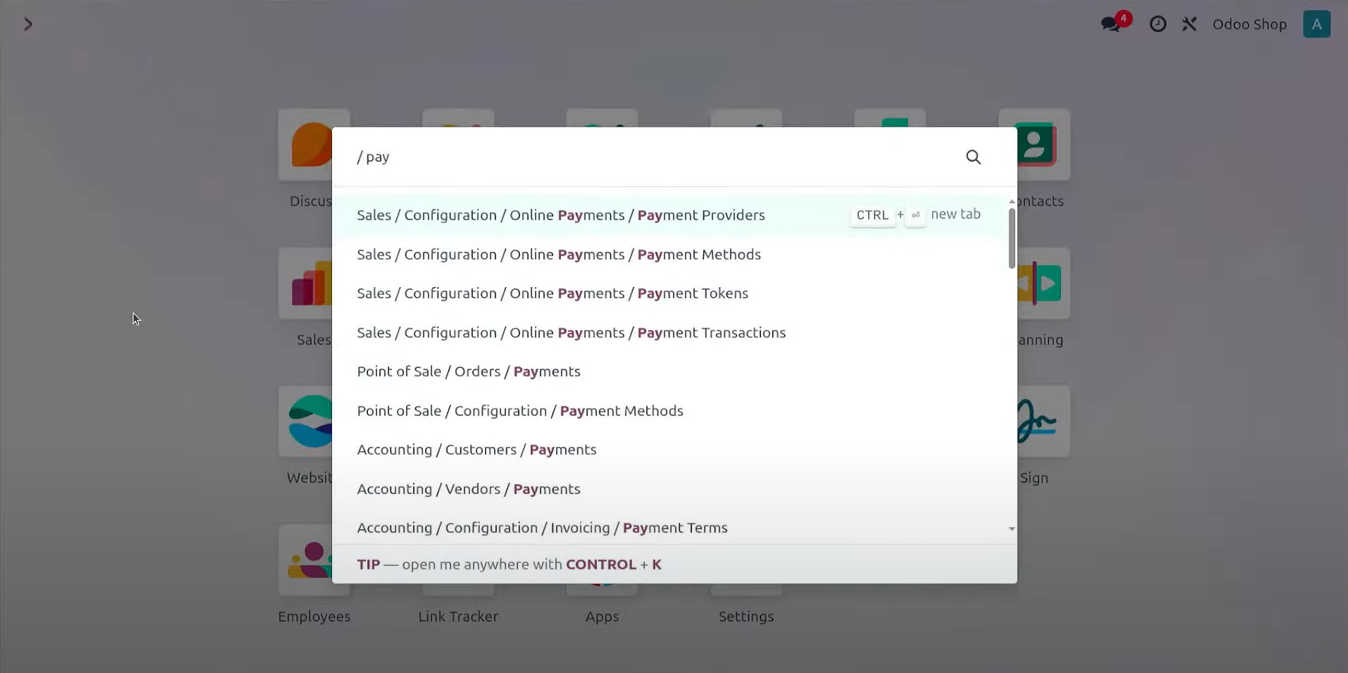
- From your Odoo database home, type “Payment” in your keyboard and select “Payment Providers”.
- Find Xendit and click “Enable”.
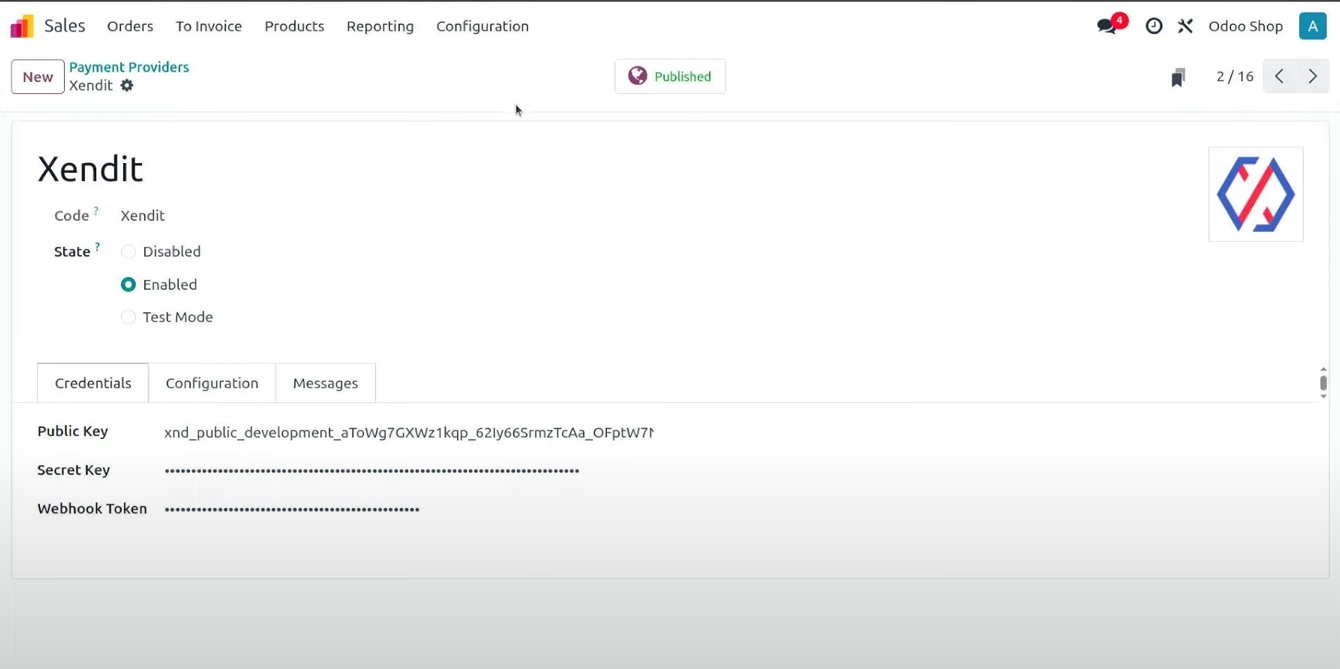
- Get your Public Key, Secret Key, and Webhook Token from your Xendit account. 🔑
Open Xendit
- Open https://dashboard.xendit.co/register/ and create an account or log in.
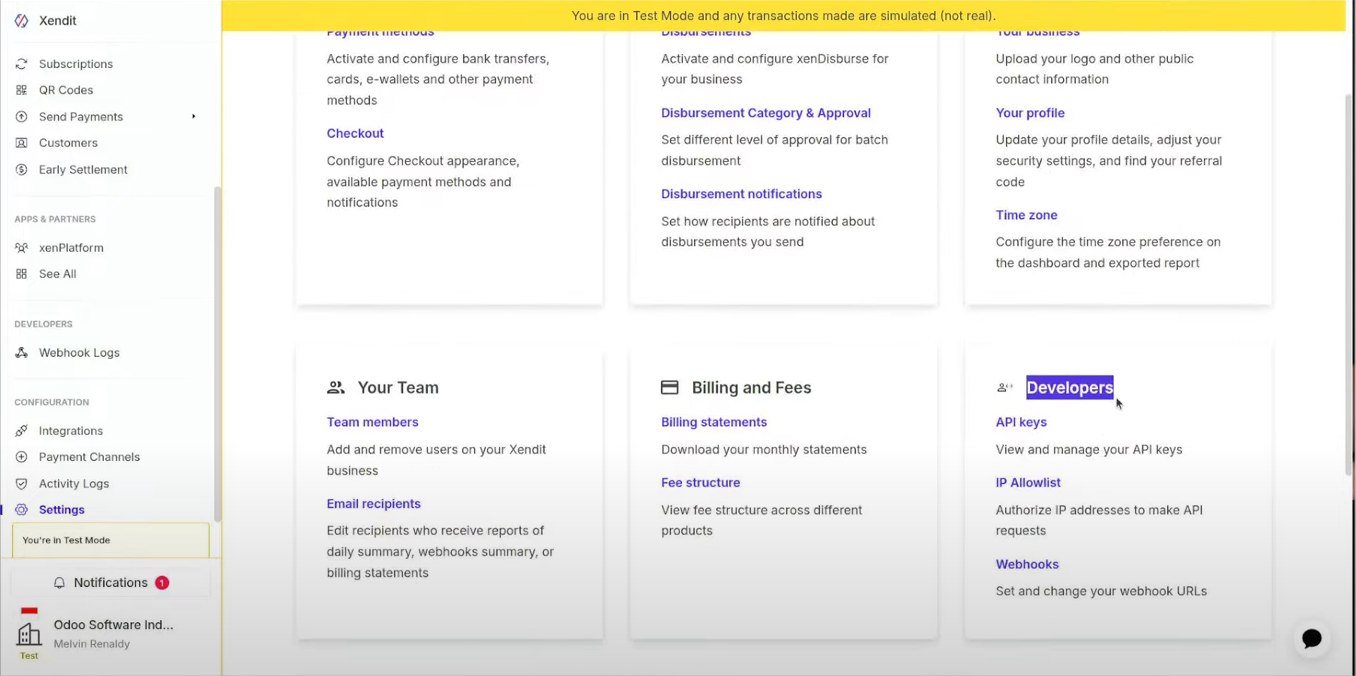
- Once logged in, go to "Settings".
- Click on the "Developers" menu. ⚙️
Obtain Secret Key
- In the "Developers" menu, select "API Keys".
- Scroll down and click "+ Generate Secret Keys".
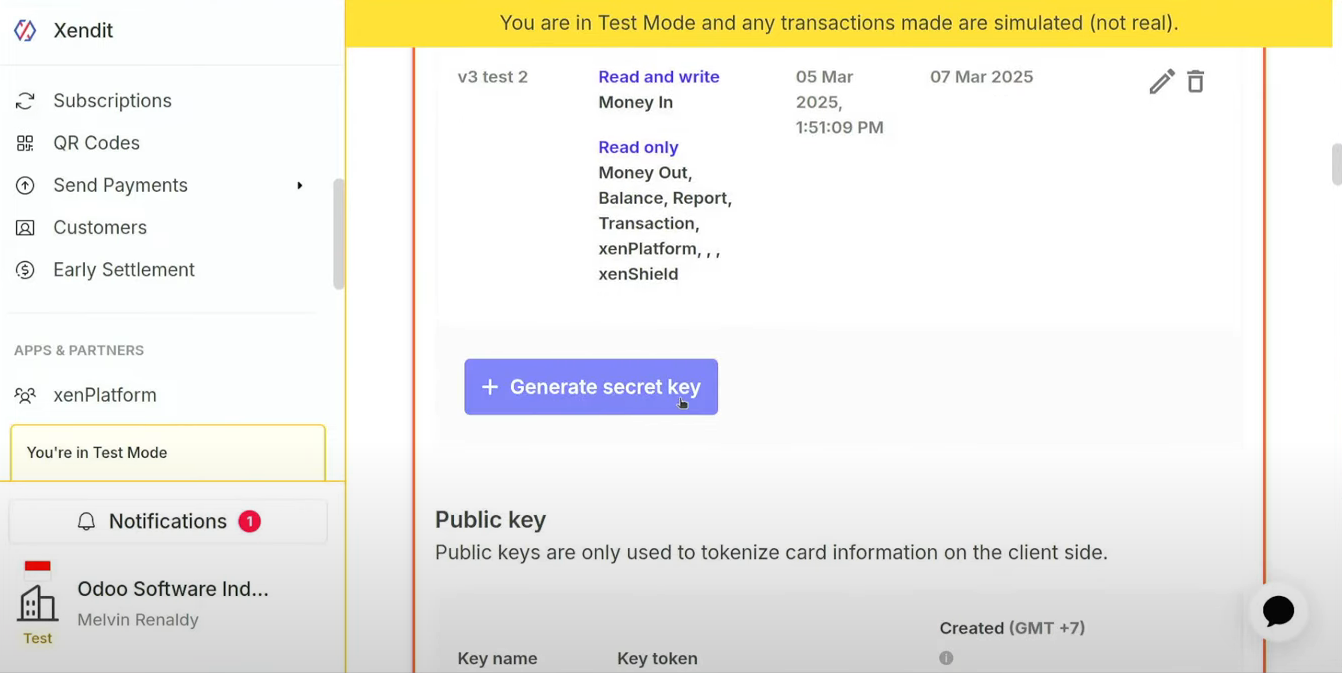
- Enter your business name.
-
Important❗: Select [Write] for "Money-in Products" and [Read] for other entries.
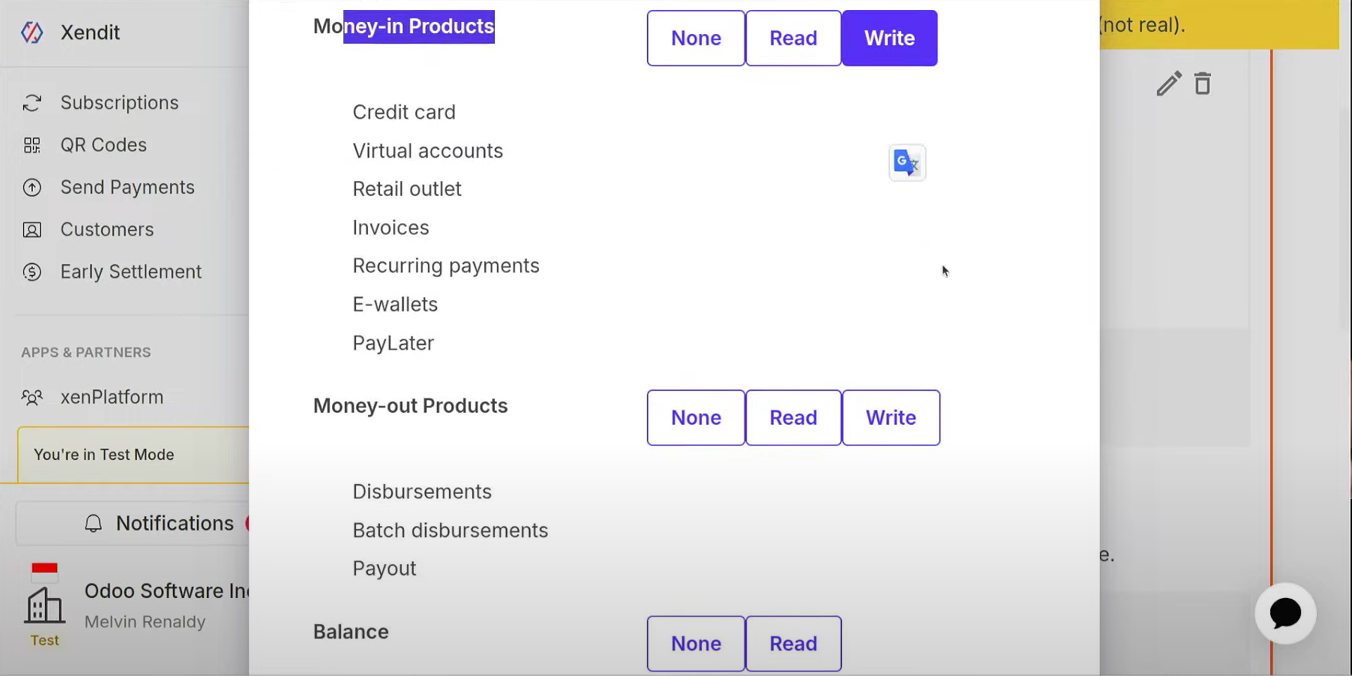
- Click "Generate Key".
- Copy the key and paste it into the Secret Key field in Odoo. 🔑✅
Obtain Public Key
- Scroll down and copy the Public Key.
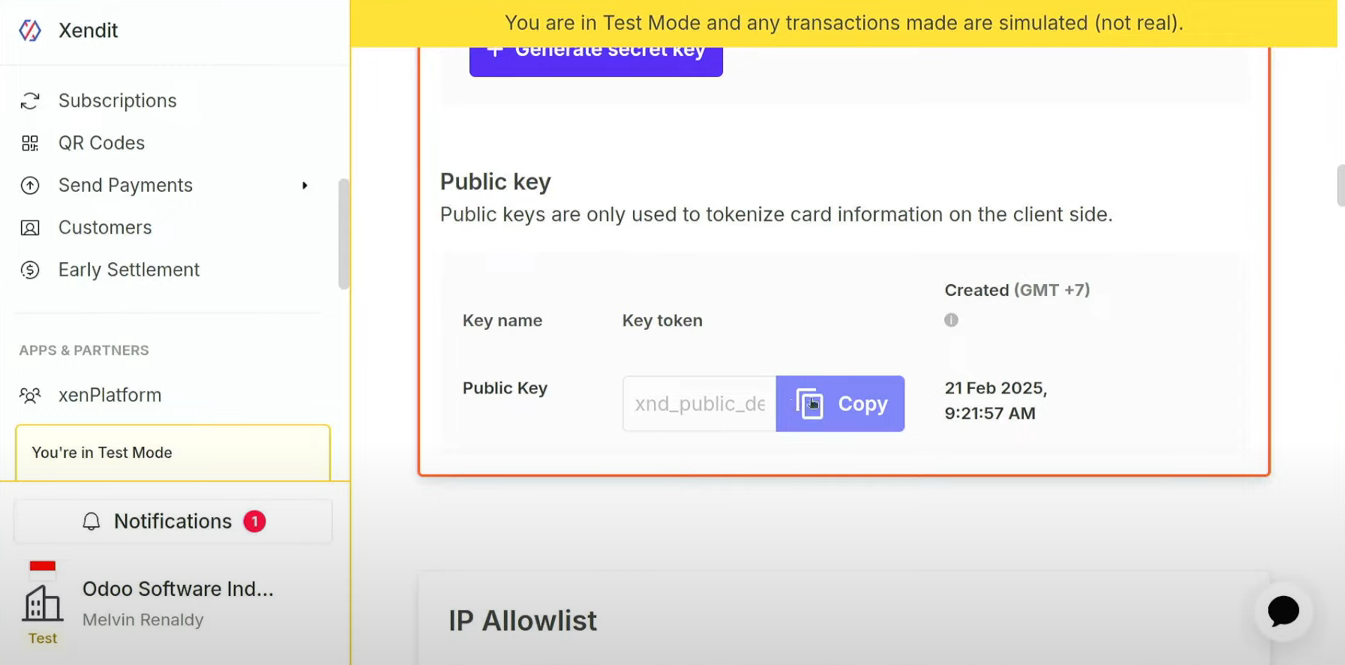
- Paste it into the Public Key field in Odoo. 🔑✅
Find Webhook Token
- In the Webhook menu, scroll down and find "Invoice".
- Copy your Odoo database link into the “Invoices paid” field and add: /payment/xendit/webhook
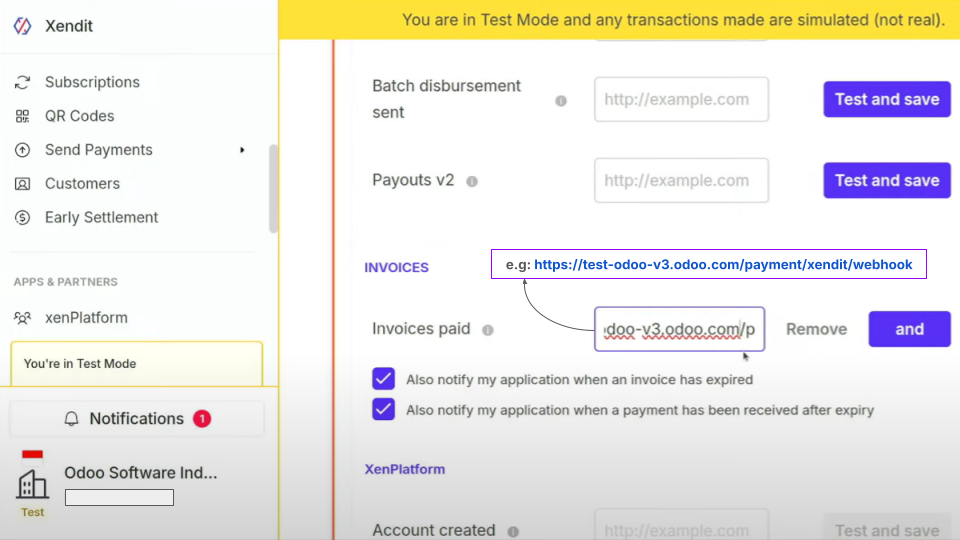
- Click "Test & Save", and ensure you see "accepted" in the Body section.
- Scroll up and click "🔒View Webhook Verification Token" button.
- Copy and paste it into the Webhook Token field in Odoo. 🔑✅
Activate Methods
- Go back to your Odoo database home.
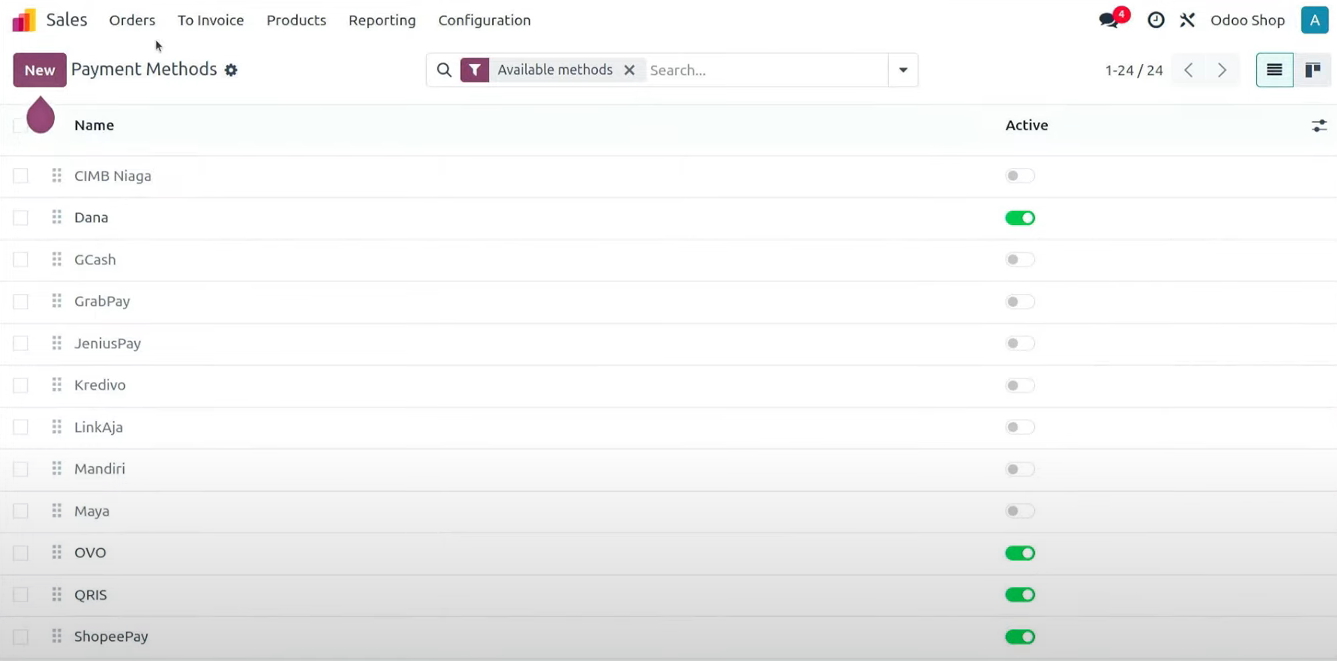
- Type “Payment” in the search bar and select “Payment Methods”.
- Choose the payment methods you want to enable.
Create Journal
- Open the Accounting app in Odoo.
- Click "Configuration", then select "Journal".
- Click "New" and fill in the details:
- Name (e.g., Xendit)
- Type: Bank
-
Custom short code (optional)
- Make sure the Bank Account Number matches the bank linked to Xendit. ✅
After completing these steps, your business is ready to offer various payment methods—whether in POS, eCommerce, or beyond! No need for extra devices like EDC or additional apps—just smooth, seamless transactions.
Easy, right? Now, let’s take your business to the next level with Odoo and Xendit. Smoother payments, happier customers!
