Hoe samenwerken aan taken en ze beheren?
Verantwoordelijkheden
In Odoo kan u de persoon toewijzen die verantwoordelijk is voor de taak.
Wanneer u een taak aanmaakt, wordt u standaard verantwoordelijk voor de uitvoering ervan. U kan dit eenvoudig wijzigen door de naam van een andere gebruiker in te typen, en hem vervolgens uit het drop-downmenu te selecteren.
Tip
Als u een nieuwe medewerker wil toevoegen (die nog niet in het systeem gekend is), dan kan u onmiddellijk een nieuwe gebruiker aanmaken door “Aanmaken en Wijzigen” uit het menu te kiezen. U hebt hiervoor echter wel beheersrechten nodig.
Volgers
Bij een taak kan u andere medewerkers als Volgers toevoegen. Die medewerker wordt dan verwittigd bij elke wijziging die zich bij die taak voordoet. De bedoeling hiervan is om via de chatter ook medewerking van anderen toe te laten. Wanneer je bijvoorbeeld advies nodig hebt van een collega van een andere afdeling, is dit best handig en efficiënt. U kunt zelfs klanten toelaten om mee in gesprek te gaan. Zij zullen per e-mail verwittigd worden over de wijzigingen in de taak, en kunnen deelnemen door simpelweg op het e-mailbericht te antwoorden. Volgers kunnen een taak volledig zien zoals uzelf, inclusief de omschrijving en de chatter.
Project: volg een project om de pijplijn te volgen
U kunt ervoor kiezen om een project te volgen. U wordt dan verwittigd bij elke wijziging in het project: taken die van fase veranderen, gesprekken die plaatsvinden, enz. U ontvangt al deze informatie in uw inbox. Een project volgen kan heel nuttig zijn voor een projectmanager die ten allen tijde het overzicht wil behouden over zijn projecten.
Taak: volg een specifieke taak
Een taak volgen is vrijwel hetzelfde als een project volgen, alleen bent u slechts geïnteresseerd in een deel van het project. Alle notificaties van wijzigingen in de taak verschijnen dan ook in uw inbox.
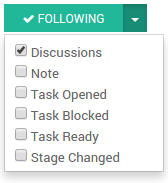
Kies voor welke actie te volgen
U kan kiezen wat u volgt door op het naar beneden pijltje te kikken in de Volgen knop.
By default, you follow the discussions but you can also choose to be notified when a note is logged in, when a task is created, blocked or ready to go, and when the stage of the task has changed.
Tijdsbeheer: analytische rekeningen
Whether it helps you for estimation of future projects or data for billing or invoicing, time tracking in Project Management is a real plus.
De Odoo urenstaten app is perfect geïntegreerd met Odoo projecten en kan helpen met het gemakkelijk opvolgen van urenstaten.
Eenmaal Odoo Urenstaten geïnstalleerd is de urenstaten functionaliteit automatisch beschikbaar in de projecten en op de taken.
To avoid any confusion, Odoo works with analytic accounts. An analytic account is the name that will always be the reference for a specific project or contract. Each time a project is created, an analytic account is automatically created under the same name.
Registreer een urenstaat op een project:
Klik op de instellingen van een project.
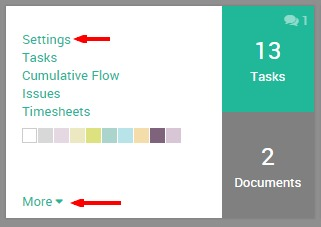
Klik op de Urenstaten knop in het bovenste grijze menu.
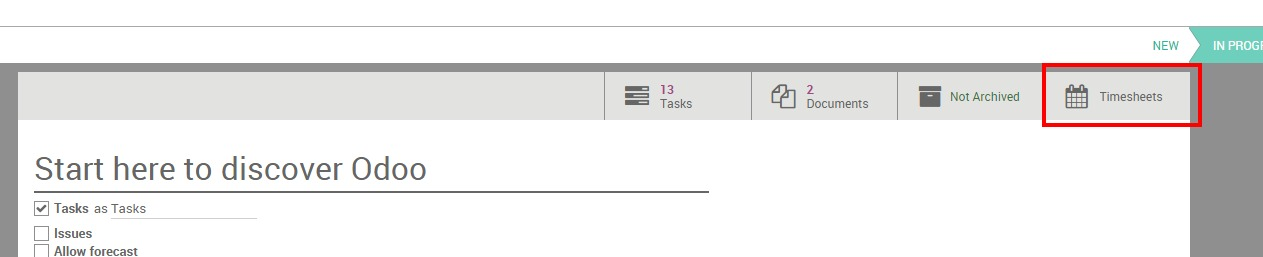
You get the Odoo Timesheet. Click on Create and a line will appear with today’s date and time. Your project name is automatically selected as the Analytic Account. No task is set, you can choose to add a specific task for it, or not.

Indien u nu naar Odoo Urenstaten gaat wordt uw lijn geregistreerd samen met uw andere urenstaten.
Registreer een urenstaat op een taak:
Binnen een taak is de urenstaten optie ook beschikbaar.
Klik in de taak op de wijzig knop. Ga naar het Urenstaten tabblad en klik op item toevoegen.
Een lijn verschijnt met de naam van het project al geselecteerd in de analytische rekening.
Nogmaals, u vind deze urenstaatlijnen terug in de Odoo Urenstaten applicatie.

Aan het einde van uw project krijgt u echt een idee van het gespendeerde tijd door te zoeken op de analytische rekening van uw project.
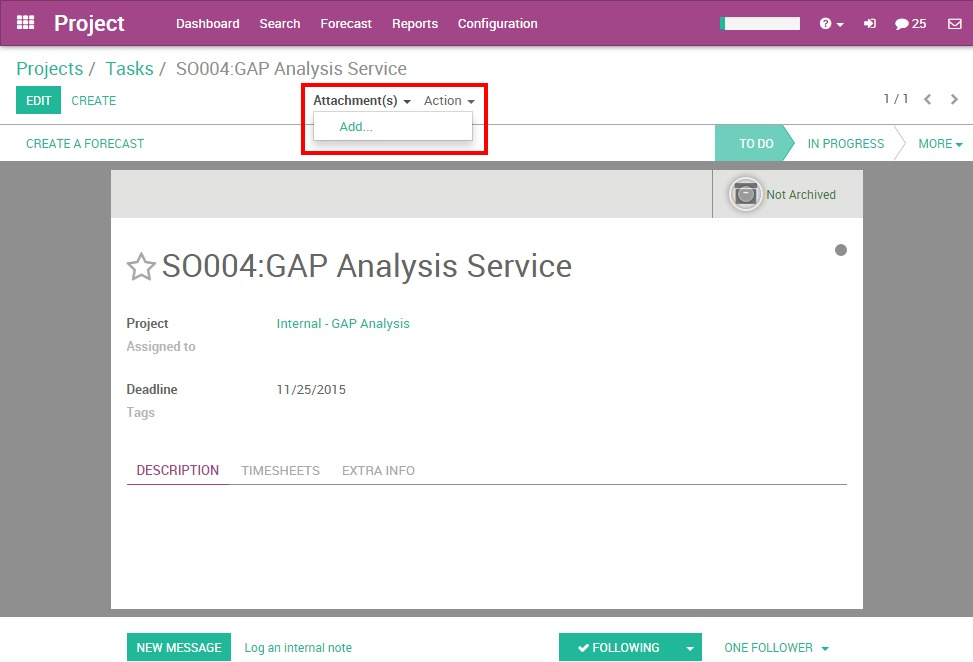
Documentbeheer in taken
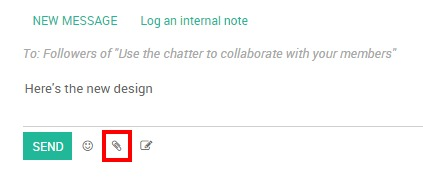
You can manage documents related to tasks whether they’re plans, pictures of the formatting, etc. An image is sometimes more informative than a thousand words! You have two ways to add a document to a task.
1. You can add an image/document to your task by clicking on the Attachment tab on the top of the form.
2. You can add an image/document to your task through the Chatter. You can log a note/send a message and attach a file to it. Or if someone sends an email with an attachment, the document will be automatically saved in the task.
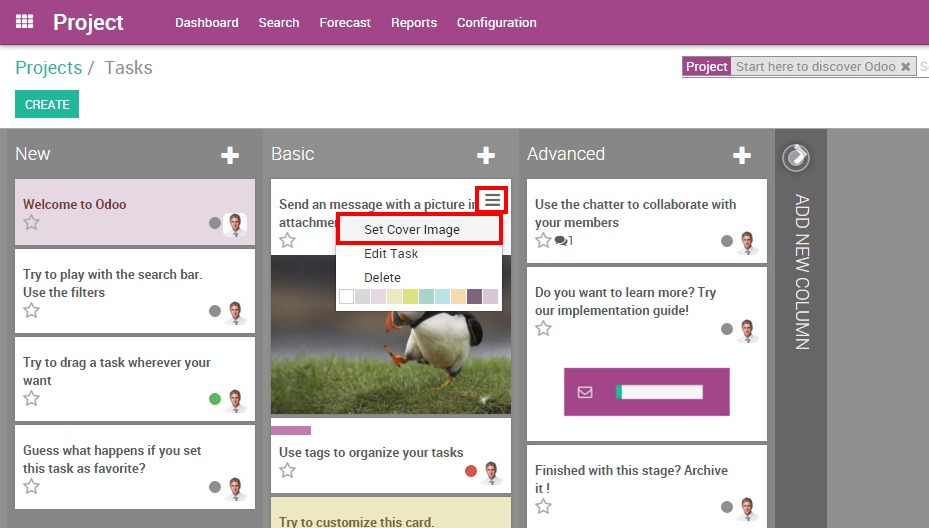
Tip
Indien u een belangrijke afbeelding heeft die u helpt de taken te begrijpen kan u deze als omslagfoto instellen. De afbeelding zal direct in de Kanban weergave getoond worden.
Werk samen aan taken
Tasks in Odoo Project are made to help you to work easily together with your colleagues. This helps you save time and energy.
The idea is to stay up to date with what interests you. You can collaborate with your colleagues by writing on the same task at the same time, with task delegation and the Chatter.
Maak een taak aan vanuit een e-mail
You can configure an email address linked to your project. When an email is sent to that address, it automatically creates a task in the first step of the project, with all the recipients (To/Cc/Bcc) as followers.
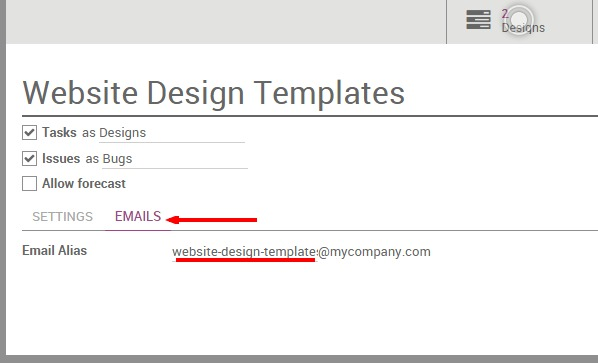
Met Odoo online is de e-mail gateway al geconfigureerd waardoor elk project automatisch een e-mailadres krijgt.
De e-mail is altijd hetzelfde als de naam van het project (met “-” in plaats van de spatie), u zal het zien onder de naam van uw project in het project dashboard.
Het standaard aangemaakte e-mailadres volgt de projectnaam maar kan gewijzigd worden.
De alias van het e-mailadres kan gewijzigd worden door de projectleider.
Om dit te doen gaat u naar de projectinstellingen en klikt u op het E-mail tabblad.
U kan direct uw project e-mailadres wijzigen.
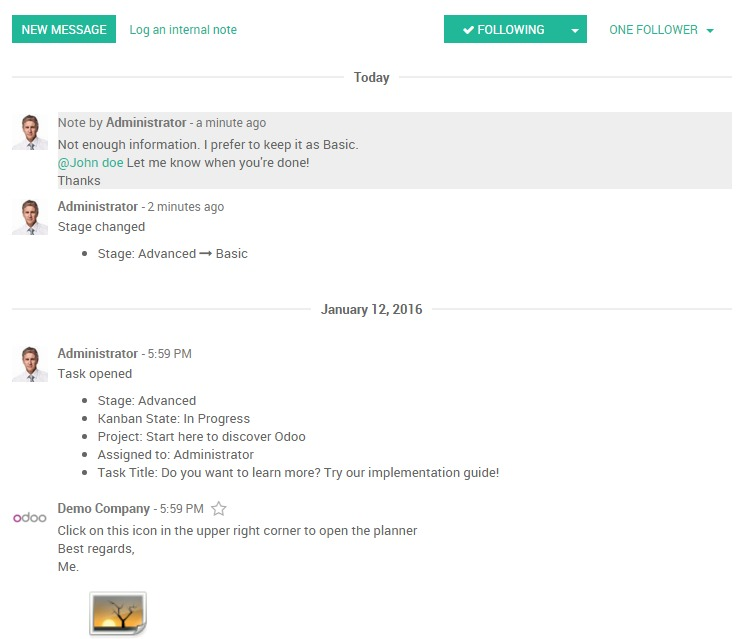
De chatter, status en opvolging.
De chatter is een zeer handige tool. Het is een communicatie tool en toont de geschiedenis van de taak.
In the Chatter, you can see when the task has been created, when it has passed from one stage to another, etc. Any changes made to that task are logged into the Chatter automatically by the system. It also includes the history of the interaction between you and your customer or colleagues. All interactions are logged on the chatter, making it easy for the task leader to remember past interactions.
You can interact with followers whether there are internal (your colleagues) or external (the client for example) by logging a note or important information. Also, if you want to send an email to all the followers of that specific task, you can choose to add a message to notify all of them. For both of these options, the date and time is saved on the entry.
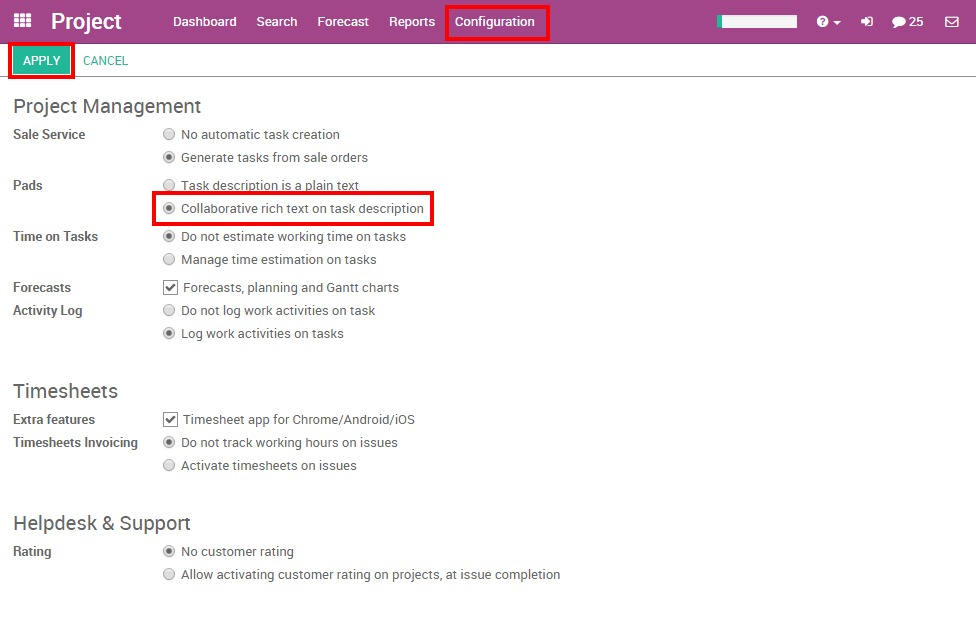
De omschrijving van de taak, het Pad
Odoo allows you to replace the task description field by an Etherpad collaborative note (http://etherpad.org). This means that you can collaborate on tasks in real time with several users contributing to the same content. Every user has their own color and you can replay the whole creation of the content.
Om deze optie te activeren gaat u naar en vinkt u de optie “Samenwerkende rijke tekst op taak omschrijving” aan.
Tip
If you just need the pad and not the whole task page, you can click
on the icon on the top right to get to the pad directly in a full
screen view. Click on the </> icon to get the direct URL of the task
description: useful if you want to send it to someone without adding
this person as a follower.

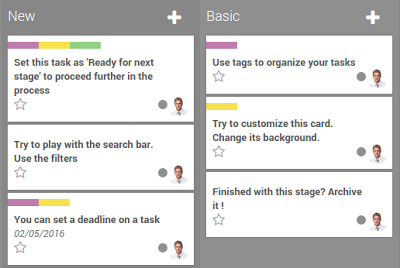
Taak fases
Stel de fase van een taak in
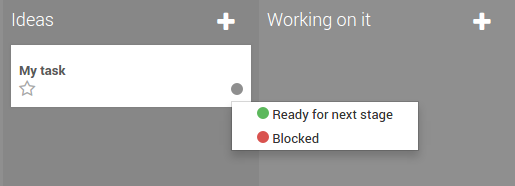
The status of the task is the easiest way to inform your colleagues when you are working on a task, if the task is ready or if it is blocked. It is a visual indicator that is seen in a glance.
You can change the status of the task from the kanban view or directly from the task. Just click on the status ball to get the choices:

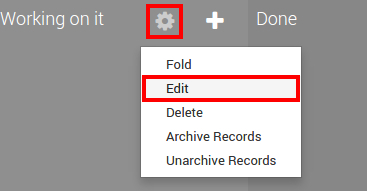
Aangepaste fases
You can decide what the different status mean for each stage of your project. On the kanban view, click on the gear icon on the top of the stage, then click on edit:
Next to the color ball, write the explanation of the state.
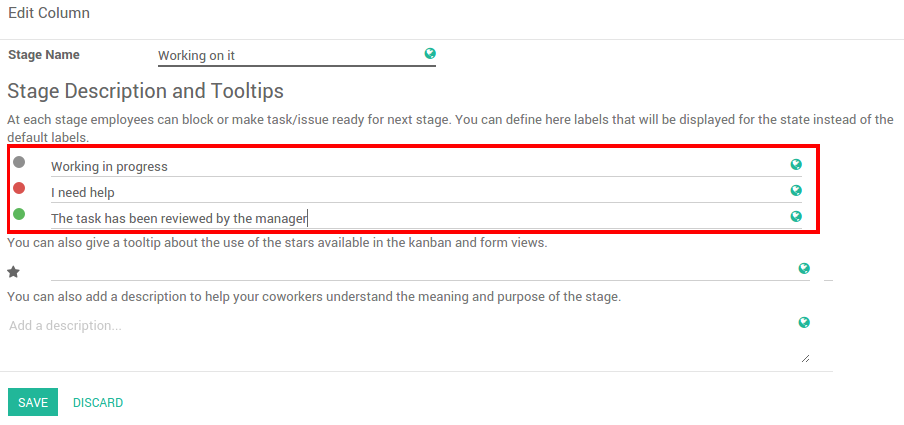
Nu wordt de uitleg getoond in plaats van de generieke tekst:

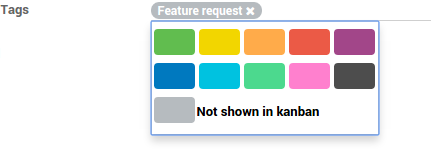
Kleur labels
In every task, you can add a tag. Tags are very useful to categorize the tasks. It helps you to highlight a task from the Kanban view or better find them thanks to the filters.
If you are always working with a specific type of tag, you can highlight the tasks containing the tag with the colors. Each tag can get a specific color, it’s very visual on the Kanban view.
Om het te doen verschijnen in de kanban weergave moet u een kleur instellen op de tag, direct vanuit de taak: