Translations
Your website is displayed in the language that matches your visitor’s browser. If the browser’s language has not been installed and added to your website, the content is shown in the default language. When additional languages are installed, users can choose their preferred language using the language selector.
The Translate feature on your website allows automatic translation of standard terms and provides a tool for manual content translation.
Install languages
To allow translation of your website, you must first install the required languages and add them to your website. To do so, go to and click Install languages in the Website Info section. In the dialog box that opens, select the Languages you want from the dropdown menu, tick the required Websites to translate, and click Add.
To edit your website’s languages, go to and add/remove the required languages in/from the Languages field in the Website info section.
Tip
Alternatively, once the languages have been installed, you can add them from the language selector. You might then need to refresh your page to see the new language.
Default language
When multiple languages are available on your website, you can set a default language to be used if the visitor’s browser language is not available. To do so, go to , and select a language in the Default field.
Note
This field is only visible if multiple languages have been installed and added to your website.
Language selector
Your website’s visitors can switch languages using the language selector, available by default in the Copyright section at the bottom of the page. To edit the language selector menu:
Go to your website and click Edit;
Click the language selector available in the Copyright block and go to the Copyright section of the website builder;
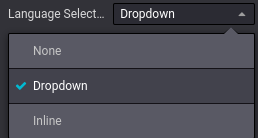
Set the Language Selector field to either Dropdown or Inline. Click None if you do not want to display the Language selector;
Click Save.
Tip
You can also add the Language Selector to the Header of your page. To do so, click the Header block and go to the Navbar section to edit the Language Selector.
Translate your website
Select your desired language from the language selector to see your content in another language. Then, click the Translate button in the top-right corner to manually activate the translation mode so that you can translate what has not been translated automatically by Odoo.
Translated text strings are highlighted in green; text strings that were not translated automatically are highlighted in yellow.

In this mode, you can only translate text. To change the page’s structure, you must edit the master page, i.e., the page in the original language of the database. Any changes made to the master page are automatically applied to all translated versions.
To replace the original text with the translation, click the block, edit its contents, and Save.
Note
When a website supports multiple languages, the core URL structure remains consistent across
languages, while specific elements like product names or categories are translated. For example,
https://www.mywebsite.com/shop/product/my-product-1 is the English version of a product page,
while https://www.mywebsite.com/fr/shop/product/mon-produit-1 is the French version of the same
page. The structure (/shop/product/) stays unchanged, but the translated elements (e.g., product
name) adapt to the selected language.
Tip
Once the desired language is installed, you can translate some items from the backend (e.g., the product’s name in the product form). To do so, click the language code (e.g., EN) next to the text you want to translate and add the translation.
Content visibility by language
You can hide content (such as images or videos, for example) depending on the language. To do so:
Click Edit and select an element of your website;
Go to the Text - Image section and Visibility;
Click No condition and select Conditionally instead;
Go to Languages to configure the condition(s) to apply by selecting Visible for or Hidden for, and click Choose a record to decide which languages are impacted.