Set up Sendcloud shipping services in Odoo
Sendcloud is a shipping service aggregator that facilitates the integration of European shipping carriers with Odoo. Once integrated, users can select shipping carriers on inventory operations in their Odoo database.
Setup in Sendcloud
Create an account and activate carriers
To get started, go to Sendcloud’s platform to configure the account and generate the connector credentials. Log in with the Sendcloud account, or create a new one if needed.
Note
For new account creation, Sendcloud will ask for a VAT number or EORI number. After completing the account setup, activate (or deactivate) the shipping carriers that will be used in the Odoo database.
Important
Odoo integration of Sendcloud works on free Sendcloud plans only if a bank account is linked, since Sendcloud won’t ship for free. To use shipping rules or individual custom carrier contacts, a paid plan of Sendcloud is required.
Warehouse configuration
Once logged into the Sendcloud account, navigate to , and fill in the field for Warehouse address.

To allow Sendcloud to process returns as well, a Return Address is required. Under the Miscellaneous section, there is a field called Address Name (optional). The Odoo warehouse name should be entered here, and the characters should be exactly the same.
Example
Warehouse #1DefaultWarehouse #1WHMy company (San Francisco)My Company (San Francisco)Notice how the inputs for the Warehouse field, for both the Odoo configuration and the Sendcloud configuration, are the exact same.
Generate Sendcloud credentials
In the Sendcloud account, navigate to in the menu on the right. Next, search for Odoo Native. Then, click on Connect.
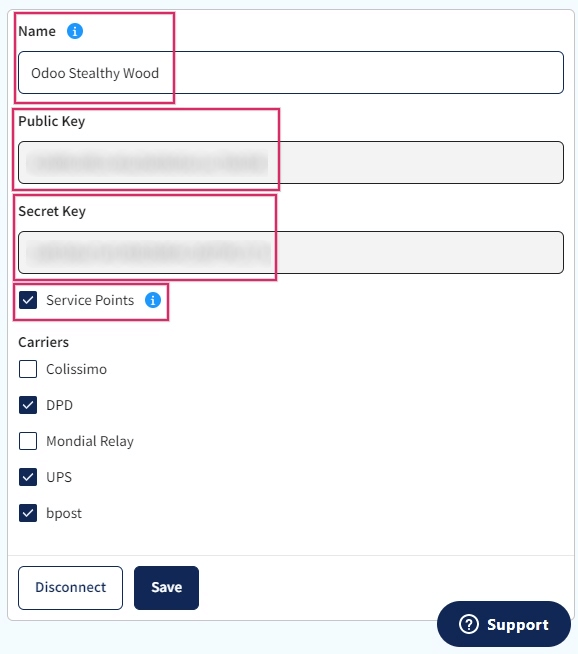
After clicking on Connect, the page redirects to the Sendcloud API settings
page, where the Public and Secret Keys are produced. The next step is to name the
Integration. The naming convention is as follows: Odoo CompanyName, with the user’s
company name replacing CompanyName (e.g. Odoo StealthyWood).
Then, check the box next to Service Points and select the shipping services for this integration. After saving, the Public and Secret Keys are generated.
Setup in Odoo
Install the Sendcloud shipping module
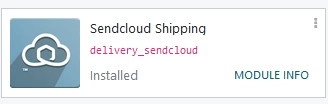
After the Sendcloud account is set up and configured, it’s time to configure the Odoo database. To get started, go to Odoo’s Apps module, search for the Sendcloud Shipping integration, and install it.
Sendcloud shipping connector configuration
Once installed, activate the Sendcloud Shipping module in . The Sendcloud Connector setting is found under the Shipping Connectors section.
After activating the Sendcloud Connector, click on the Sendcloud Shipping Methods link below the listed connector. Once on the Shipping Methods page, click Create.
Tip
Shipping Methods can also be accessed by going to .
Fill out the following fields in the New Shipping Method form:
Shipping Method: type
Sendcloud DPD.Provider: select Sendcloud from the drop-down menu.
Delivery Product: set the product that was configured for this shipping method or create a new product.
In the SendCloud Configuration tab, enter the Sendcloud Public Key.
In the SendCloud Configuration tab, enter the Sendcloud Secret Key.
Manually Save the form by clicking the cloud icon next to the Shipping Methods / New breadcrumbs.
After configuring and saving the form, follow these steps to load the shipping products:
In the SendCloud Configuration tab of the New Shipping Method form, click on the Load your SendCloud shipping products link.
Select the shipping products the company would like to use for deliveries and returns.
Click Select.
Example
Sample Sendcloud shipping products configured in Odoo:
DPD Home 0-31.5kgDPD0.0031.50Countries: Austria Belgium Bosnia Herzegovina Bulgaria Croatia Czech
Republic Denmark Estonia Finland France Germany Greece Hungary Iceland
Ireland Italy Latvia Liechtenstein Lithuania Luxembourg Monaco Netherlands
Norway Poland Portugal Romania Serbia Slovakia Slovenia Spain Sweden
Switzerland
DPD Return 0-20kgDPD0.0020.00Belgium Netherlands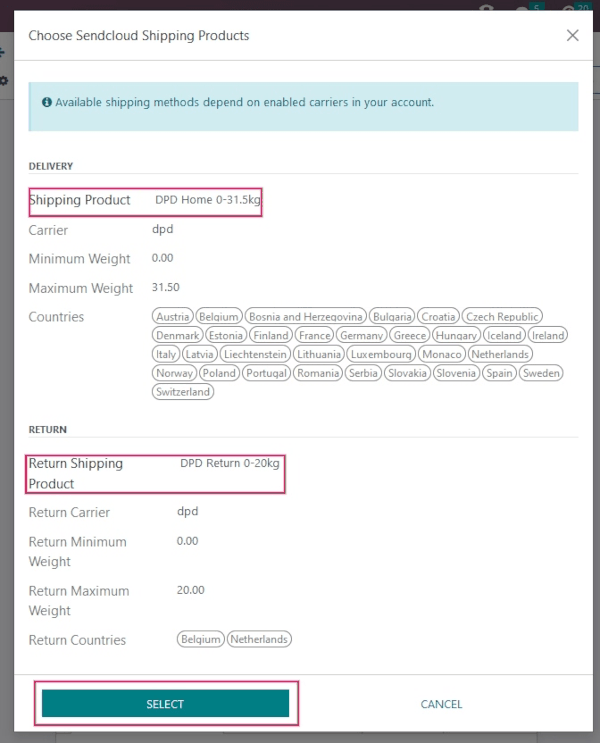
Tip
Sendcloud does not provide test keys when a company tests the sending of a package in Odoo. This means if a package is created, the configured Sendcloud account will be charged, unless the associated package is canceled within 24 hours of creation.
Odoo has a built-in layer of protection against unwanted charges when using test environments. Within a test environment, if a shipping method is used to create labels, then those labels are immediately canceled after the creation — this occurs automatically. The test and production environment settings can be toggled back and forth from the Smart Buttons.
Generate a label with Sendcloud
When creating a quotation in Odoo, add shipping and a Sendcloud shipping product. Then, Validate the delivery. Shipping label documents are automatically generated in the chatter, which include the following:
Shipping label(s) depending on the number of packages.
Return label(s) if the Sendcloud connector is configured for returns.
Customs document(s) should the destination country require them.
Additionally, the tracking number is now available.
Important
When return labels are created, Sendcloud will automatically charge the configured Sendcloud account.
FAQ
Shipment is too heavy
If the shipment is too heavy for the Sendcloud service that is configured, then the weight is split to simulate multiple packages. Products will need to be put in different Packages to Validate the transfer and generate labels.
Rules can also be set up in Sendcloud to use other shipping methods when the weight is too heavy. However, note that these rules will not apply to the shipping price calculation on the calculation on the sales order.
Personal carrier contract
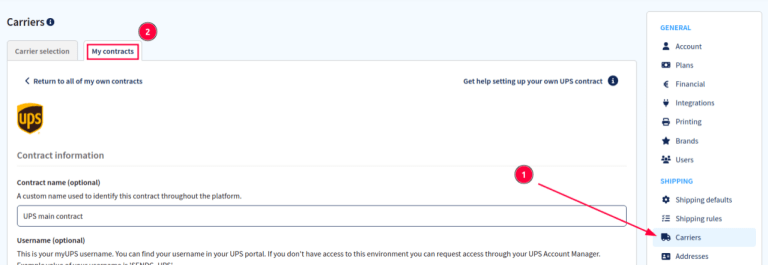
Use custom prices from a direct carrier contract, via CSV upload, by first logging into Sendcloud, navigating to , and then selecting the intended contract.
Under the Contract prices section, click Download CSV and fill out the contract prices in the price column of the CSV file template.
Warning
Ensure the CSV file includes the correct prices to avoid any inaccuracies.
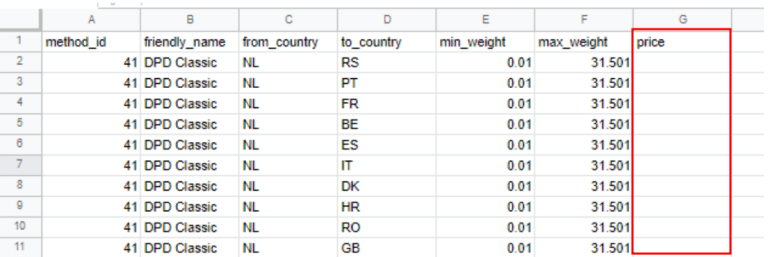
Upload the completed CSV file to Sendcloud, then click Save these prices.
Measuring volumetric weight
Many carriers have several measures for weight. There is the actual weight of the products in the parcel, and there is the volumetric weight (Volumetric weight is the volume that a package occupies when in transit. In other words it is the physical size of a package).
Tip
Check to see if selected carrier(s) already have defined formulas to compute the volumetric weight.
Unable to calculate shipping rate
First, verify that product being shipped has a weight that is supported by the selected shipping method. If this is set, then verify that the destination country (from the customer address) is supported by the carrier. The country of origin (warehouse address) should also be supported by the carrier.