
Canada
The Odoo Canada localization package provides tailored features and configurations for Canadian businesses.
A series of videos on the subject of Accounting are available through Odoo’s eLearning platform. These videos cover how to start from scratch, set up configurations, complete common workflows, and provide in-depth looks at some specific use cases.
Modules
The following modules are installed automatically with the Canadian localization:
Name |
Technical name |
Description |
|---|---|---|
Canada - Accounting |
|
Base accounting module for Canadian localization. |
Canada - Accounting Reports |
|
Adds Canadian accounting reports. |
Canadian Checks Layout |
|
Enables the printing of payments on pre-printed check paper. Supports the three most common check formats and works natively with the linked checks from checkdepot.net. |
Note
In some cases, such as when upgrading to a version with additional modules, it is possible that modules may not be installed automatically. Any missing modules can be manually installed.
Localization overview
The Canadian localization package ensures compliance with Canadian fiscal and accounting regulations. It includes tools for managing taxes, fiscal positions, reporting, and a predefined chart of accounts tailored to Canada’s standards.
The Canadian localization package provides the following key features to ensure compliance with local fiscal and accounting regulations:
Chart of accounts: a predefined structure tailored to Canadian accounting standards
Fiscal position: automated tax adjustments based on customer or supplier registration status
Taxes: pre-configured tax rates, including standard VAT, zero-rated, and exempt options
Chart of accounts
The chart of accounts (COA) for the Canadian localization, has accounts grouped into seven main categories, with corresponding numeric values that prefix individual journal entries:
Receivable: the balance of money (or credit) due to the business for goods or services delivered or used, but not yet paid for by customers. AR is indicated by the journal code labeled (or beginning) with 1.
Payable: the business’s short-term obligations owed to its creditors or suppliers, which have not yet been paid. AP is indicated by the journal code labeled (or beginning) with 2.
Equity: the amount of money that would be returned to a company’s shareholders if all of the assets were liquidated and all of the company’s debt was paid off in the case of liquidation. Equity is indicated by the journal code labeled (or beginning) with 3 or 9.
Assets: items listed on the balance sheet that contains economic value or have the ability to generate cash flows in the future, such as a piece of machinery, a financial security, or a patent. Assets are indicated by the journal code labeled (or beginning) with 1.
Liability: refers to a company’s financial debts or obligations that arise during the course of business operations. Liabilities are indicated by the journal code labeled (or beginning) with 2.
Income: synonymous with net income, this is the profit a company retains after paying off all relevant expenses from sales revenue earned. Income is indicated by the journal code labeled (or beginning) with 4 or 6.
Expenses: the cost of operations that a company incurs to generate revenue. Expenses are indicated by the journal code labeled (or beginning) with a 6.
Tip
Predefined accounts are included in Odoo, as part of the CoA that’s installed with the Canadian localization package. The accounts listed below are preconfigured to perform certain operations within Odoo. It is recommended to not delete these accounts; however, if changes are needed, rename the accounts instead.
Type |
Account Name |
|---|---|
Current Assets |
Bank Suspense Account
Outstanding Receipts
Outstanding Payments
Liquidity Transfer
Stock Valuation
Stock Interim (Received)
Stock Interim (Delivered)
Cost of Production
|
Income |
Foreign Exchange Gain
Cash Difference Gain
Cash Discount Gain
|
Expenses |
Cash Discount Loss
Foreign Exchange Loss
Cash Difference Loss
|
Current Year Earnings |
Undistributed Profits/Losses |
Receivable |
Account Receivable |
Payable |
Account Payable |
See also
Fiscal positions
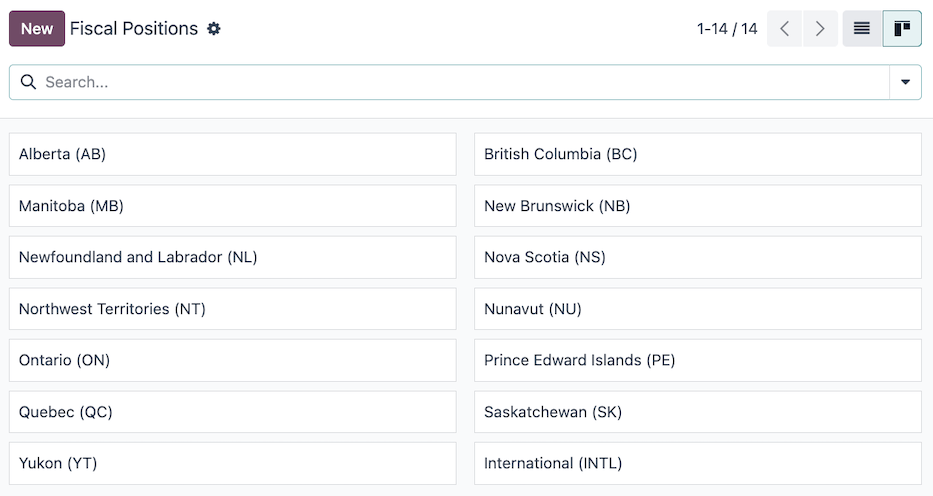
Canadian tax rates and taxable items vary by province and territory. Default fiscal positions are automatically created when the Odoo Accounting application is installed. To manage or configure additional fiscal positions, navigate to .
The following fiscal positions are available by default:
Alberta (AB)
British Columbia (BC)
Manitoba (MB)
New Brunswick (NB)
Newfoundland and Labrador (NL)
Nova Scotia (NS)
Northwest Territories (NT)
Nunavut (NU)
Ontario (ON)
Prince Edward Islands (PE)
Quebec (QC)
Saskatchewan (SK)
Yukon (YT)
International (INTL)
Note
When considering what taxes to be applied, it is the province where the delivery occurs that matters. Therefore, delivery is the responsibility of the vendor and is accounted for at the customer location.
Example
- A delivery is made to a customer from another province.
Set the fiscal position on the customer’s record to the province of the customer.
- A customer from another province comes to pick up products.
No fiscal position should be set on the customer’s record.
- An international vendor doesn’t charge any tax, but taxes are charged by the customs broker.
Set the fiscal position on the vendor’s record to International.
- An international vendor charges provincial tax.
Set the fiscal position on the vendor’s record to your position.
Taxes
In Canada, tax rates and what is considered taxable vary by province and territory. Default Sales and Purchases taxes are created automatically when the Odoo Accounting application is installed. To manage existing or configure additional taxes, navigate to .
AvaTax
Avalara AvaTax is a cloud-based tax calculation and compliance software that integrates with Odoo for several localizations, including Canada. Integrating AvaTax with Odoo provides real-time and region-specific tax calculations when items are sold, purchased, and invoiced in the database.
Important
AvaTax is available for integration with databases/companies that have locations in Canada and/or the United States. Reference the Fiscal country documentation for more information.
See also
Refer to the documentation articles below to integrate and configure an AvaTax account with an Odoo database:
Avalara’s support documents: About AvaTax
Reports
A number of report selections are readily available for the Canadian localization, under the drop-down menu:
Balance Sheet: a “snapshot” of a company’s financial position at a specific point in time, which contains an overview of a company’s assets, liabilities, and equity.
Be sure to select the option from the Report filter.

Profit & Loss: otherwise known as a P&L statement or income statement, provides a summary of a company’s revenues, expenses, and profits/losses over a given period of time.
Be sure to select the option from the Report filter.

Cash Flow Statement: shows how much cash and cash equivalents a company has received and spent in a given period.
Executive Summary: an overview report that covers the key performance indicators of a company’s financial position, such as revenue, profit, and debt.
Tax Report: an official form filed for a tax authority that reports income, expenses, and other pertinent tax information. Tax reports allow taxpayers to calculate their tax liability, schedule tax payments, or request refunds for the overpayment of taxes. In Odoo, the tax report can be made monthly, every two months, quarterly, every 4 months, semi-annually, and annually.
Accounting
Cash discount
Cash discounts can be configured from . Each payment term can be set up with a cash discount and reduced tax.
See also
Writing checks
The Canadian localization allows users to print checks for vendor payments. Be sure the Canadian
Checks Layout (l10n_ca_check_printing) module for the CA localization is installed.
To enable check printing from Odoo, navigate to and find the Vendor Payments section. From here, tick the Checks checkbox to reveal several fields for check configuration.
Select a Check Layout from the drop-down menu:
Print Check (Top) - CA
Print Check (Middle) - CA
Print Check (Bottom) - CA
Next, choose whether or not to enable the Multi-Pages Check Stub checkbox.
Optionally set a Check Top Margin, Check Left Margin, or Check Right Margin if required.
Tick the Print Date Label checkbox if a date label is required.
Once all check configurations are complete, Save the settings.
Tip
Some of the check formats may require pre-printed paper from a third party vendor. Pre-printed checks from checkdepot.net are recommended.
See also
EFT - electronic transfers
In Canada, Electronic Funds Transfer (EFT) refers to the digital transfer of funds between different bank accounts, largely replacing traditional paper-based transactions. EFT is the primary system used by businesses to automate payroll, pay suppliers, and collect recurring payments.
CPA005 file
CPA005 is a standardized file format used by Canadian banks to process batched financial transactions, primarily for EFT.
Note
Make sure to install the CPA005 Payments
(l10n_ca_payment_cpa005) module.
Configuration
The following configurations are required:
Make sure to fill in the necessary fields on the company record:
Country: Canada.
Short Name used in Canadian EFT: Enter a short version of the Company Name, limited to a maximum of 15 characters.
Note
Most banks require this value to be all uppercase letters.
Both the Company Name and the short name appear in the CPA005 file.
Set up the CPA005 information in the Bank journal:
Note
Make sure to have the appropriate access rights in the Accounting section to validate bank accounts.
Go to and access the relevant Bank journal.
In the Journal Entries tab, enter the bank Account Number and Bank details.
In the Outgoing Payments tab, make sure the Canadian EFT Payment Method is set. Then, complete the following fields in the Canadian EFT/CPA configuration section:
Destination Data Center: Enter the 5-digit ID provided by your bank.
Originator ID: Enter the 10-digit code provided by your bank.
Next File Creation Number (FCN): Enter a sequence between
1and9,999that will appear on the CPA005 file.
Make sure the Bank Account information is properly set up in the Accounting tab for the relevant vendor.
CPA005 EFT payments
Note
Make sure that batch payments are enabled.
To pay vendor bills using an EFT via the CPA005 file format, follow these steps:
When registering payments for vendor bills, select the Canadian EFT payment method.
Go to , access the relevant payments, and select the EFT/CPA transaction code for each payment.
In the Vendor Payments list view, select the relevant payments and click Create Batch.
Verify the information, such as the Date and File Creation Number, before validating the batch payment, as modifications can be more complex once validated.
Click Validate.
The generated CPA005 TXT file is available in the chatter for download and bank import.
Important
After importing the file into your banking system, payment processing may take up to 48 hours.