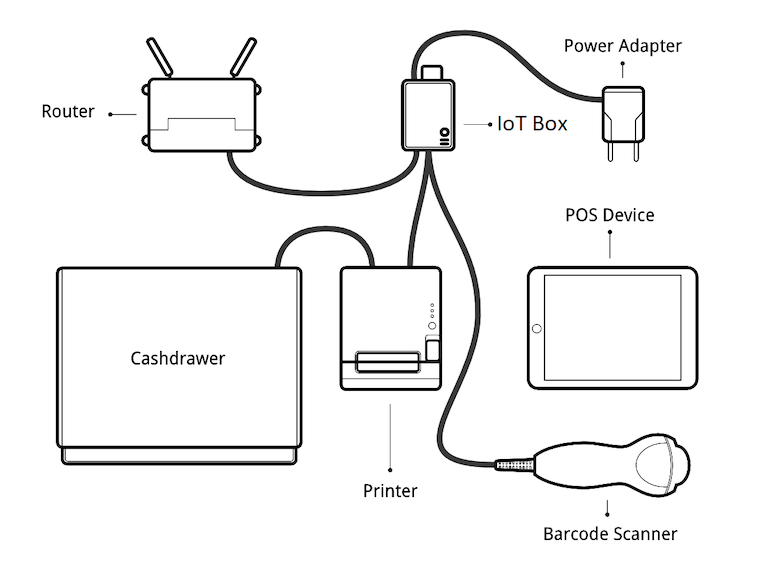
IoT system connection
To connect the POS with an IoT system:
Make sure both the Point of Sale and Internet of Things (IoT) apps are installed on your database.
Set up the IoT box or Windows virtual IoT.
Connect the peripheral devices to the IoT system:
Device
Instructions
Printer
Connect a supported receipt printer to a USB port or to the network, and power it on. Refer to Order printing.
Cash drawer
The cash drawer should be connected to the printer with an RJ25 cable.
Barcode scanner
The barcode scanner must end barcodes with an
ENTERcharacter (keycode 28) in order for the barcode scanner to be compatible. This is most likely the barcode scanner’s default configuration.Scale
Connect the scale and power it on. Refer to Connect a scale.
Customer display
Connect a screen to the IoT box to display the PoS order. Refer to Connect a screen.
Payment terminal
The connection process depends on the terminal. Refer to the payment terminals documentation.
Access the POS settings and select your POS, or click the vertical ellipsis button (⋮) on a POS card and click Edit. Scroll down to the Connected Devices section, enable IoT Box, then select the devices to be used for the POS. Click Save.
Tip
Click IoT Devices to access the list of Devices for your POS and view their connection status. Click a card to access the device’s form.
See also
Setup example