
Temă generală
Odoo provides a range of theme customization options to define the website’s colors, fonts, and shadow styles, and the appearance of paragraphs and headings, buttons, links, and input fields. Additional advanced settings are also available.
When setting up a website for the first time, you are prompted to select a theme. Hover the mouse over the themes to see an extended preview of each one. Click a theme to select it, or click the View more themes button to display the full list of available themes.
Notă
If you leave without selecting a theme, the website is created with the default theme.
To customize the theme, open the website editor, navigate to the Theme tab, and go to the Website section. You can:
Click Switch Theme to open the theme selector. Hover the mouse over the themes to see an extended preview of each one. Click Use this theme to apply it to the website.
Add a language for the website.
Select the Page Layout to change the overall display and spacing of building blocks and website elements on pages.
Customize the layout’s background:
Click Save to apply the changes to the website.
Culori
Odoo’s website editor features two main types of colors: theme colors and status colors. Click the color palette bar to open the Website / Colors menu in the Theme tab.
Culorile temei
Theme colors refer to the set of colors displayed across all pages of the website. They consist of five colors: three Main colors, used mainly for buttons and links, and two Light & Dark colors, used mainly for text and headings.
To customize the theme colors:
Click the color you want to change, then select a predefined Solid color or click Custom to pick a specific color tone manually (or add its #HEX or RGBA code). Click (Reset) to remove the color selection.
Click the paint palette icon and choose a color palette. As a result, all color customizations are reset.
Odoo automatically creates Color Presets for the chosen colors or palette. These predefined color combinations are applied to various elements of the website to create a structured and visually appealing design. When selecting a color palette, its presets define how those colors are distributed across different elements. To modify them, click Color Presets, then select a preset to open the customization dropdown. Each color preset contains colors for the building block’s Background, Text, Headings, Links, Primary Buttons, and Secondary Buttons.
Sfat
To apply a color preset to a building block, select the building block, go to the Style tab, click the color dot located next to Background, and choose a Theme.
Notă
Changing a color preset automatically updates the colors of both the default preset and the building blocks that use it.
Culori de stare
Status colors indicate the status of certain actions (e.g., Success, Warning, etc.). They are used in pop-up messages that appear to provide feedback to users and website visitors. To customize the website’s Status Colors, go to the Advanced section and click the dots to change their color. You can also configure Grays.
Example
Informațiile legate de o acțiune reușită pe site apar în verde.


Fonturi
Odoo vă permite să personalizați familia de fonturi și dimensiunea fontului elementelor site-ului, inclusiv paragrafele și titlurile, butoanele și câmpurile de introducere.
Dimensiunea fontului: În secțiunile Paragraf, Titluri, Buton și Câmpuri de introducere, utilizați câmpul Dimensiunea fontului pentru a seta o dimensiune implicită. Faceți clic pe pictograma (Comutare mai multe opțiuni) pentru a extinde secțiunea și a defini dimensiuni personalizate (de ex., pe baza nivelului titlului, dimensiunii butonului etc.).
Familie font: În secțiunile Paragraf, Titluri și Buton, selectează un font din meniul derulant.
Notă
Când este selectat Fonturi de sistem, Odoo utilizează fonturile native deja instalate pe sistemul de operare al vizitatorului. De exemplu, Android folosește Roboto ca font de sistem implicit.
Fonturi personalizate
Pentru a adăuga un font personalizat care nu este disponibil implicit în Odoo, faceți clic pe meniul derulant Familie de fonturi și selectați Adăugare font personalizat în partea de jos. În fereastra pop-up Adăugați un font Google sau încărcați un font personalizat:
Pentru a adăuga un font Google, deschideți meniul derulant Selectați un font Google și selectați fontul dorit. Dezactivați Servire font de pe serverele Google dacă site-ul dvs. este operat dintr-o locație în care reglementările impun conformitatea cu legi precum, dar fără a se limita la, GDPR al Uniunii Europene. Acest lucru va asigura că fontul Google este stocat pe serverul site-ului, nu pe serverele Google.
Pentru a încărca un Font personalizat de pe computerul dvs., faceți clic pe Alegere fișier.
Odată terminat, faceți clic pe Salvare și reîncărcare.
Sfat
O Previzualizare a fontului selectat este afișată în partea dreaptă a ferestrei.
Stiluri
Aspectul elementelor site-ului poate fi personalizat în continuare. De exemplu, puteți personaliza paragrafele și titlurile, butoanele, link-urile și câmpurile de introducere.
Paragrafe și titluri
Secțiunile Paragraf și Titluri oferă opțiuni suplimentare de stilizare pentru aceste elemente de text. Puteți:
Modifica setările fontului.
Ajusta Înălțimea liniei pentru a defini spațierea dintre liniile de text.
Ajusta Marginile pentru a defini spațierea din jurul paragrafelor și titlurilor.
Butoane
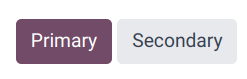
Pentru a personaliza stilul butoanelor principale și secundare ale site-ului, navigați la secțiunea Buton și editați opțiunile relevante:
Deschideți meniul derulant de lângă câmpurile Stil principal sau Stil secundar pentru a schimba stilul pentru fiecare tip de buton, cum ar fi Umplere, Contur sau Plat. Când selectați Contur, opțiunea Lățimea conturului apare mai jos, permițându-vă să ajustați lățimea conturului butonului.
Modifica setările fontului.
Ajustați Spațierea pentru a schimba spațiul din jurul etichetelor butoanelor.
Utilizați opțiunea Round Corners pentru a ajusta raza de rotunjire a marginilor butoanelor.
Adaugă o animație la apăsarea butonului din meniul derulant Efect la click.
Sfat
Pentru a defini dimensiuni personalizate Small și Large pentru Padding, Font Size și Round Corners ale butoanelor, faceți clic pe pictograma (Toggle more options), apoi utilizați câmpurile aferente.
Link-uri
În secțiunea Link, deschideți meniul derulant de lângă Link Style pentru a alege aspectul link-urilor pe site. Puteți alege între:
No Underline;
Underline On Hover; sau
Always Underline.
Câmpuri de intrare
Pentru a personaliza stilul câmpurilor de intrare ale site-ului, navigați la secțiunea Input Fields și editați opțiunile relevante:
Ajustați Padding pentru a modifica spațierea din jurul câmpurilor.
Modifica setările fontului.
Personalizați Border Width din jurul câmpurilor.
Definiți o Border Radius pentru a rotunji colțurile câmpurilor.
Alegeți o Background color pentru a umple câmpurile.
Shadows
Configure the default shadow styles used across sections, cards, and other elements. To customize them, go to the Shadow section, and define the Color, Blur, and Spread values for each shadow size: Normal, Small, and Large. These settings serve as the default shadow styles. Whenever you apply a shadow option to a building block or another website element, the corresponding configured shadow option is automatically applied.
Setări avansate
Additional settings can be configured in the Advanced section, such as showing or hiding the header and using Code Injection for website verification through an HTML tag.
De asemenea, puteți configura Google Maps pentru a afișa hărți și a activa funcții de geolocalizare pe site, de exemplu, pe pagina Contact Us și în anumite fragmente. Pentru a configura această opțiune:
Accesați contul dvs. Google.
Activați Maps Static API, Maps JavaScript API și Places API.
Important
Nu activați Places API (New), deoarece nu este încă suportat de Odoo.
Utilizarea API-urilor Google ar putea necesita plata către Google.
Creați o cheie API și copiați-o.
În editorul de site web Odoo, accesați fila Temă, iar în secțiunea Avansat, faceți clic pe Cheie personalizată lângă Google Map.
Lipiți cheia API generată în câmpul Cheie API.
Faceți clic pe Salvați.