Manage unsubscriptions (Blacklist)
Providing recipients with the power to unsubscribe from mailing lists is not only a smart business practice, it’s often a legal requirement. By allowing recipients to unsubscribe from a mailing list establishes a sense of trust with an audience, and helps companies appear genuine (and not spammy).
Enable the Blacklist feature
First, the Blacklist feature must be enabled. To do that, navigate to , enable to Blacklist Options when Unsubscribing, and click Save.

With that feature activated, an Unsubscribe link appears in mailings. If a recipient clicks that link, Odoo reveals a Unsubscriptions page, where they can directly manage their subscriptions.
Note
With a test mailing, clicking the Unsubscribe link reveals an error page (error 403 - Access Denied). To make sure the link is working properly, create the mailing, and only send it to a personal email.
Blacklist
In addition to having the option to Unsubscribe from specific mailing lists, the recipient can also Blacklist themselves, meaning they will not receive any more emails.
Note
The mailing list has to be configured as Public in order to be visible for users.
To view a complete collection of blacklisted email addresses, navigate to .
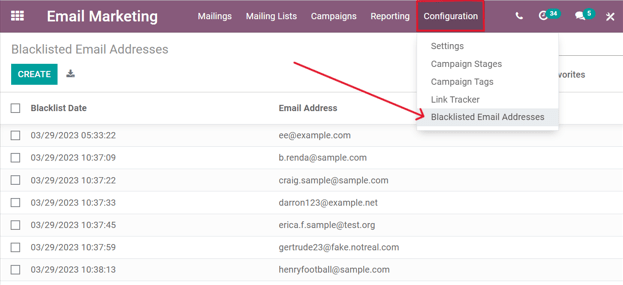
When a blacklisted record is selected from this page, Odoo reveals a separate page with that blacklisted recipient’s contact information.
In the Chatter of this page, there’s a time-stamped message, informing the user when that recipient blacklisted themselves (via a Mail Blacklist created log note).
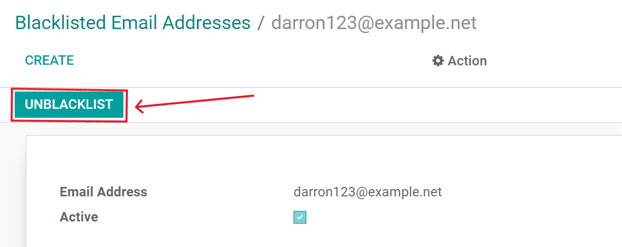
Unblacklist contacts
To Unblacklist contacts, click the Unblacklist button in the upper-left corner to remove the contact from the blacklist, allowing them to receive mailings once again.
When Unblacklist is clicked, a pop-up appears. In this pop-up, the specific email address is listed, and there’s a Reason field, in which a reason can be entered, explaining why this particular contact was removed from the blacklist.
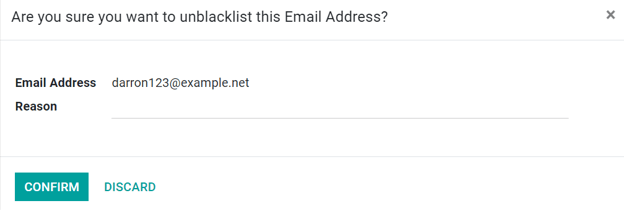
After filling in the fields, click Confirm to officially remove that particular contact from the blacklist.
Pour plus d'infos