- CPA005 is a type of EFT (electronic fund transmission) in Canada.
- Please install Canadian localization.
- The video example is in version 18. If your database has version 17.2+, CPA005 is available.
Odoo is the world's easiest all-in-one management software.
It includes hundreds of business apps:
- CRM
- e-Commerce
- Contabilidad
- Inventario
- PoS
- Project
- MRP
Se marcó esta pregunta
1
Responder
13256
Vistas

Video
Prerequisite
- Available version: v17.2
- Install Canada localization

3. Install the CPA005 from the app:

Configuration:
- Company setup:
Go to setting -> Company -> Update Info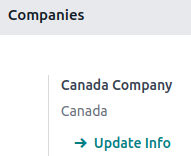
- Add the country in the 'address' 'country' in Canada and add the the short name used in EFT
Both company name and the short name will appear in the CPA005 file.

2. Set up the CPA 005 information in the bank journal.
2.1 Go to Accounting > configuration >journal > bank journal.

2.2 In the bank journal > outgoing payments tab > you should see ‘Canadian EFT’ under the payment method column.

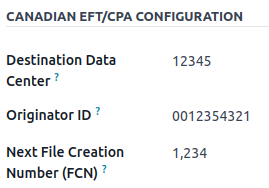
2.3 Under the outgoing payments tab, you will see the section of CPA configuration.
Insert the destination data center, originator ID and file creation number.
Sometimes, the original ID combines the destination data center ID with the routing. Please check with the bank.
FCN > sequence print on xml. Similar to printing the check number.
Sometimes the bank request the certain FCN
2.4 In the bank journal -> Journal Entries tab -> Set the bank account number by clicking on the internal link.

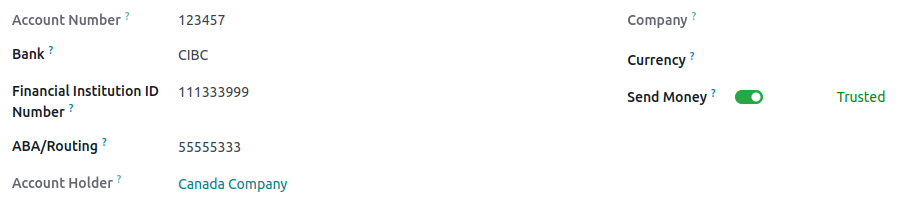
💡Notes: To validate the bank account, the user needs to be granted with the access right - validate bank account.
Go to setting > users> pick the user > check the accounting setting with bank access right field.

3. Vendor setup:
Go to Accounting > vendor > vendor and choose a vendor to set up the bank account information.


Workflow:
- Create the vendor bills.
- Select the vendor bills and register the payment (pay) assuming we are paying the full bills.

3. Go to accounting -> vendor -> payment -> add the 'EFT/CPA transaction code' of each payment.

4. Accounting -> Configuration -> Enable: Batch payment.
Go to Accounting > Vendor payments > Select different payments > Action > Create batch payment.
* Notice that batch payment is not restricted to batch by the same vendor.

5. Open the vendor -> batch payment. The export txt file appears in the chatter.


💡Note1: Please be aware that after importing the file to your bank, it might take up to 48 hours to process the payment. Plan ahead if you have a deadline such as payroll to avoid legal issues.
💡Note2: Please validate the batch payment when you are 100% sure on the date, FCN etc. It will be harder to modify the validated batch payment.
Thanks for the tutorial!
Information for Québec users (V18): The generated file contains the accents from the contact names / companies. Since an accent counts for 2 digits, the file is rejected by the bank because the line exceeds the allowed 1464 byte per line. The .txt file needs to be edited before upload.
¿Le interesa esta conversación? ¡Participe en ella!
Cree una cuenta para poder utilizar funciones exclusivas e interactuar con la comunidad.
Inscribirse| Publicaciones relacionadas | Respuestas | Vistas | Actividad | |
|---|---|---|---|---|

|
2
sept 25
|
2191 | ||
|
|
1
sept 25
|
3678 | ||
|
[18.0] Odoo go live checklist
Resuelto
|
|
1
jul 25
|
1579 | |


|
3
ago 25
|
8179 | ||
|
|
1
abr 25
|
2159 |
