合同
Every employee in Odoo is required to have a contract in order to be paid. A contract outlines the terms of an employee’s position, their compensation, their working hours, and any other details about their position.
重要
Contract documents (PDFs) are uploaded and organized using the Documents application, and are signed using the Sign application. Ensure these applications are installed in order to send and sign contracts. Please refer to the Documents and 签署 documentation.
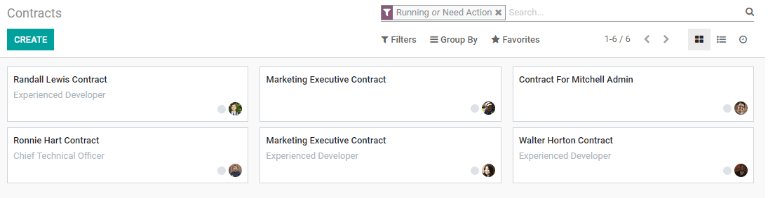
To view the employee contracts, go to the from the top menu. All employee contracts, and their current contract status, are displayed in a default kanban view. The default view displays both running contracts and contracts that need action. Expired and canceled contracts are hidden in the default view.
注解
The list of contracts in the Payroll application matches the list of contracts in the Employees application. The default contracts view in the Payroll application displays running contracts and contracts needing attention, while the default contracts view in the Employees application displays all contracts in a kanban view, organized by their stage, regardless of status. All contracts can be viewed by changing the filters.
创建一个新的合同
In order for an employee to be paid, an active contract is required. If a new contract is needed, click the Create button on the contracts dashboard. A contract form appears where the information can be entered. Required fields are underlined in bold.
必填字段
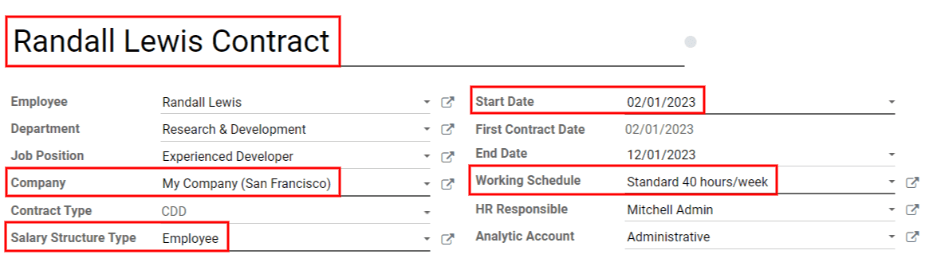
Contact Reference: Type in the name or title for the contract, such as
John Smith Contract.Company: Select the company the contract applies to by clicking on the drop-down menu. A new company can be created by typing the name in the field, then clicking either Create to create the new company, or Create and Edit to create the new company and edit the company details.
Salary Structure Type: Select one of the salary structure types from the drop-down menu. The default salary structure types are Employee or Worker. A new salary structure type can be created by typing the name in the field.
Start Date: The date the contract starts. Choose a date by clicking on the drop-down menu, navigating to the correct month and year by using the < > (arrow) icons, then clicking on the date.
Working Schedule: Select one of the working schedules from the drop-down menu.
小技巧
The Working Schedule drop-down menu displays all the working times for the selected Company. To modify or add to this list, go to and either Create a new working time or click on an existing working time and edit it by clicking Edit.
可选字段
Employee: Name of the employee that the contract applies to.
Department: The department the contract applies to.
Job Position: The specific job position the contract applies to.
Contract Type: Choose from CDI, CDD, or PFI from the drop-down menu.
CDI is an open-ended contract with only a start date but no end date.
CDD 是一个固定期限合同,有开始日期和结束日期。
guilabel: “PFI “是一种比利时特有的合同,用于雇用需要培训的员工,且涵盖专门的培训期。
End Date: If the contract has a specific end date, click the drop-down menu, navigate to the correct month and year using the arrow icons, then click on the date.
HR Responsible: If there is a specific person in HR that is responsible for the contract, select the person from the drop-down menu.
Analytic Account: This field allows a link between the contract and a specific analytic account for accounting purposes.
合同详情
The contract details section allows for the addition and editing of a contract, and the ability to send the contract to the employee for approval and signatures.
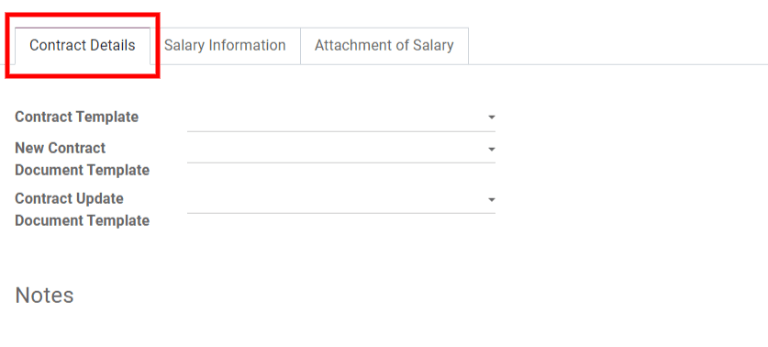
Contract Template: Select a pre-existing contract template from the drop-down menu. Contract templates are typically created through the Recruitment application.
New Contract Document Template: Select a contract from the drop-down menu to be modified for this new employee contract.
Contract Update Document Template: Select a contract from the drop-down menu if the employee has an existing contract that requires updating.
Notes: The notes field is a text field where any notes for the employee contract can be entered for future reference.
Modifying a contract
Click the External Link button at the end of each line to open the corresponding contract template and make any changes.
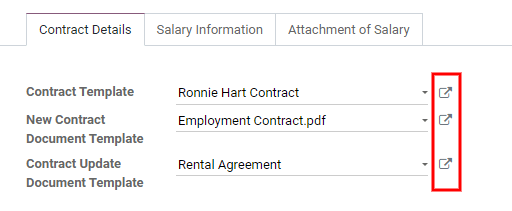
弹出窗口显示所有合同详细信息,请根据需要修改合同字段。
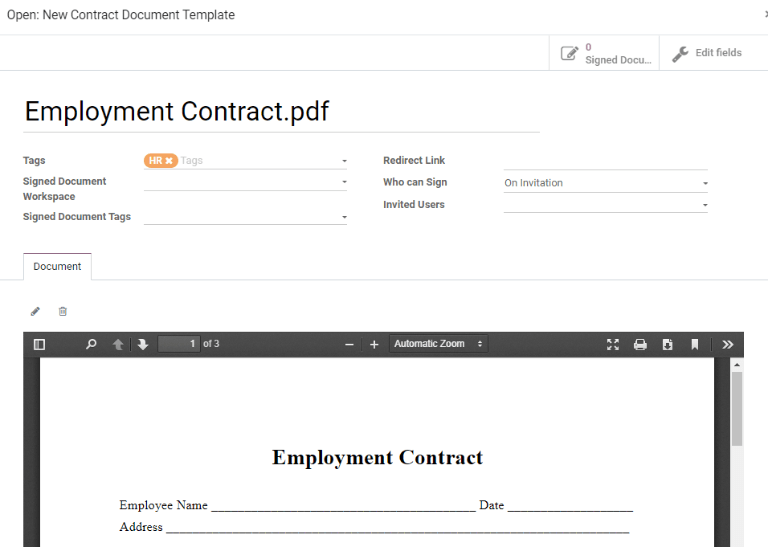
Tags: Select any tags associated with the contract.
Signed Document Workspace: This is where the signatures are stored. Choose a pre-configured workspace or create a new one.
Signed Document Tags: Select or create any tags associated only with the signed contract as opposed to the original unsigned contract.
Redirect Link: Enter a redirect link for the employee to access the contract. A redirect link takes the user from one URL to another, in this case, to the newly updated contract specifically written for them.
Who can Sign: Select either All Users or On Invitation.
All Users: Any user in the organization can sign the contract.
On Invitation: Only users selected in this field can sign the contract.
Invited Users: Select the person(s) that can sign the document.
Document: The attached document can be replaced by clicking the ✏️ (pencil) icon. A pop-up window appears so another document can be selected for upload. The file must be a PDF. To remove the document, click the 🗑️ (trash can) icon.
编辑完成后,单击 保存 按钮。所选合同模板的所有信息将填充到 工资信息 选项卡中的字段。如适用,将出现其他选项卡,如 个人文档。
工资信息
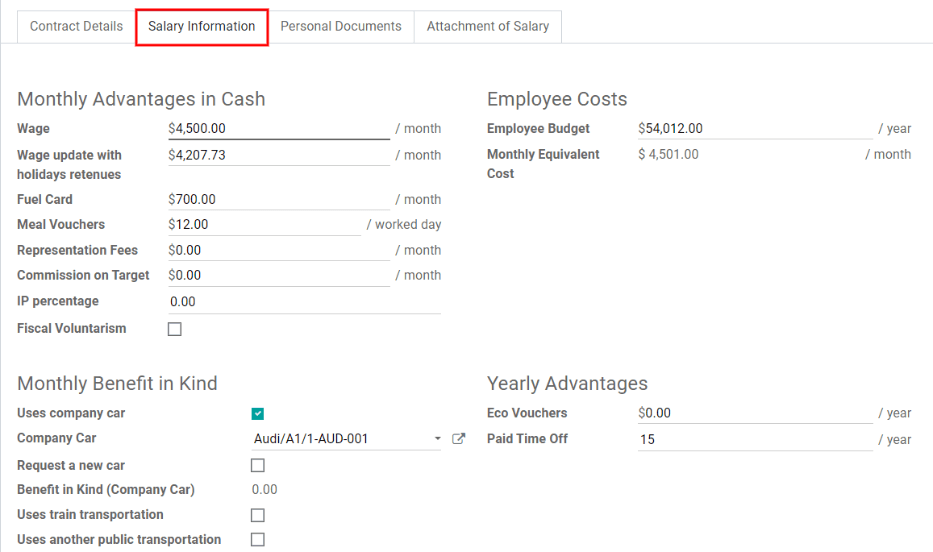
This section is where the specific salary details are defined. This section is country-specific, so depending on where the company is located, these fields may vary.
Enter the amount in the various fields, or check a box to apply a benefit. Some options that can be entered here include Meal Vouchers, Fuel Card, Internet, Paid Time Off, etc.
Some fields may be automatically filled in based off of the contracts selected in the Contract Details tab.
Attachment of salary
Any automatic deductions or allocations for an employee, such as child support payments and wage garnishments, are referred to as a salary attachment. This section is where all of these deductions or allocations are set.
To add a new deduction, click Add a line. Type in a description for the allocation under Description.

Select the Garnished Type from the drop-down menu. Choose from:
Attachment of Salary: Any payments taken out towards something that is not child support. Typically any garnishments such as lawsuit payments, payments toward taxes owed, etc.
Assignment of Salary: Any deduction that is not required but voluntary, such as a pre-tax allocation to a college savings account.
Child Support: Any payments taken out specifically for child support.
Enter the start and end dates the entry applies to. Click on the drop-down menu under From and To, navigate to the correct month and year by using the < > (arrow) icons, then click on the date.
Last, enter the Amount that each payslip pays towards the entry.
To delete a line, click the 🗑️ (trash can) icon at the end of the line.
Save and send the contract
Once a contract has been created and/or modified, save the contract by clicking the Save button. Next, the contract must be sent to the employee to be signed.
Click on one of the following buttons to send the contract to the employee:
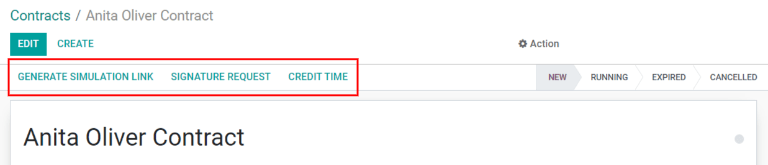
Generate Simulation Link: This option is for Belgian companies only. Clicking this opens a pop-up window that contains the basic information from the contract as well as a link for the contract when using the salary configurator. Click Send Offer to send an email to the employee so they can sign the contract.
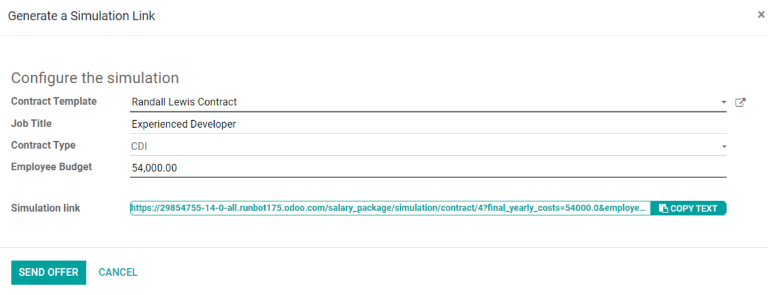
注解
In order to send a contract using the Generate Simulation Link, there must be a signature field in the contract PDF being sent to the employee so they can sign it.
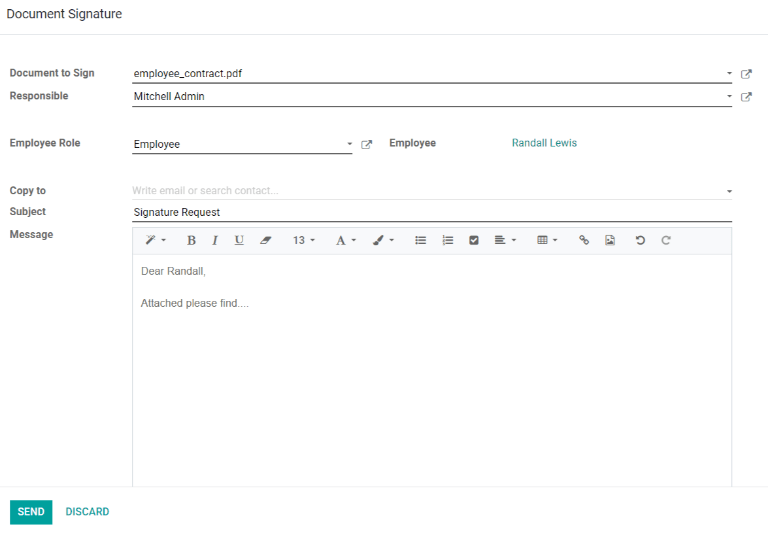
Signature Request: Click this and a pop-up window appears where an email can be typed to the employee. Select the document, such as a contract, NDA, or Homeworking Policy, from the drop-down menu, and fill out the email section. Click Send when the email is ready to be sent.
Credit Time: This option is for Belgian companies only. When clicked, a pop-up window appears that allows for the changing of working times, and can compute time off.