Mogelijk hebt u servicecontracten met uw klanten om hen te ondersteunen bij problemen. Voor dit doel helpt Odoo u de tijd te registreren die u besteedt aan het oplossen van het probleem en vooral om het aan uw klanten te factureren.
De modules die nodig zijn
Om tijd op tickets te registreren en te factureren, zijn de volgende modules nodig: Helpdesk, Project, Urenstaten, Verkoop. Als u een van deze mist, ga dan naar de Apps-module, zoek ernaar en klik vervolgens op * Installeren [UNKNOWN NODE problematic].
Starten met Odoo Helpdesk
Stap 1 : start een helpdesk project
To start a dedicated project for the helpdesk service, first go to and make sure that the Timesheets feature is activated.

Ga vervolgens naar uw dashboard, maak het nieuwe project aan en laat daarvoor urenstaten toe.
Stap 2: Breng een helpdeskteam bij elkaar
To set a team in charge of the helpdesk, go to and create a new team or select an existing one. On the form, tick the box in front of Timesheet on Ticket to activate the feature. Make sure to select the helpdesk project you have previously created as well.

Stap 3 : start de helpdesk service
Finally, to launch the new helpdesk service, first go to and make sure that the Units of Measure feature is activated.

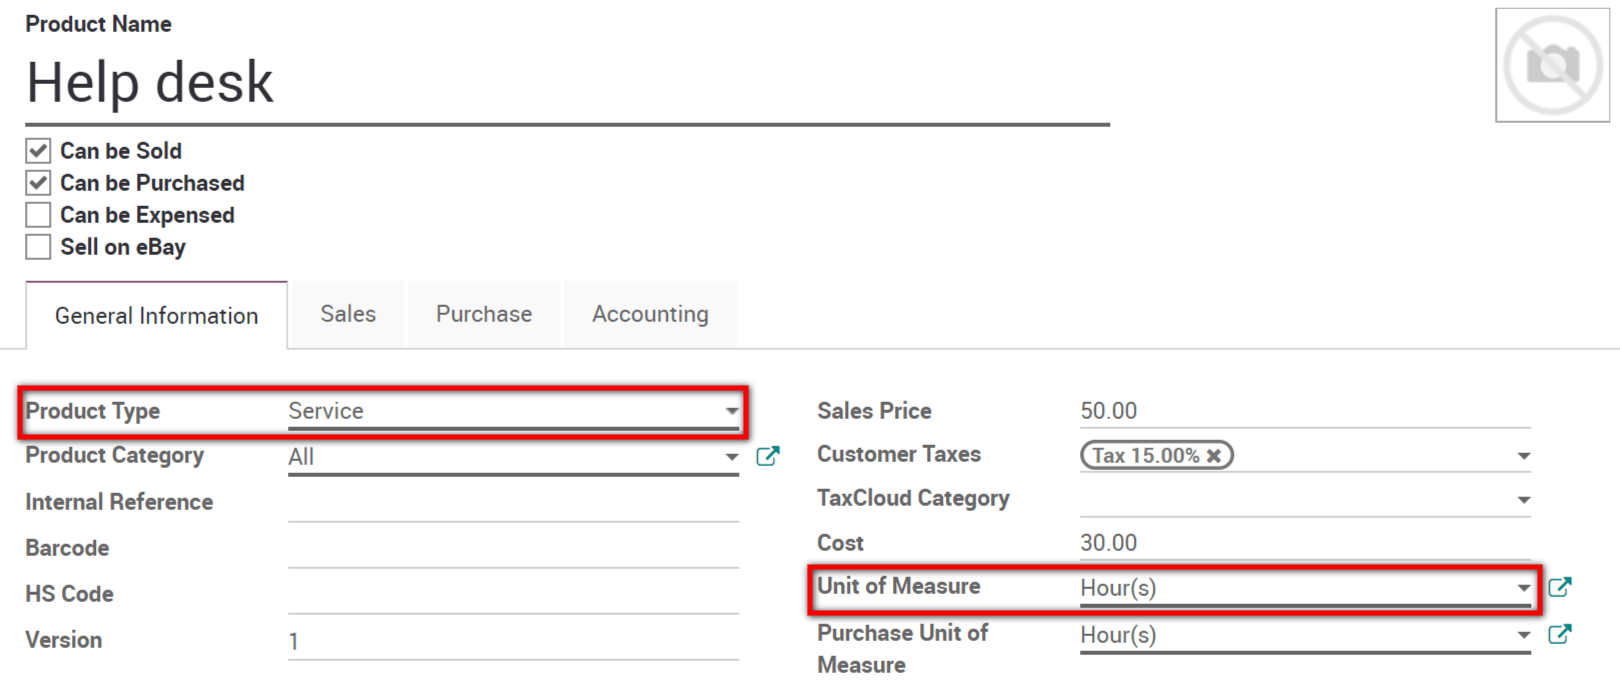
Then, go to and create a new one. Make sure that the product is set as a service.
Notitie
Here, we suggest that you set the Unit of Measure as Hour(s), but any unit will do.
Finally, select the invoicing management you would like to have under the Sales tab of the product form. Here, we recommend the following configuration :
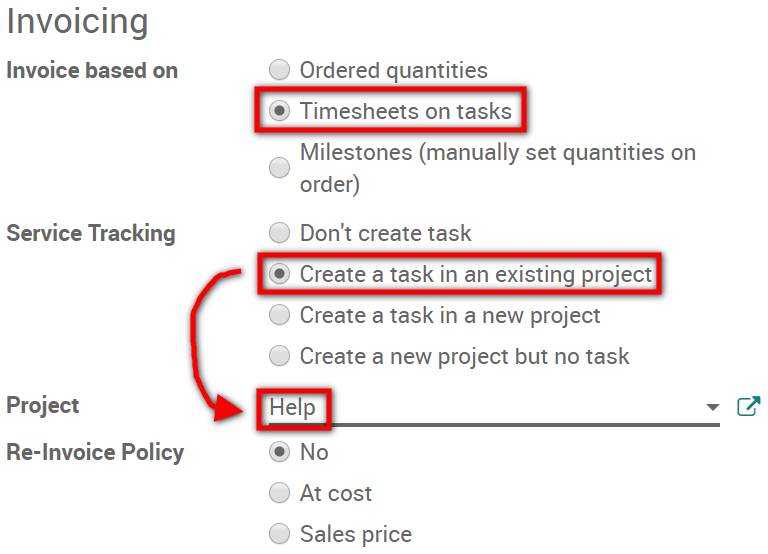
U bent nu klaar voor het ontvangen van tickets!
Los incidenten op en registreer de bestede tijd
Stap 1 : plaats een bestelling
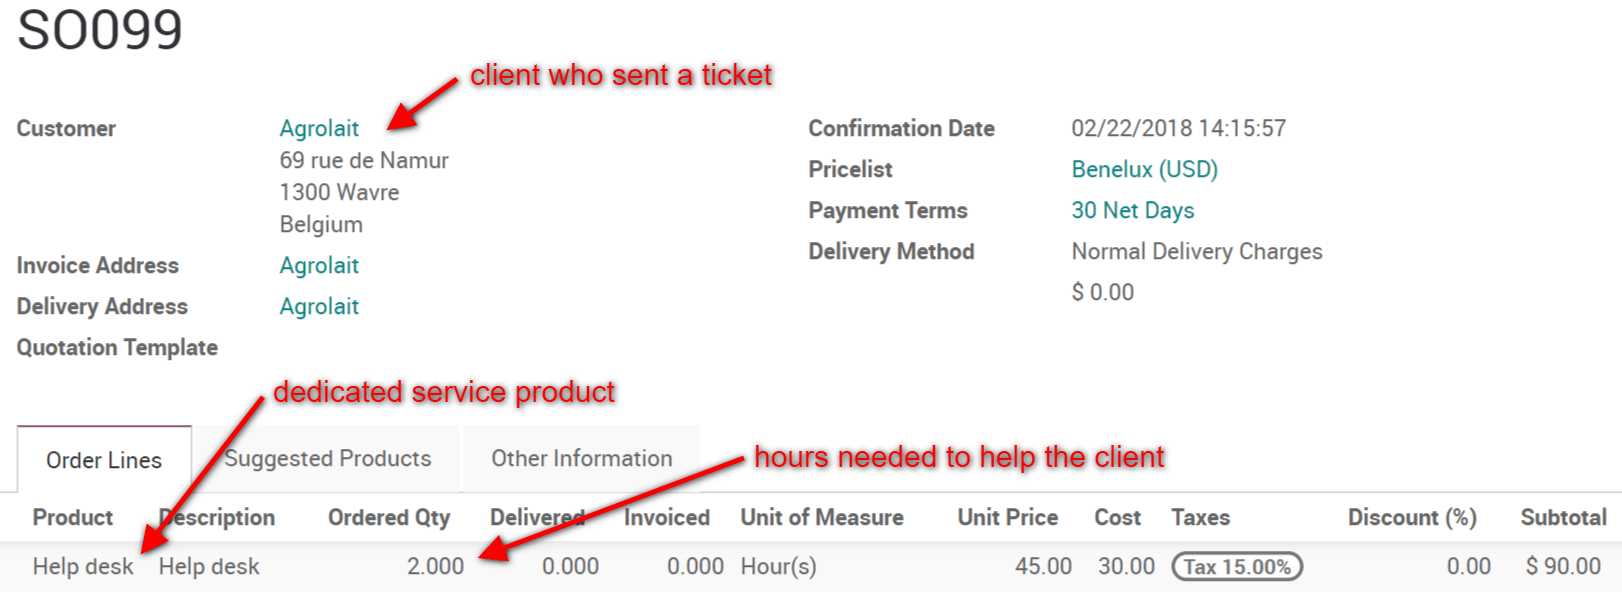
You are now in the Helpdesk module and you have just received a ticket from a client. To place a new order, go to and create one for the help desk service product you have previously recorded. Set the number of hours needed to assist the client and confirm the sale.
Stap 2 : koppel de taak aan het ticket
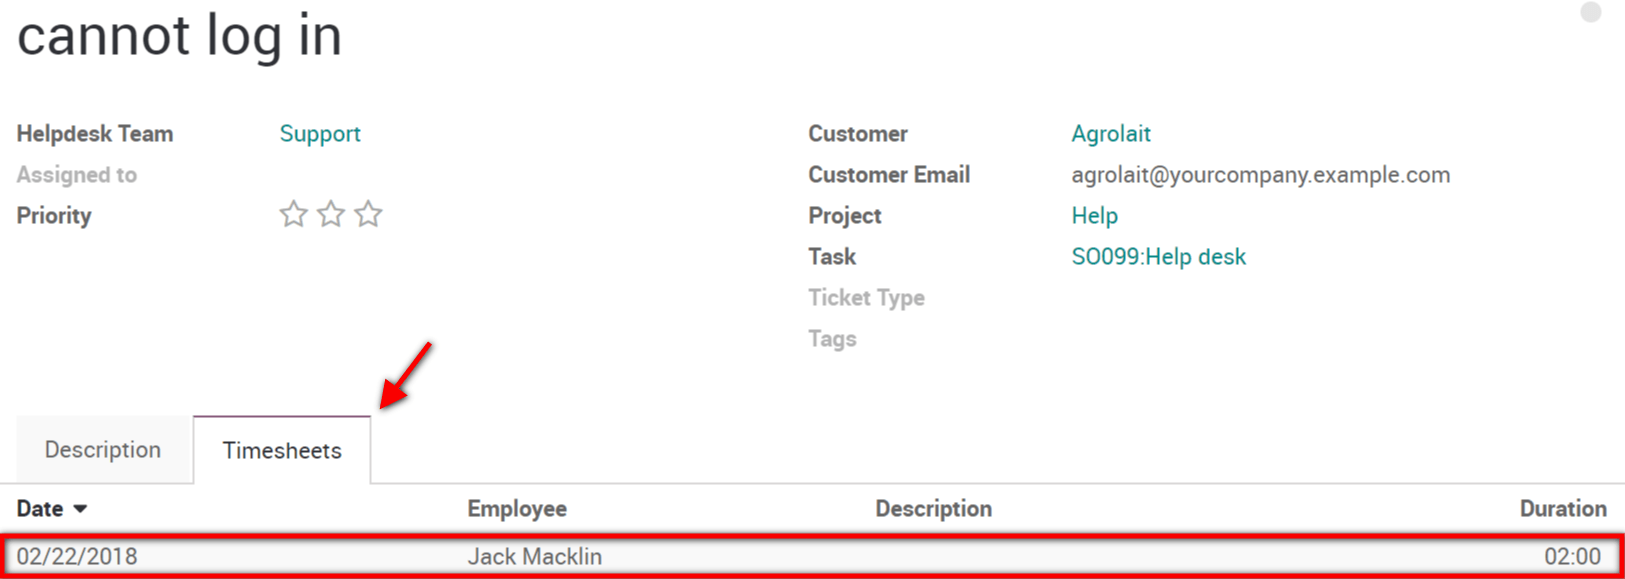
If you access the dedicated helpdesk project, you will notice that a new task has automatically been generated with the order. To link this task with the client ticket, go to the Helpdesk module, access the ticket in question and select the task on its form.

Stap 3 : registreer de tijd die is besteed om de klant te helpen
De klus is geklaard en het probleem van de klant is opgelost. Om de uren te registreren die voor deze taak zijn uitgevoerd, gaat u terug naar het ticketformulier en voegt u ze toe op het tabblad Urenstaten.
Tip
De uren die op het ticket zijn geregistreerd, verschijnen ook automatisch in de Urenstaten app en in de speciale taak.
Stap 4 : Factureer de klant
To invoice the client, go back to the Sales module and select the order that had been placed. Notice that the hours recorded on the ticket form now appear as the delivered quantity.
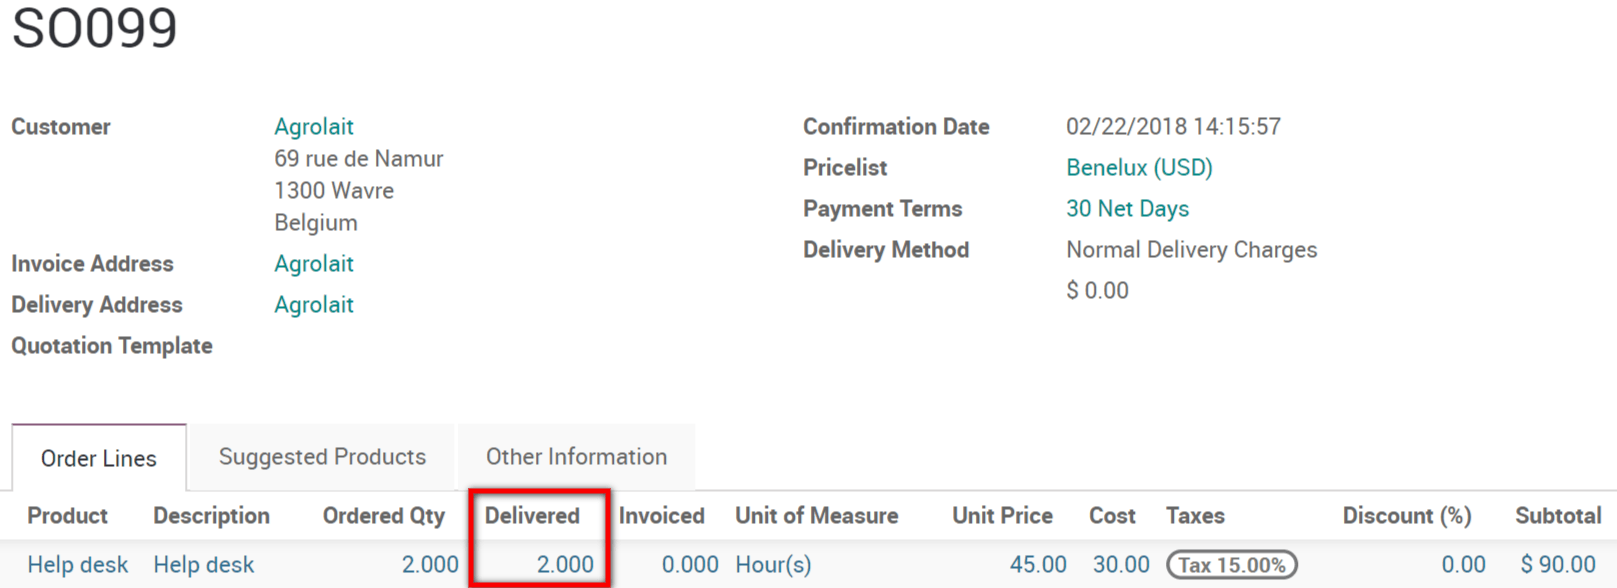
Het enige dat u nog hoeft te doen, is de factuur vanaf de bestelling maken en deze vervolgens te valideren. Nu enkel wachten op de betaling van de klant!