
Khối dựng
You can design your website by dragging and dropping building blocks, then editing them to fit your content and layout needs.
Thêm khối xây dựng
To add a block to a website page, access the page, click Edit, then drag and drop the desired building block into the appropriate location. Two types of building blocks are available: Categories and Inner Content. Inner Content building blocks can only be added into Categories building blocks.
When clicking a category block, a popup appears, allowing you to select between multiple templates for each category.
Mẹo
Search for a specific block in the Insert a block popup using the search bar.
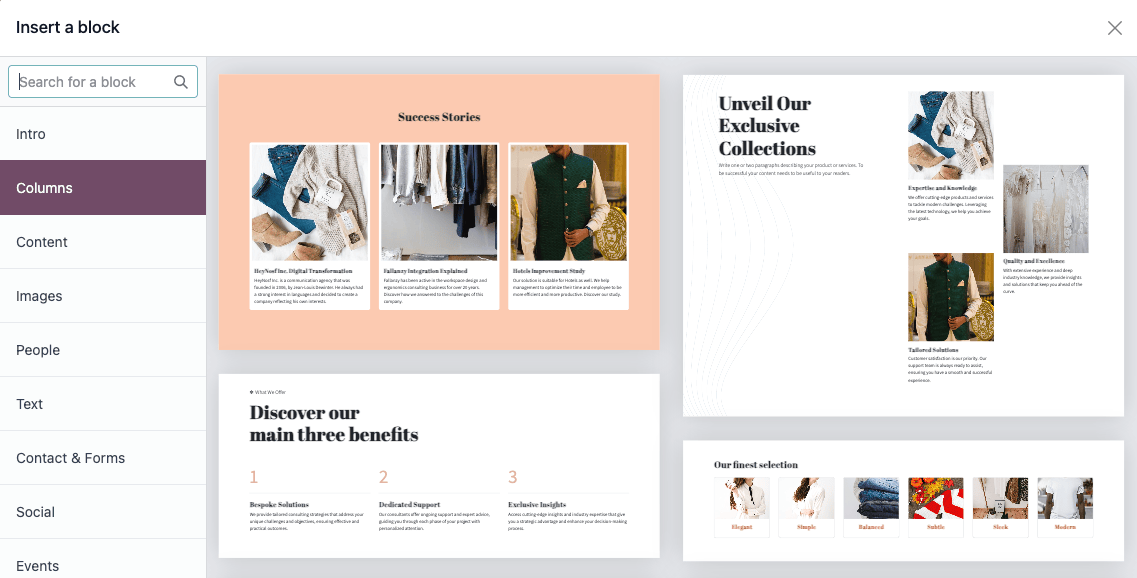
Once the category block is placed, you can drag and drop Inner content blocks within it. The Inner content blocks allow you to add elements, such as videos, images, social media buttons, etc., into pre-existing category blocks.
Ghi chú
You can also add a building block on the login page. To do so, navigate to the website's homepage, add
/web/loginto the URL and pressEnter.Access to certain blocks requires installing their respective application or module (e.g., eCommerce for the Products block).
Example
Add all your social media accounts in one place with the inner content Social Media block. Toggle the switch on or off next to the desired platform and copy/paste your account URL.

Biểu mẫu
The Form block is used to collect information from website visitors and, if applicable, create records in your database. To add a form to a website page, drag and drop the Contact & Forms category block, then select a block in the popup.

Tác vụ
By default, when the form is submitted, an email containing the information entered by the visitor is automatically sent. Depending on the apps installed on your database, additional actions that can automatically create records may become available. To choose a different action, click Edit, click the form, navigate to the Style tab, and select the desired Action:
Nộp đơn xin việc (Tuyển dụng)
Create a Customer (eCommerce)
Tạo phiếu yêu cầu (Hỗ trợ)
Tạo cơ hội (CRM)
Đăng ký nhận bản tin (Tiếp thị qua email)
Tạo nhiệm vụ (Dự án)
More models: để tạo các loại bản ghi khác
By default, submitting the form redirects visitors to a Thank you page. Use the URL field to send them to a different page. Alternatively, you can choose not to redirect and keep them on the form's page by selecting Nothing or Show Message in the On Success field.
Trường
To add a new field to the form, navigate to the Style tab and click the + Field button next to the Form or Field section. To modify any field on the form, select the field, then use the options available in the Field section of the Style tab. For example, you can:
Thay đổi trường Loại.
Mẹo
Cũng có thể chọn một Trường hiện có từ cơ sở dữ liệu và sử dụng dữ liệu mà nó chứa. Các trường có sẵn phụ thuộc vào hành động được chọn. Các trường thuộc tính được thêm vào cơ sở dữ liệu cũng có thể được sử dụng.

Một số trường trông giống nhau về mặt hình thức, nhưng dữ liệu nhập vào phải tuân theo định dạng cụ thể.
Chỉnh sửa Nhãn của trường và điều chỉnh Vị trí của nó.
Bật Description của trường. Bật công tắc và nhấp vào mô tả mặc định trên biểu mẫu để chỉnh sửa.
Add a Placeholder or Default value.
Chỉ định xem trường có Bắt buộc hay không.
Edit the field's visibility settings.
Thêm hoạt ảnh.
Once you have made the desired changes, click Save.
Thêm biểu mẫu liên hệ Odoo trên trang web không phải Odoo
Bạn có thể hiển thị biểu mẫu liên hệ Odoo trên trang web khác bằng iframe. Để làm điều này, hãy làm theo các bước sau:
Prepare the Odoo form: Create a contact form on a page in Odoo Website and remove the header and footer. Make sure only the contact form remains on the page.
Tạo mã nhúng: Sao chép URL của trang biểu mẫu Odoo và dán vào trình tạo iframe, chẳng hạn như La Digitale.dev hoặc iFrame Generator. Điều chỉnh chiều rộng và chiều cao để hiển thị phù hợp.
Add the embedded code to the non-Odoo website: Open the relevant page’s HTML (in the code editor or CMS) and insert the embedded code where the form should be displayed.
Example
Ví dụ về mã nhúng:
<iframe src="https://example.com/odoo-form"
        style="border:0;"
        name="odooForm"
        scrolling="no"
        frameborder="0"
        marginheight="0"
        marginwidth="0"
        height="400px"
        width="600px"
        allowfullscreen>
 </iframe>
Mã nhúng
Embedding code allows you to integrate content from third-party services into a page, such as videos from YouTube, maps from Google Maps, social media posts from Instagram, etc.
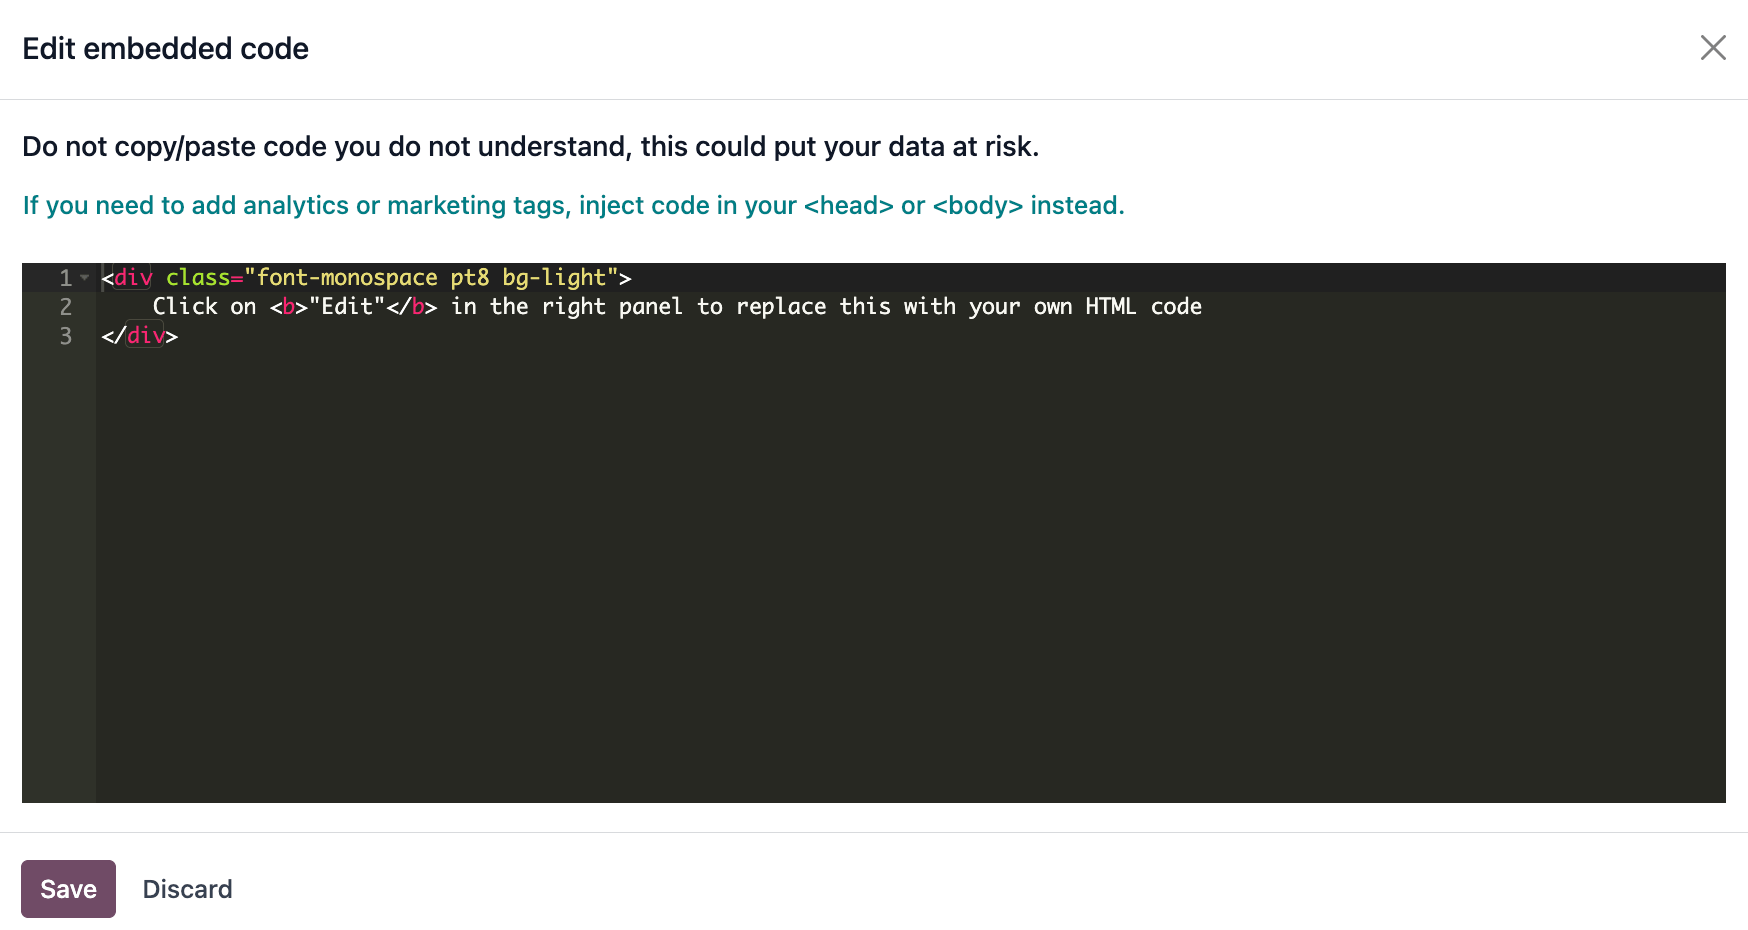
After dragging and dropping the Embed Code block from the Inner Content section into a page, click the block, then go to the Style tab and click Edit. Replace the placeholder code with your custom embed code.
Cảnh báo
Do not copy/paste code you do not understand, as it could put your data at risk.
Move, switch, duplicate or delete a building block
Pull the turquoise borders on the block to reduce or increase the space at the top or bottom of it.
Change the block order by clicking (chevron up) or (chevron down) and move the block on the page by clicking (arrows). When you have multiple columns, move a column to the left or right by clicking (chevron left) or (chevron right).
To duplicate a building block, click (duplicate). Once duplicated, the new block appears on the page beneath the original one.
Mẹo
Alternatively, click the (duplicate) icon at the top of the Style tab to duplicate the selected block.
To delete a block, click (trash).

Chỉnh sửa khối xây dựng
To edit the content of a building block, click it and go to the Style tab. Available customization options vary depending on the type of block selected.
Xem thêm
Nền
To modify the background of a building block, select the block, go to the Style tab, and click the color dot or another Background option. You can change the color and/or add an image, video, and/or shape. Once you've selected a shape, new fields appear to allow you to customize the shape.
Mẹo
Position an element (image, text, etc.) behind or in front of another one by using the Send to back or Bring to front icons.

Để thay đổi kích thước khối, nhấp và kéo các chấm xung quanh các cạnh của nó để điều chỉnh theo nhu cầu.

Xem thêm
Layout: grid and columns
For most building blocks, you can choose between two layout styles: grid or columns (cols). To change the default layout style, click the block, go to the Style tab, and set the Layout field to Grid or Cols.
Lưới
The Grid layout allows you to reposition and resize elements, such as images or text, by dragging and dropping them. When Grid is selected, additional options are available to Add Elements by clicking Image, Text, or Button.

Cột
Choosing the Cols layout allows you to determine the number of elements per line within the block. To do so, select the block to modify, click the dropdown next to the Cols field, and adjust the number. You can then modify a specific column's settings using the options in the Column section of the Style tab.
Ghi chú
By default, on mobile devices, only one element (column) is visible per line to ensure that content remains easily readable and accessible on smaller screens. To adjust the value, click the (mobile icon) at the top of the website editor and adapt the number of columns. Shapes are hidden by default on mobiles.
Lưu khối xây dựng tùy chỉnh
You can save a customized building block to reuse it elsewhere. To do so, select it, navigate to the Style tab, and click the (floppy disk) icon. Click the Save button in the popup to confirm saving your custom block.
To add a saved building block to the page, navigate to the Blocks tab and drag and drop the Custom block from the Categories section. In the popup that opens, click the desired block in the Custom category.
Mẹo
In the Insert a block popup, click (edit) to rename the custom block or (delete) to delete it.
Tạo liên kết neo
Anchor links are hyperlinks that direct users to a specific section of a page. To create an anchor link for a block, follow these steps:
Nhấp vào Chỉnh sửa và chọn khối bạn muốn liên kết đến.
Click (link) at the top of the Style tab.
To edit the default anchor name, click Edit in the green popup message that opens.
Replace the anchor name and click Save & copy.
Sau khi neo được lưu, bạn có thể liên kết đến nó từ bất kỳ đâu trên trang web của mình.