Paie
Odoo Paie est utilisé pour traiter les prestations et créer les fiches de paie des employés, y compris les salaires réguliers et les commissions. L’application Paie fonctionne avec d’autres applications d’Odoo, telles que Employés, Feuilles de temps, Congés et Présences.
L’application Paie permet de s’assurer qu’il n’y a pas de problèmes ou de conflits lors de la validation des prestations, gère les localisations spécifiques à chaque pays pour s’assurer que les fiches de paie respectent les règles et les taxes locales et permettent les cessions de salaire. La configuration de la paie est essentielle pour garantir un traitement précis et opportun des fiches de paie.
Paramètres
Pour accéder aux Paramètres, allez à . C’est ici que l’on choisit si les fiches de paie sont enregistrées ou non dans la comptabilité et si les paiements SEPA sont créés.
L’écran des Paramètres permet de configurer les paramètres de localisation. Les Localisations sont des paramètres spécifiques au pays préconfigurés dans Odoo lors de la création de la base de données et tiennent compte de toutes les taxes, frais et allocations pour ce pays particulier. La section Localisation des Paramètres comprend une vue détaillée de tous les avantages fournis aux employés.

Toutes les localisations spécifiques à un pays sont configurées dans la section Localisation de l’écran Paramètres. Tous les éléments de la localisation sont préremplis lorsque vous choisissez le pays lors de la création de la base de données. Il n’est pas recommandé de modifier les paramètres de localisation sauf en cas de besoin spécifique.
Note
Odoo can handle a multi-company configuration. This is generally done when there is a main company or office location, such as a headquarters, and there are other offices/branches around the country or globe, that fall under that main company or headquarters. In Odoo, each company, including the headquarters, would be setup as their own company/branch using the multi-company method.
Each individual company can have a different localization setting configured for that specific company, since company locations can vary and be located anywhere in the world, where rules and laws differ. For more information on companies refer to this documentation on setting up companies.

Prestations
Une prestation est un enregistrement individuel sur la feuille de temps d’un employé. Les prestations peuvent être configurées pour comptabiliser tous les types de travail et de congés, tels que les Présences, les Congés de maladie, les Formations ou les Jours fériés.
Pour plus d'infos
Types de prestations
Lors de la création d’une prestation dans l’application Paie ou lorsqu’un employé saisit des informations dans l’application Feuilles de temps, vous devez sélectionner un Type de prestation. La liste des Types de prestations est créée automatiquement en fonction des paramètres de localisation définis dans la base de données.
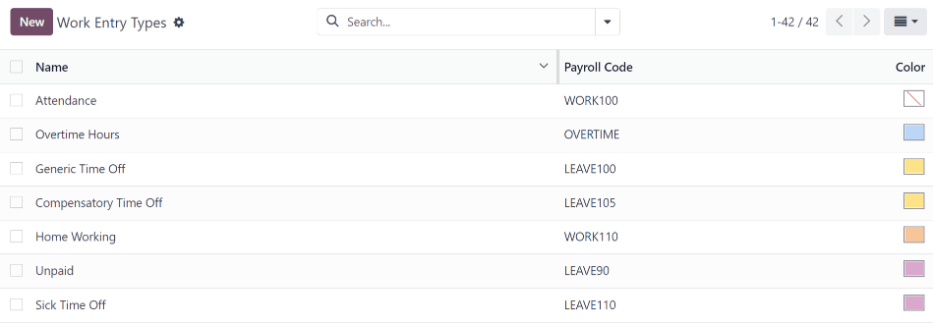
To view the current work entry types available, go to .
Each work entry type has a code to aid in the creation of payslips, and to ensure all taxes and fees are correctly entered.

Nouveau type de prestation
To create a new Work Entry Type, click the New button, and enter the information for the following sections on the form.
General information section
Nom du type de prestation : Le nom doit être court et descriptif, tel que
Congé maladieouJour férié.Payroll Code: This code appears with the work entry type on timesheets and payslips. Since the code is used in conjunction with the Accounting application, it is advised to check with the accounting department for a code to use.
DMFA code: This code is used to identify DMFA entries on a corresponding DMFA report. The DMFA report is a quarterly report that Belgian-based companies are required to submit for social security reporting purposes. This report states the work done by the employees during the quarter, as well as the salaries paid to those employees.
External Code: This code is used for exporting data to a third-party payroll service. Check with the third-party being used in order to determine the External Code to enter for the new work entry type.
SDWorx code: This code is only for companies that use SDWorx, a payroll service provider.
Color: Select a color for the particular work entry type.
Display in payslip section
Rounding: The rounding method selected determines how quantities on timesheet entries are displayed on the payslip.
Aucun arrondi : Une entrée de feuille de temps n’est pas modifiée.
Demi-journée : Une entrée de feuille de temps est arrondie à la demi-journée la plus proche.
Journée : Une entrée de feuille de temps est arrondie à la journée la plus proche.
Example
Si le temps de travail est fixé à une journée de 8 heures (semaine de 40 heures) et qu’un employé saisit 5,5 heures sur une feuille de temps et que l’option Arrondi est définie sur Aucun arrondi, l’entrée reste à 5,5 heures. Si l”Arrondi est défini sur Demi-journée, l’entrée est modifiée en 4 heures. S’il est défini sur Journée, l’entrée est modifiée en 8 heures.
Unpaid section
Unpaid in Structures Types: If the work entry is for work that is not paid, specify which pay structure the unpaid work entry applies to from the drop-down menu. Some situations where work would be logged on a timesheet but no compensation given would be for unpaid internships, unpaid training, or volunteer work.
Valid for advantages section
Meal Voucher: If the work entry should count towards a meal voucher, check the box.
Representation Fees: If the work entry should count towards representation fees, check the box.
Private Car Reimbursement: If the work entry should count towards a private car reimbursement, check the box.
Time off options section
Time Off: Check this box if the work entry type can be selected for a time off request or entry in the Time Off application. If Time Off is checked, a Time Off Type field appears. This field has a drop-down menu to select the specific type of time off, such as
Paid Time Off,Sick Time Off, orExtra Hoursfor example. A new type of time off can be entered in the field if the listed types of time off in the drop-down menu do not display the type of time off needed.Keep Time Off Right: This is for Belgian-specific companies only, and will not appear for other localizations. Check this box if the work entry is for time off that will affect the time off benefits for the following year. Workers are given time off each year according to the government, and in some cases, time-off taken during a specific time period can affect how much time off the employee will receive or accrue the following year.
Reporting section
Unforeseen Absence: If the work entry should be visible on the unforeseen absences report, check this box.


Working schedules
To view the currently configured working schedules, go to . The working schedules that are available for an employee’s contracts and work entries are found in this list.
Working schedules are company-specific. Each company must identify each type of working schedule they use.
Example
An Odoo database containing multiple companies that use a standard 40-hour work week needs to have a separate working schedule entry for each company that uses the 40-hour standard work week.
A database with five companies that all use a standard 40-hour work week needs to have five separate 40-hour working schedules configured.


New working schedule
To create a new working schedule, click the New button, and enter the information on the form.
Les champs sont préremplis pour une semaine de travail normale de 40 heures, mais ils peuvent être modifiés. Changez d’abord le nom de l’horaire en modifiant le texte dans le champ Nom. Ensuite, apportez les modifications nécessaires aux jours et aux heures qui s’appliquent au nouvel horaire.
Dans l’onglet Heures de travail, modifiez le Jour de la semaine, la Période du jour, et le Type de prestation en cliquant sur les menus déroulants de chaque colonne et en effectuant la sélection souhaitée. Les colonnes Heure de début et Heure de fin peuvent être modifiées en saisissant l’heure.
Note
L”Heure de début et l”Heure de fin doivent être au format 24 heures. Par exemple, 2:00 PM doit être saisi comme 14:00.
If the working time should be in a two-week configuration, click the Switch to 2 weeks calendar button in the top left. This creates entries for an Even week and an Odd week.


Salaire
Types de structures
Dans Odoo, la fiche de paie d’un employé est basée sur des structures et des types de structures, qui impactent tous deux la manière dont un employé saisit les feuilles de temps. Chaque type de structure est un ensemble individuel de règles pour le traitement d’une entrée de feuille de temps, qui consiste en différentes structures imbriquées. Les types de structures définissent la fréquence à laquelle un employé est payé, l’horaire de travail et si les salaires sont basés sur une rémunération (fixe) ou sur le nombre d’heures travaillées par l’employé (variable).
Par exemple, un type de structure peut être Employé et ce type de structure peut avoir deux différentes structures imbriquées : une structure Salaire régulier qui comprend toutes les règles distinctes de traitement du salaire régulier, ainsi qu’une structure Prime de fin d'année qui comprend uniquement les règles relatives à la prime de fin d’année. La structure Salaire régulier et la structure Prime de fin d'année sont toutes deux des structures appartenant au type de structure Employé.
The different structure types can be seen by going to .
Deux types de structures par défaut sont configurés dans Odoo : Employé et Ouvrier. Typiquement, Employé est utilisé pour les employés salariés, c’est pourquoi le type de salaire est Salaire fixe mensuel, et Ouvrier est utilisé pour les employés payés à l’heure, c’est pourquoi le type de salaire est Salaire horaire.


New structure type
To make a new structure type, click the New button and a structure type form appears. Enter the information in the fields. Most fields are pre-populated, but all the fields can be modified.
Structure Type: Enter the name for the new structure type, such as “Employee” or “Worker”.
Country: Select the country that the new structure type applies to from the drop-down menu.
Wage Type: Select what type of wage the new structure type will use, either Monthly Fixed Wage or Hourly Wage. If the wage type is going to be used for salaried employees who receive the same wage every pay period, select Monthly Fixed Wage. If the wage type is going to be used for employees who receive wages based on how many hours they worked during a pay period, select Hourly Wage.
Default Scheduled Pay: Select the typical pay schedule for the new structure type from the drop-down menu. Options are Monthly, Quarterly, Semi-annually, Annually, Weekly, Bi-weekly, Bi-monthly. This indicates how often this type of structure type is paid out.
Default Working Hours: Select the default working hours for the new structure type from the drop-down menu. All available working hours for the currently selected company appear in the drop-down menu. The default working hours that are pre-configured in Odoo is the Standard 40 hours/week option. If the needed working hours do not appear in the list, a new set of default working hours can be created.
Regular Pay Structure: Type in the name for the regular pay structure.
Default Work Entry Type: Select the default type of work entry the new structure type will fall under from the drop-down menu. Options include Attendance, Overtime Hours, Generic Time Off, Compensatory Time Off, Home Working, Unpaid, Sick Time Off, Paid Time Off, and Out Of Contract.


New default working hours
To make new default working hours, type the name for the new working hours in the Default Working Hours field on the new structure type form. Click Create and edit. A default working hours form will pop up. The default working hours form has two sections, a general information section and a tab listing out all the individual working hours by day and time. When the form is filled out, click Save & Close.
Name: Type in the name for the new default working hours. This should be descriptive and clear to understand, such as
Standard 20 Hours/Week.Company: Select the company that can use these new default working hours from the drop-down menu. Keep in mind, working hours are company-specific and cannot be shard between companies. Each company needs to have their own working hours set.
Average Hour Per Day: The average hours per day field will be auto-populated based on the working hours configured in the Working Hours tab. This entry affects resource planning, since the average daily hours affect what resources can be used, and in what quantity, per work day.
Timezone: Select the timezone that the new default working hours will be used for from the drop-down menu.
Company Full Time: Enter the number of hours per week an employee would need to work in order to be considered a full-time employee. Typically, this is approximately 40 hours, and this number affects what types of benefits an employee can receive based on their employment status (full-time vs part-time).
Work Time rate: This percentage is auto-generated based on the entry for the Company Full Time and the working hours configured in the Working Hours tab. This number should be between
0.00%and100%, so if the percentage is above100%, it is an indication that the working times and/or Company Full Time hours need adjustment.Working Hours Tab: This tab is where each day’s specific working hours are listed. When a new default working hour form is created, the working hours tab is pre-populated with a default 40-hour week, with each day divided into three timed sections. Every day has morning (8:00-12:00), lunch (12:00-13:00), and evening (13:00-17:00) hours configured using a 24 hour time format. To adjust any of these hours, click on the specific field to adjust, and make the adjustment using the drop-down menus, or in the specific case of the times, type in the desired time.
Note
If the working hours are not consistent each week, and the hours are on a bi-weekly schedule instead, click the Switch to 2 week calendar button at the top of the new default working hours form. This will change the working hours tab to display two weeks of working times that can be adjusted.
Structures
Les Structures salariales sont les différentes façons dont un employé est payé au sein d’une structure spécifique et sont spécifiquement définies par plusieurs règles.
Le nombre de structures dont une entreprise a besoin pour chaque type de structure dépend du nombre de modes de rémunération des employés et de la manière dont leur salaire est calculé. Par exemple, une structure commune utile à ajouter pourrait être une Prime.
To view all the various structures for each structure type, go to .
Chaque type de structure répertorie les différentes structures qui lui sont associées. Chaque structure contient un ensemble de règles qui la définissent.

Cliquez sur une structure pour afficher ses Règles salariales. Ces règles permettent de calculer la fiche de paie de l’employé.


Règles
Each structure has a set of salary rules to follow for accounting purposes. These rules are configured by the localization, and affect actions in the Accounting application, so modifications to the default rules, or the creation of new rules, should only be done when necessary.
To view all the rules, go to . Click on a structure (such as Regular Pay) to view all the rules.
To make a new rule, click New. A new rule form appears. Enter the information in the fields.
Les champs obligatoires pour une règle sont les suivants :
Nom : Donnez un nom à la règle.
Catégorie : Sélectionnez une catégorie à laquelle la règle s’applique dans le menu déroulant ou saisissez une nouvelle catégorie.
Code: Enter a code to be used for this new rule. It is recommended to coordinate with the accounting department for a code to use as this will affect accounting reports and payroll processing.
Structure salariale : Sélectionnez une structure salariale à laquelle la règle s’applique dans le menu déroulant ou saisissez une nouvelle structure.
Condition basée sur : Dans l’onglet Général, sélectionnez dans le menu déroulant si la règle est Toujours vraie (s’applique toujours), une Plage (s’applique à une plage spécifique, qui est saisie sous la sélection), ou une Expression Python (le code est saisi sous la sélection).
Type de montant : Dans l’onglet Général, sélectionnez dans le menu déroulant si le montant est un Montant fixe, un Pourcentage (%), ou un Code Python. En fonction de l’option sélectionnée, vous devez ensuite saisir le montant fixe, le pourcentage ou le code Python.


Paramètres de la règle
Note
Currently, the Rule Parameters feature found inside the menu is still in development and only serves a specific use case for Belgian markets. The documentation will be updated when this section has matured to more markets.
Autres types d’entrées
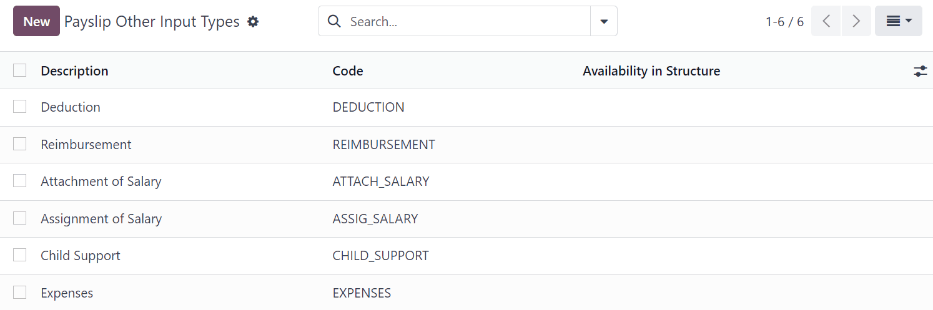
When creating payslips, it is sometimes necessary to add other entries for specific circumstances, like expenses, reimbursements, or deductions. These other inputs can be configured by going to .

To create a new input type, click the New button. Enter the Description, the Code, and which structure it applies to in the Availability in Structure field.
Important
The Code is used in the salary rules to compute payslips. If the Availability in Structure field is left blank, it indicates that the new input type is available for all payslips and is not exclusive to a specific structure.


Configurateur du package salarial
The various options under the Salary Package Configurator section of the menu all affect an employee’s potential salary. These sections (Advantages, Personal Info, Resume, and Offers) specify what benefits can be offered to an employee in their salary package.
En fonction des informations saisies par l’employé (telles que les déductions, les personnes à charge, etc.), leur salaire est ajusté en conséquence. Lorsqu’un candidat postule à un emploi sur le site web de l’entreprise, les sections du Configurateur du package salarial affectent directement ce que le candidat voit et ce qui est renseigné lorsque le candidat saisit des informations.
Avantages
When offering potential employees a position, there can be certain advantages or benefits set in Odoo in addition to the salary to make an offer more appealing (such as extra time off, the use of a company car, reimbursement for a phone or internet, etc.).
To see the advantages, go to . Advantages are grouped by Structure type, and the advantage listed for a particular structure type is only available for that specific structure.

Example
A company has two structure types, one labeled Employee, and anther labeled Intern. The Employee structure type contains an advantage of using a company car, while the Intern structure type does not. Instead, the Intern structure type has a meal voucher advantage available, while the Employee structure type does not.
A person hired under the Employee structure type can use a company car, but cannot have meal vouchers. The opposite is true for someone hired under the Intern structure type. They would have meal vouchers available to them, not the use of a company car.
To make a new advantage, click the New button, and enter the information in the fields. The required fields for an advantage are:
Nom : Saisissez le nom de l’avantage.
Champ d’avantage : Sélectionnez dans le menu déroulant le champ de la fiche de paie dans lequel cet avantage apparaît.
Type d’avantage : Sélectionnez dans le menu déroulant le type d’avantage dont il s’agit. Choisissez parmi Avantages mensuels de toute nature, Avantages mensuels en net, Avantages mensuels en espèces, ou Avantages annuels en espèces.
Type de structure salariale : Sélectionnez dans le menu déroulant le type de structure salariale auquel cet avantage s’applique.
Display Type: Select from the drop-down menu how this advantage is displayed.


Informations personnelles
Every employee in Odoo has an employee card which is created when a candidate becomes an employee. This card includes all of their personal information, resume, work information, and documents.
The personal information is gathered from the salary package configurator section that a candidate fills out after being offered a position. This personal information is then transferred to the employee card when they are hired.
To view an employee’s card, go to the main app dashboard, and click on the employee’s card.
Note
Une fiche d’employé peut être considérée comme un dossier personnel de l’employé.
The Personal Information section lists all of the fields that are available to enter on the employee’s card. To access this section, go to .

To edit a personal info entry, select the entry from the list, and modify the personal info. To create a new personal info entry, click the New button.
The required fields, aside from entering the Information name, are Related Model, Related Field, and Category. Select a Related Model from the drop-down menu. Employee populates the field by default, but the Bank Account option is also available if the information is related to a bank account instead. Select a Related Field from the drop-down menu that best describes what kind of personal information this entry is, and where it is going to be stored in the backed. Then, select a Category from the drop-down menu that the personal information should be under, such as Address or Personal Documents.
The two most important fields on the personal info form are Is Required and Display Type. Checking the Is Required box makes the field mandatory on the employee’s card. The Display Type drop-down menu allows for the information to be entered in a variety of ways, from a Text box, to a customizable Radio button, a Checkbox, a Document, and more.


Résumé
Note
Currently, the Resume feature found inside the menu is still in development and only serves a specific use case for Belgian markets. The documentation will be updated when this section has matured to more markets.
Offres
When a candidate is offered a position, there are several items that need to be tracked in order for a business to stay organized, such as where in the offer process the candidate is, how long the offer is valid for, as well as all the offer details. These details are all stored in each offers record.
To view all offers, go to . All offers that have been sent to either potential candidates or current employees appears in this list. The status, offer start date and expiration date, amount of the contract, and more, can all be found in this list. Offers sent via the Recruitment application appear here, but there is an option to create a new offer from the Payroll application as well.

To create a new offer, click the New button. The two required fields are the Contract Template, and the Company. Select the Contract Template and Company from the drop-down menus. Fill in any other details for the offer, such as the Job Title, Department, the Contract Start Date and the Offer Validity Date.
