Order handling
In Odoo’s e-commerce workflow, an online purchase typically goes through three main steps: sale, delivery, and invoicing. Each step generates key documents, including sales orders upon order confirmation, delivery orders to manage picking, packing, and shipping, and invoices. Odoo eCommerce also offers additional tools for sending abandoned cart emails, ensuring stock availability, and handling product returns and refunds.
Sale
To view all quotations and orders, navigate to . By default, the Confirmed filter is enabled. Remove this filter to display all records.
The dashboard at the top of the Orders page provides a summary of the orders and includes the following filter buttons:
To Fulfill: confirmed and paid orders (i.e., sales orders)
To Confirm: unpaid and unconfirmed orders (i.e., sent but unconfirmed quotations)
To Invoice: confirmed orders that are ready for invoicing but have not necessarily been fulfilled (i.e., sales orders)
The number of Visitors, Orders, and the Sales amount for a given period is displayed on the right side of the Orders page dashboard.

To view the details of a specific order, select it from the list. The status bar at the top of the order form shows its current status in the sales flow:
Quotation: A product has been added to the cart, but the customer has not yet completed the checkout process. If the customer is not logged in, the quotation is assigned to the default Public User contact.
Quotation Sent: The customer has completed the checkout process, but the payment has not yet been confirmed (orders with this status are displayed when the To Confirm dashboard button is selected).
Sales Order: The customer has completed the checkout process, and the payment has been successfully received (orders with this status are displayed when the To Fulfill or To Invoice dashboard buttons are selected, depending on the configured workflow).
Notitie
This three-step process is not visible to customers. However, they can view their orders and check their status through the customer portal.
If the customer pays via wire transfer, the quotation is not automatically confirmed. In this case, the customer receives a notification on the My account page of their customer account to review and pay for the order. After the payment is received, the order must be manually confirmed in the backend.
Tip
E-commerce orders can be automatically assigned to a specific sales team or salesperson. To do so, go to . In the eCommerce section, under Orders Assignment, select the relevant Sales Team or Salesperson.
Zie ook
Abandoned carts
An abandoned cart is created when a customer adds products to the cart but does not go through the checkout process or leaves the website before completing it. It is possible to automatically send an email reminder to the customer for these pending orders.
To enable abandoned cart reminders:
Go to .
In the eCommerce section, enable Follow up abandoned carts.
Set the time delay after which the reminder email is sent in the Send after field, then click Save.
If needed, click the Customize Abandoned Email Template link to customize the email template.
To view all abandoned carts, go to and remove the Confirmed filter. Open the dropdown menu and, under Filters, select Abandoned.
Notitie
To receive reminders, customers must have entered their contact details during checkout or be logged in when adding items to the cart. Without the customer details, it remains a quotation with no follow-up.
Abandoned cart reminders are only sent for carts created after the feature is enabled. Existing abandoned carts are not affected.
Levering
Notitie
The Inventory app must be installed to process deliveries.
Delivery orders are not generated for Service or subscription products.
Once a sales order is confirmed, a delivery order is automatically created. To access it, click the Delivery smart button on the sales order.
The next step is preparing e-commerce orders in the warehouse. Depending on order volume, refill and stock management strategies, or available resources, different stock handling flows for receipts and deliveries can be implemented. These flows may involve manually receiving, picking, and packing products, printing shipping labels, and shipping orders to customers, or handling these processes through dropshipping or consignment flows.
After completing the warehouse operations, return to the delivery order and click Validate once the order has been shipped.
Tip
To enable automatic confirmation emails for completed delivery orders (Done status), go to , scroll to the Shipping section, and enable Confirmation Email.
Stock management
To ensure that products ordered by customers are reserved in stock, go to , click the Delivery Orders operation type, and set the Reservation Method field to At Confirmation. When enabled, product quantities are automatically reserved once the order is confirmed, preventing items from becoming unavailable after the order is placed.
Notitie
If the customer pays by wire transfer, products are not reserved in stock until the payment is received and the order is manually confirmed.
Zie ook
Retourneren en terugbetalen
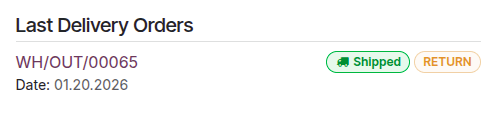
Customers can return products through the customer portal by navigating to the Your Orders section, selecting the relevant order, and clicking the Return button. A return document is automatically generated.
Once the returned items are received, initiate the return and refund process in the backend.
Notitie
Returning products may not be possible depending on the product type.
To issue refunds, the payment must have been made through a refund-compatible payment provider.
Zie ook
Invoicing
The final step of an e-commerce order is generating and sending the customer invoice. Depending on your needs, invoices can be generated manually or automatically.
To automate invoicing:
Go to .
In the eCommerce section, enable Automatic Invoice.
Select the relevant Email Template, then click Save.
If needed, click the (Internal link) icon next to the template name to customize the email template.
Notitie
Customers can view their invoices under Your Invoices in the portal.
Invoices are only sent automatically if (and when) the payment is registered.
When automatic invoicing is disabled, and invoices are created manually, they appear as pro-forma invoices in the customer portal until they are manually sent to the customer.