Manage unsubscriptions (blacklist)
Providing recipients with the power to unsubscribe from mailing lists is not only a smart business practice, it’s often a legal requirement. Allowing recipients to unsubscribe from a mailing list establishes a sense of trust and control with an audience. It also helps companies appear more genuine, and less spammy.
Unsubscribe and blacklist
In addition to having the option to unsubscribe from specific mailing lists, the recipient can also blacklist themselves during the unsubscription process, meaning they will not receive any more marketing emails from the Odoo database.
In order to provide recipients with the ability to blacklist themselves, a specific feature must be enabled in the Email Marketing application.
Navigate to , and tick the checkbox next to the Blacklist Option when Unsubscribing feature. Then, click Save in the upper-left corner of the Settings page.

Unsubscribe
By default, an Unsubscribe link appears at the bottom of all mailing templates.
Warning
The Unsubscribe link does not appear by default if the Start From Scratch template is
used to create a mailing. The user must manually add the specific unsubscribe link
/unsubscribe_from_list in the body of the email, or use a block from the Footers section of
the email builder, which includes the unsubscribe link.
If a recipient clicks the Unsubscribe link in a mailing, Odoo instantly unsubscribes them from the mailing list, presents them with a Mailing Subscriptions page where they can directly manage their subscriptions, and informs them that they’ve been Successfully Unsubscribed.

Beneath that, Odoo asks the former subscriber to Please let us know why you updated your subscription, and the user can proceed to choose the appropriate opt-out reason from a series of options presented to them.
Note
The opt-out answer options can be created and modified by navigating to .
Once they’ve chosen the appropriate opt-out reason from the options presented to them, they can click the Send button. Odoo then logs their reasoning for unsubscribing in the Email Marketing app for future analysis.
Blacklist
For a recipient to remove (i.e. blacklist) themselves from all marketing emails during the unsubscription process, on the Mailing Subscriptions page, they must click Exclude Me.
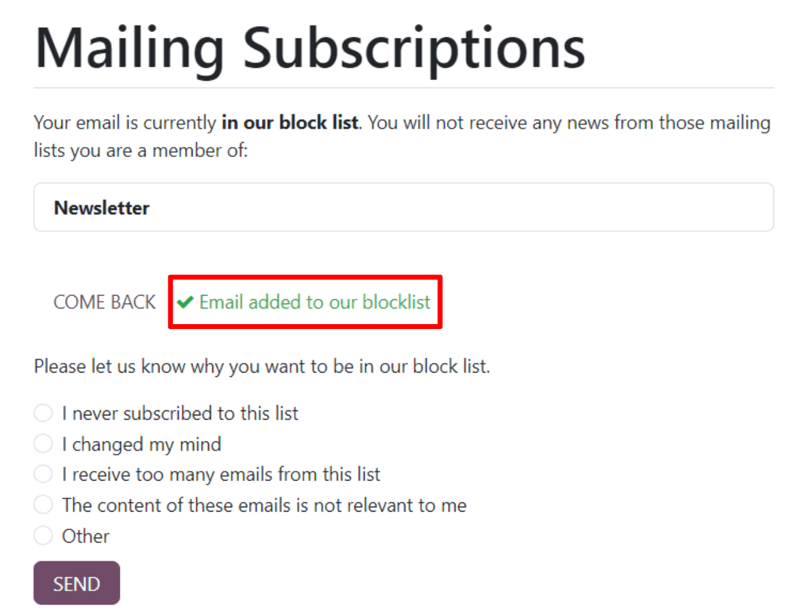
Upon clicking Exclude Me, Odoo informs the recipient they have been successfully blacklisted, with a message reading: ✔️ Email added to our blocklist.

Beneath that, Odoo asks the former subscriber to Please let us know why you want to be added to our blocklist, and the user can proceed to choose the appropriate reason from a series of options presented to them.
Once they’ve chosen the appropriate reason from the options presented to them, they can click the Send button. Odoo then logs their reasoning for blacklisting themselves in the Email Marketing app for future analysis.
Blacklisted email addresses
To view a complete list of all blacklisted email addresses, navigate to .

When a blacklisted record is selected from this list, Odoo reveals a separate page with the recipient’s contact information, along with the provided Reason why they chose to blacklist themselves.

In the chatter of the blacklisted record page, there’s a time-stamped message, informing the user when the recipient blacklisted themselves (via a Mail Blacklist created log note).
Note
Blacklisted emails are excluded from all marketing mailings, however, these emails can still receive transactional emails, such as order confirmations, shipping notifications, etc.
Unblacklist contacts
To Unblacklist contacts, click the Unblacklist button in the upper-left corner of a blacklisted record’s page to remove the contact from the blacklist, allowing them to receive mailings once again.
When Unblacklist is clicked, an Are you sure you want to unblacklist this Email Address? pop-up window appears.
In this pop-up window, the email address of the selected blacklisted record is shown, and there’s a Reason field, in which a reason can be entered, explaining why this particular contact was removed from the blacklist.

After filling in the fields, click Confirm to officially remove that particular contact from the blacklist.
See also