Introduction
When a business thrives, its owner(s) might want to expand and open a new company or a subsidiary. In Odoo, they can create new companies easily, but some setup aspects need to be considered.
What if that new company needs a point-of-sale system? Again, they need to make sure their setup is done correctly.
Here are the best practices to make your business evolve as smoothly as possible.
Step 1: create the company
The first step is to create that company. To do so, go to the Settings app and click Users & Companies ⇢ Companies. Enter your new company’s name, and fill in all the required information.
Congratulations! Your new company is created in Odoo.
Don’t forget to switch to it by clicking on your company’s name in the top right corner of your screen, right next to your avatar.Step 2: define a fiscal localization package
The second step is to define a Fiscal Localization Package. To do so, go to the Invoicing - or the Accounting- app, click Configuration ⇢ Settings, and select your package in the Fiscal Localization section.
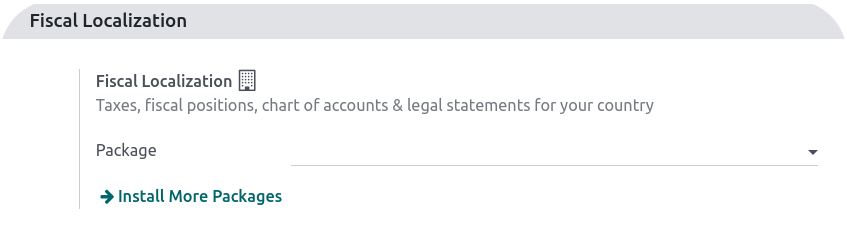
Sidenote: if your new company is located in another country, you must install the corresponding package. To do so, click Install More Packages, search for the country in the search bar, and click Activate.
Doing so redirects you to the Odoo dashboard and automatically fills in all the financial information related to your company’s localization.
Step 3: Add and set your point of sale
The next step is to add your point-of-sale system (or POS) to the database. Your POS needs at least one defined payment method and an attributed Default Journal to work properly.
Create the payment methods
Start by creating the payment methods (cash or bank, with or without payment terminals) your customers will use at this point of sale. Create them by going to the Point of Sale app and clicking Configuration ⇢ Payment Methods.
If you use a payment terminal, check the corresponding documentation to set it up properly.
Add a POS
Now, create your point of sale! Go to the Point of Sale app and click Configuration ⇢ Settings ⇢ + New Shop, name it, check (or not) the "is a Bar/Restaurant" checkbox, and save.
Refresh, and your POS is created...
... but it still needs to be adjusted a bit. Let’s do it.
Default accounting journal
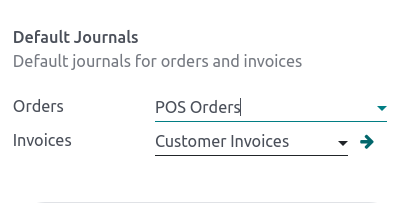
Attribute a Default Journal by scrolling down to the Accounting section and start typing your journal’s name in the Default Journals field.
We recommend you create a journal every time you add a new POS. Otherwise, the accounting gets very messed up very fast.
For demonstration purposes, I added POS orders, then pressed enter. Doing so opens a popup creation window with one required field: Short Code. I chose "POSO" for POS orders. Then, I clicked save and close.
Sidenote: If you plan to create a second POS for your company, check out our eLearning video, which specifically tells you how to do it.
And there you have it!
You are fiscally ready to sell and make money in your new company’s new POS!
Do you want to know more about the Point of Sale app?
Make sure to check the Point of Sale ELearning platform!

A new POS for a new company