Down payments
A down payment is a partial payment made by the buyer when a sales contract is concluded. This implies both parties’ (seller and buyer) full commitment to honor the contract.
With a down payment, the buyer pays a portion of the total amount owed while agreeing to pay the remaining amount at a later date. In turn, the seller provides goods or services to the buyer after accepting the down payment, trusting that the remaining amount will be paid later on.
Initial down payment request
When a sales order is confirmed, the option to create an invoice becomes available, via the Create Invoice button, located in the upper-left corner of the sales order form. When clicked, a Create invoices pop-up appears.
Notitie
Invoices are automatically created in drafts, so they can be reviewed before validation.
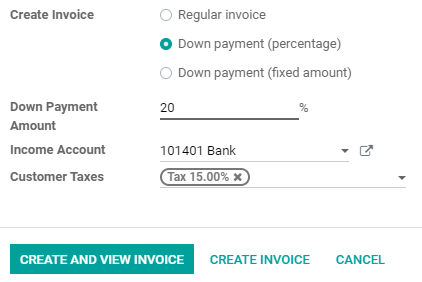
On the Create invoices pop-up, there are 3 options to choose from in the Create Invoice field:
- Regular invoice
Notitie
If Regular Invoice is selected the other fields disappear, as they only pertain to down payment configurations.
Down payment (percentage)
Down payment (fixed amount)
In terms of a down payment, it can either be a fixed amount or a percentage of the total amount.
Once the desired down payment option is selected in the Create Invoice field, designate the desired amount (either as a percentage or fixed amount) in the Down Payment Amount field.
Then, select the appropriate income account for the invoice in the Income Account field, and add a tax amount, if necessary, in the Customer Taxes field. These settings will be reused for future down payments.
Belangrijk
When a down payment is first requested, a new product called Down payment is created. This product is registered as a Service product, with an invoicing policy of Ordered quantities. This product can be edited and modified at any time.
Waarschuwing
If Delivered quantities is chosen as the invoicing policy, an invoice will not be able to be created.
Request a 50% down payment
For the following example, the flow involves a 50% amount down payment on a product with Ordered quantities as the invoicing policy.
When the order is confirmed (via the Confirm button), it’s time to create/view the invoice, by clicking Create Invoice.
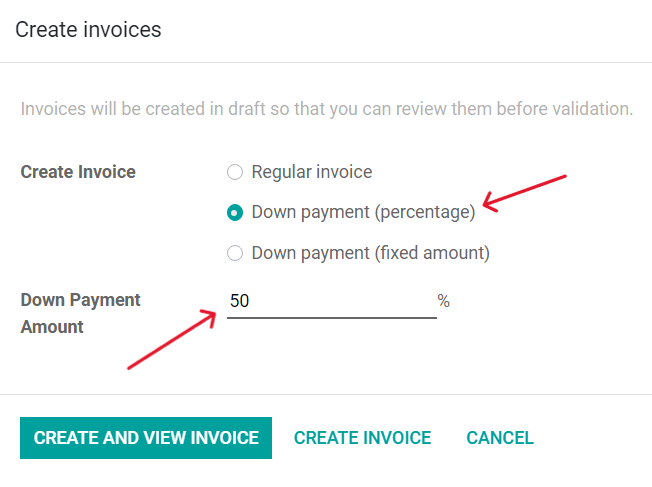
Then, on the Create invoices pop-up window that appears, select Down payment
(percentage), and type 50 in the Down Payment Amount field. Lastly, click
Create and View Invoice to create and view the invoice.
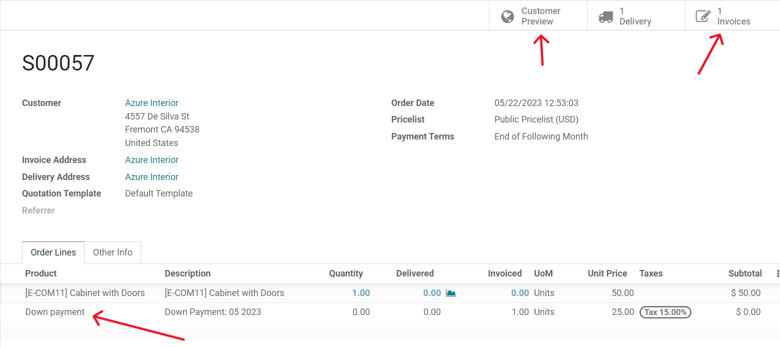
Doing so reveals the draft invoice, which mentions the down payment.
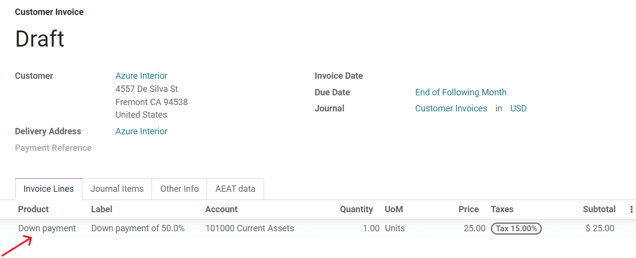
From there, the invoice can be confirmed/posted, and the payment can be registered. Return to the sales order, via the breadcrumbs.
On the sales order, the option to view what the customer will see is available, via the Customer Preview smart button, and the Invoice button reveals the drafted invoice. In either case, the down payment is mentioned on both the sales order and draft invoice.
To confirm and register the first payment of the down payment, click the Invoices smart button to return to the invoice. On the Customer Invoice page, click Confirm, then Register Payment to open a Register Payment pop-up form.
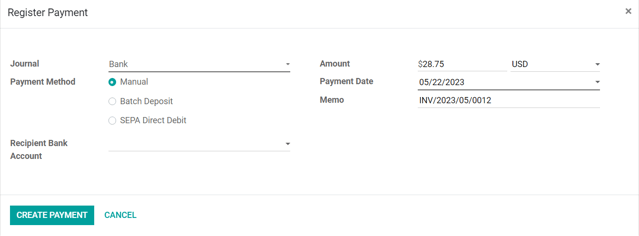
On this form, select the appropriate Journal and confirm that the down payment amount is correct in the Amount field. Then, make any other modifications to the other fields, if necessary, before clicking Create Payment.
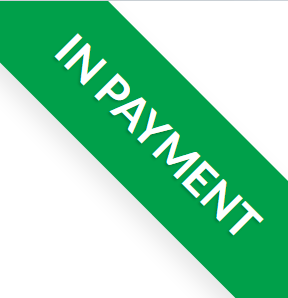
Odoo returns to the invoice, which now has a green In Payment banner visible in the upper-right corner.
Now, when the customer wants to pay the remaining amount of the order, another invoice must be created. To do that, return to the sales order, and click Create Invoice.
On the Create invoices pop-up window, there is now an option to Deduct down payments, which is selected by default.
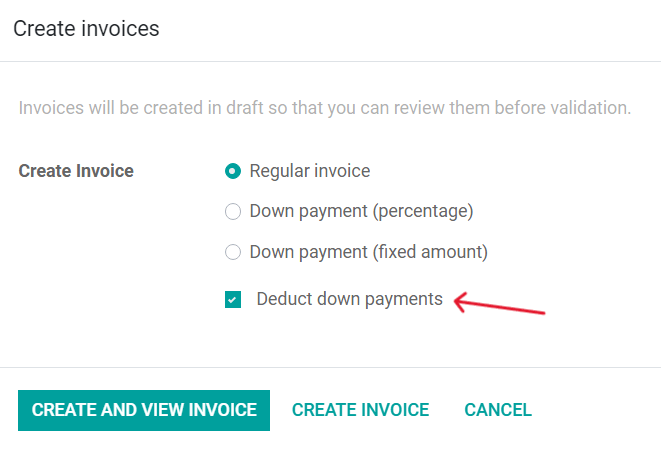
If the remaining amount is ready to be paid, the Regular Invoice option should be selected, and the Deduct down payments option should stay selected. Then, click Create and View Invoice.
Doing so reveals a separate Invoices page, listing all the invoices for that specific sales order. Each invoice line item displays all the necessary information related to each invoice, along with the current Payment Status.
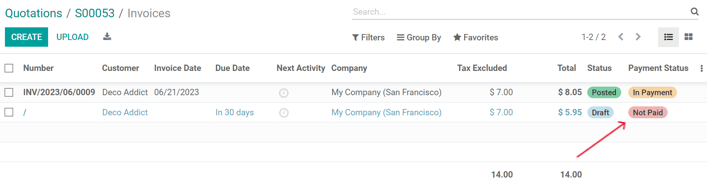
To complete the flow, select the invoice with the Not Paid status, which opens that invoice. On the invoice page, click Confirm, then Register Payment, and confirm that the remaining Amount is correct. Then, click Create Payment.
That pop-up window disappears, and a green In Payment banner is now present on the invoice. The line items on the invoice show that the total amount has been paid, including mentions of the down payment, and the flow is complete.
This flow is also possible with the Fixed amount down payment option.
Belangrijk
If a down payment is used with a product that has a Delivered quantities invoicing policy, the down payments will not be able to be deducted when it comes time to invoice the customer. This is because, due to the invoicing policy, the product(s) would have to be delivered before creating the final invoice.
If nothing has been delivered, a Credit Note is created, which cancels the draft invoice that was created after the down payment. To utilize the Credit Note option, the Inventory application must be installed, in order to confirm the delivery. Otherwise, the delivered quantity can be entered manually directly on the sales order.
Income account and customer taxes modifications
To adjust the income account and customer taxes attached to a down payment, navigate to the
Products page (), search for the
Down Payment product in the search bar, and select it to reveal the product detail page.
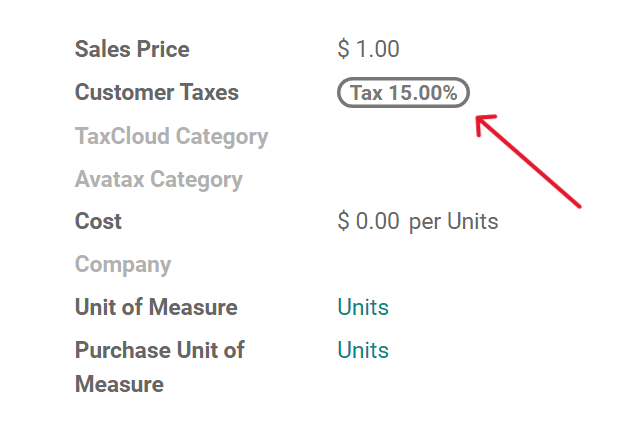
On the Down Payment product page, click Edit, then scroll down to the General Information tab. In this tab, the customer taxes can be modified in the Customer Taxes field.
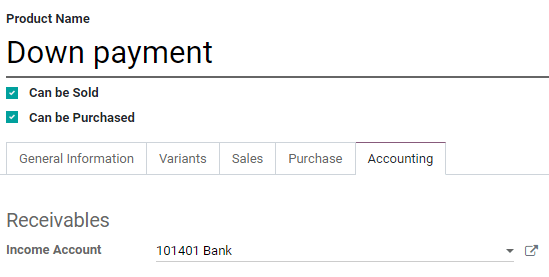
To change or adjust the income account attached to the Down Payment product page, the Accounting app must be installed. With the Accounting app installed, the Accounting tab becomes available on the product page. That tab will not be accessible without the Accounting app installed.
In the Accounting tab, the income account can be changed in the Income Account field, in the Receivables section. Once all desired changes are complete, click Save.